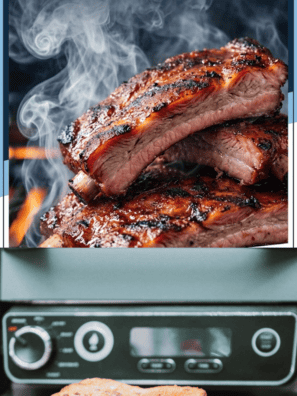
These Ninja Foodi Grill Ribs are fall-off-the-bone tender, smoky, and glazed with your favorite BBQ sauce — all done indoors in about 30 minutes. Whether you’re using the Ninja Foodi Indoor Grill or the Ninja Woodfire Outdoor Grill, I’ve got step-by-step instructions for both. No smoker, no outdoor grill, no problem!
Why You’ll Love This Recipe
- Year-round BBQ: No outdoor grill or charcoal needed
- Fast: Done in 30 minutes on the Ninja Foodi Grill (no 6-hour smoking required!)
- Tender and juicy: The foil-wrapping method locks in moisture for fall-off-the-bone results
- Two ways to make it: Full instructions for both the Ninja Foodi Indoor Grill AND the Ninja Woodfire Grill
- Easy cleanup: Dishwasher-safe grill grates make post-rib cleanup painless

If you love easy rib recipes, try my Air Fryer St Louis-style, Air Fryer Pork Country Style Ribs, or Instant Pot Ribs Recipe.
Ingredients Needed
- Baby back pork ribs: Tender pork ribs perfect for grilling and smoking
- Brown sugar: Adds sweetness and helps create caramelized crust
- Smoked paprika: Adds smoky flavor and rich deep color
- Garlic powder: Savory garlic flavor blended evenly into rub
- Onion powder: Adds subtle sweetness and savory onion depth
- Black pepper: Adds mild heat and balances overall seasoning
- Kosher salt: Enhances flavor and seasons meat evenly throughout
- Cayenne pepper (optional): Adds spicy heat for extra kick
- BBQ sauce: Sweet and tangy glaze for finishing ribs
- Grapeseed or avocado oil spray: High smoke point oil prevents sticking on grates
- Aluminum foil: Wraps ribs to keep moisture and tenderness
- Ninja Wood Pellets (optional): Adds authentic smoky flavor when using Woodfire
How to Prepare the Ribs (Both Methods)
Step 1: Flip the ribs over so the bone side faces up. Slide a butter knife under the thin silver membrane, grab it with a paper towel, and pull it off. Removing the membrane allows the seasoning to penetrate the meat and results in a much more tender rib.
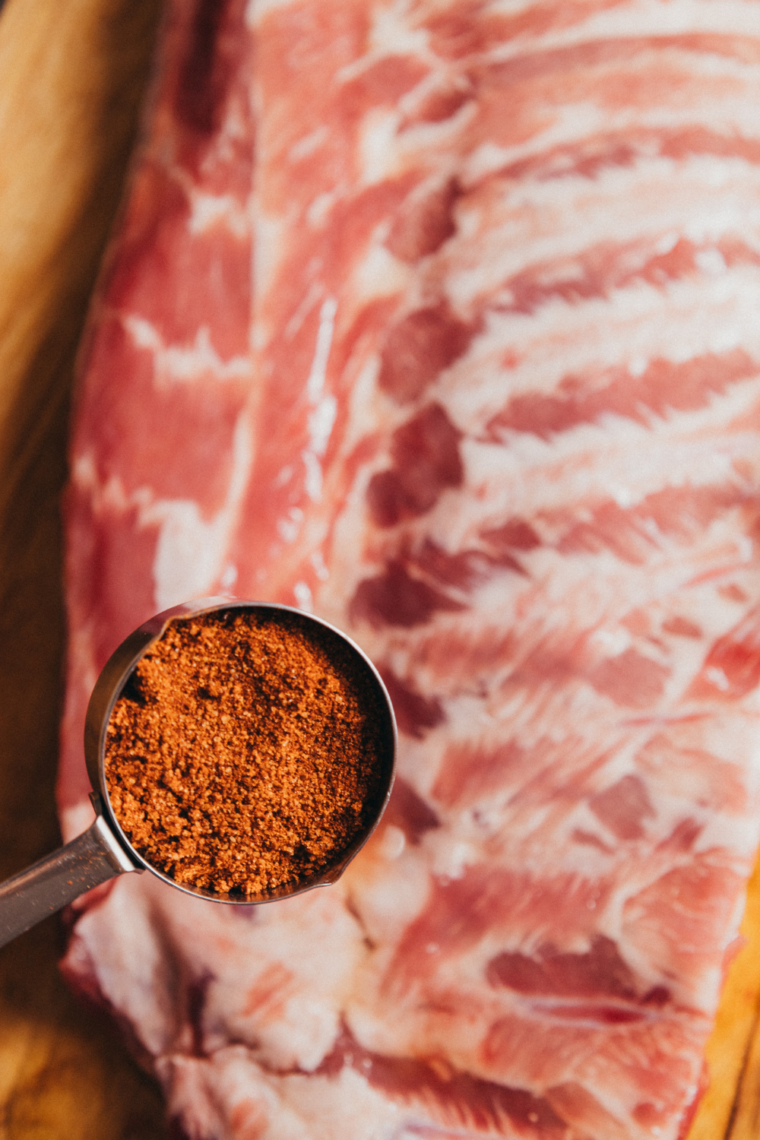
Step 2: In a small bowl, mix together the brown sugar, smoked paprika, garlic powder, onion powder, black pepper, salt, and cayenne (if using).
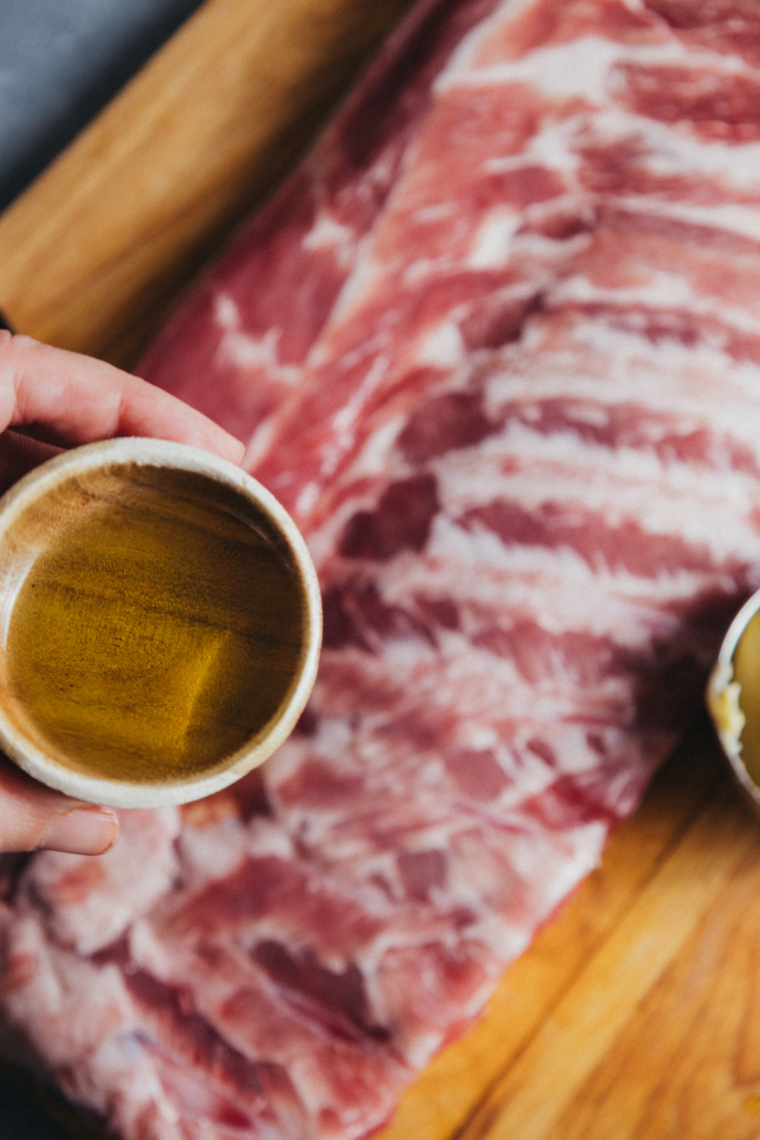
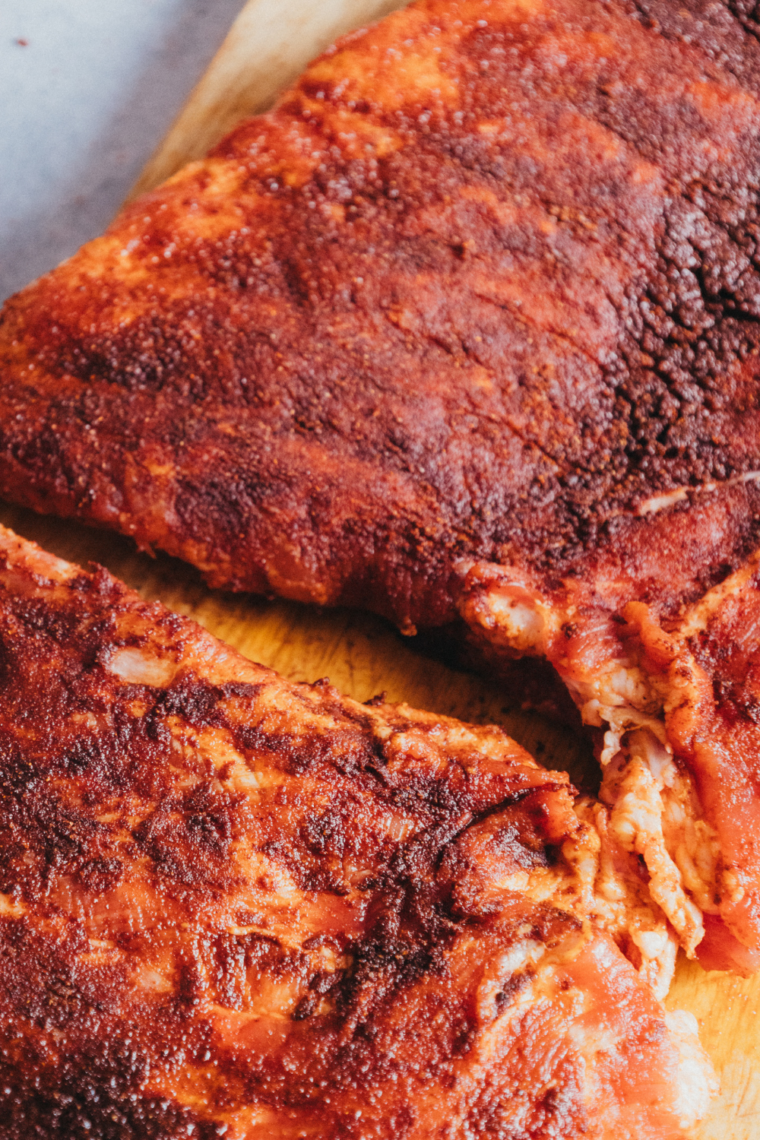
Step 3: Pat the ribs dry with a paper towel. Apply the dry rub generously on all sides, pressing it into the meat with your hands. For the best flavor, let the ribs sit at room temperature for 30 minutes before cooking. This also helps the ribs cook more evenly.
Method 1: Ninja Foodi Indoor Grill Instructions
Works with: Ninja Foodi 5-in-1 Indoor Grill, Ninja Foodi Smart XL Grill, Ninja Foodi XL Pro Grill
Step 1: Cut the rack in half (or thirds) to fit your grill. Wrap each section tightly in aluminum foil. This traps steam and makes the ribs incredibly tender.
Step 2: Insert the grill grate and close the hood. Select GRILL, set the temperature to MED (around 375°F), and set the time to 25 minutes. Press START and allow it to fully preheat, this takes about 8-10 minutes.
Step 3: Once preheated, spray the grill grates lightly with grapeseed or avocado oil. Place the foil-wrapped rib sections on the grill grate. Close the hood and cook for 20 minutes, flipping the packets over once at the 10-minute mark.
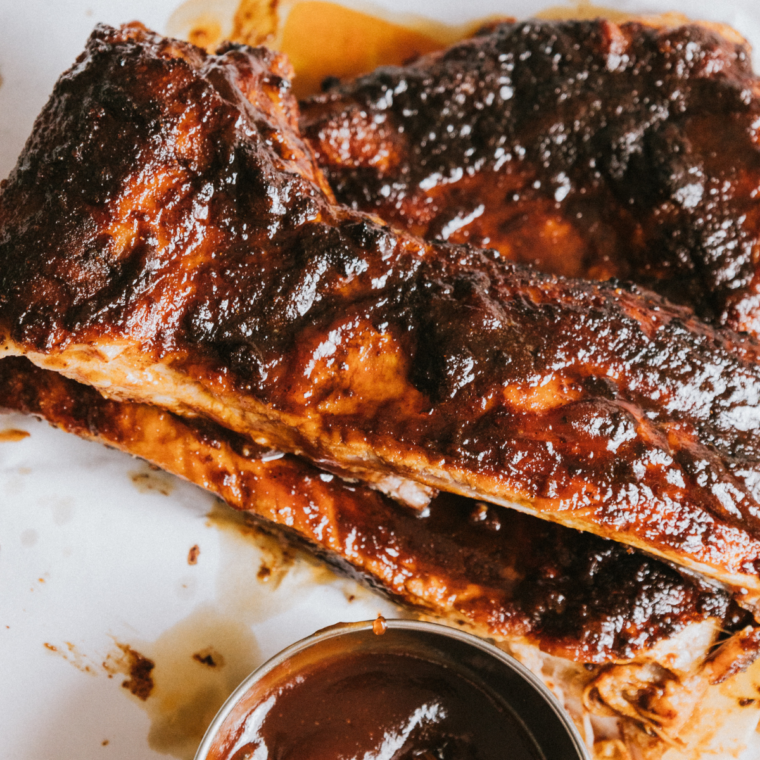
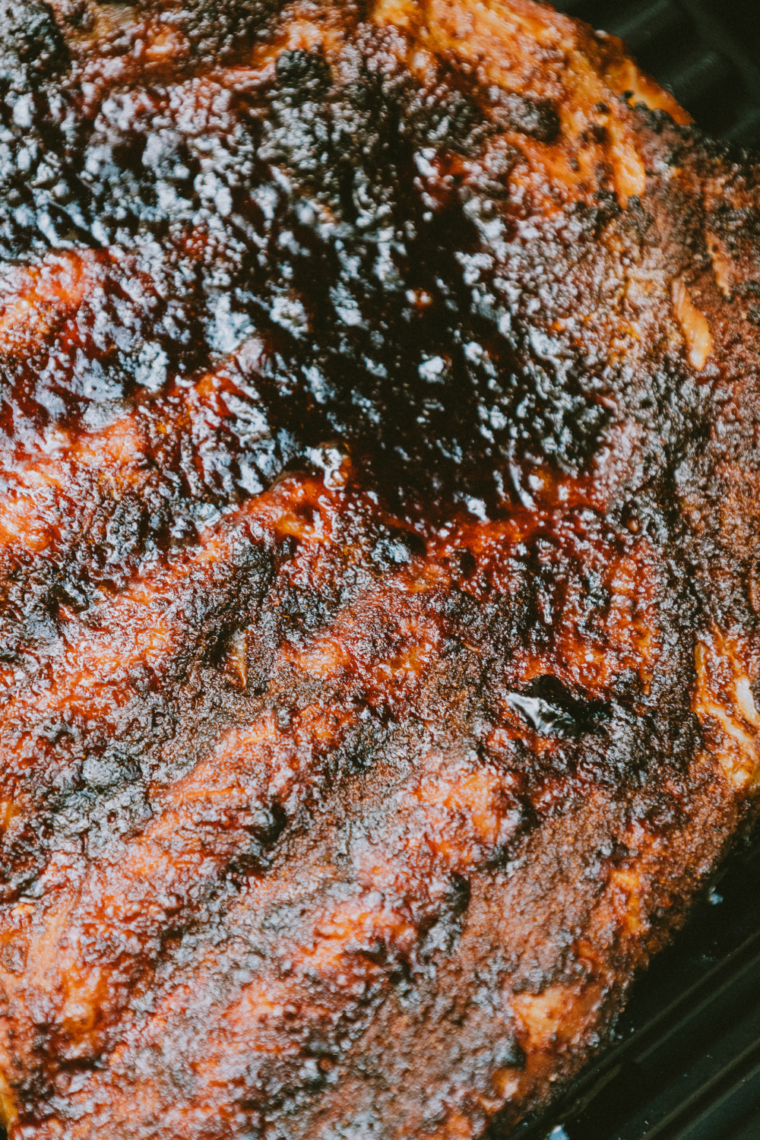
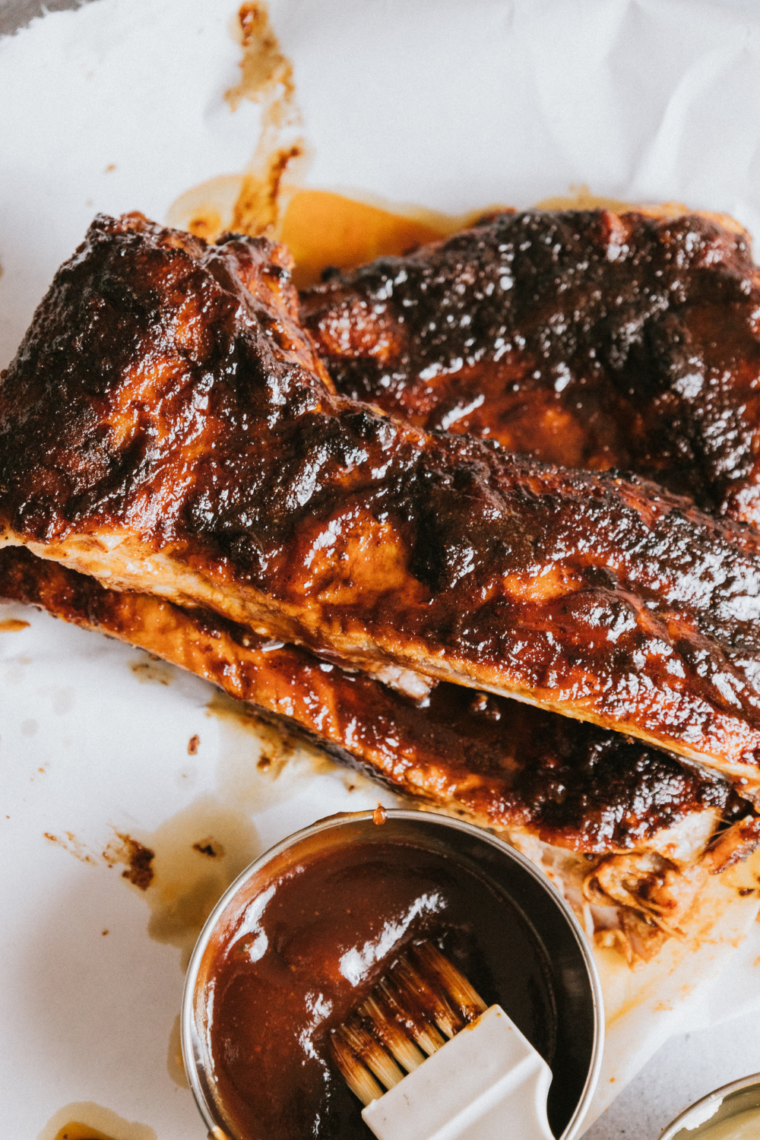
Step 4: Carefully open the foil (watch for hot steam!). Remove the ribs from the foil and place them directly on the grill grates. Brush generously with BBQ sauce on both sides. Close the hood and grill on HIGH (500°F) for 5–8 more minutes, flipping once and adding more BBQ sauce, until you get a beautiful caramelized, slightly charred crust.
Step 5: The internal temperature should reach 195–203°F for fall-off-the-bone ribs (145°F is the food-safe minimum, but higher temps break down the collagen for tenderness). Remove from the grill and let rest for 5 minutes before slicing and serving.

Method 2: Ninja Woodfire Outdoor Grill Instructions
Works with: Ninja Woodfire OG701, Ninja Woodfire Pro Connect XL OG901, Ninja Woodfire Pro OG751
The Ninja Woodfire Grill adds a genuine smoky BBQ flavor that the indoor grill can’t replicate, making it the ultimate tool for ribs. Here’s how to get competition-worthy results.
Step 4: Add 1 cup of Ninja Wood Pellets to the pellet box on the side of the grill. For ribs, Hickory or Competition Blend pellets give the best smoky BBQ flavor.
Step 5: Close the lid. Turn the left knob to SMOKER. Set the temperature to 225°F and the time to 2.5 hours. Press the WOODFIRE FLAVOR button (the flame icon) — this activates the pellet ignition system. Press START and preheat for about 15 minutes until the unit reaches temperature.
Pro Tip: The WOODFIRE FLAVOR button is what produces the smoke. Don’t skip it!
Step 6: Once preheated and smoking, place the seasoned rib rack directly on the grill grate, bone side down. Close the lid. Smoke at 225°F for 2 to 2.5 hours. The low temperature breaks down the tough connective tissue and infuses smoke flavor into the meat.
Step 7: After the smoking phase, remove the ribs and wrap them tightly in aluminum foil. Add a splash of apple juice or apple cider vinegar inside the foil before sealing — this creates steam and keeps the ribs incredibly moist. Switch the Woodfire to GRILL mode. Set the temperature to 300°F and time to 45 minutes. Place the foil-wrapped ribs back on the grill. Cook for 30-45 more minutes.
Step 8: Carefully unwrap the ribs (watch for steam). Place them back on the grill grates and brush both sides with BBQ sauce. Turn the grill up to HIGH (around 500°F) and grill for 5–8 minutes, flipping once, until the sauce is caramelized and slightly charred. Check that the internal temp has reached 195–203°F. Remove from the grill and rest for 5–10 minutes before slicing. The result? Fall-off-the-bone ribs with a real, authentic smoke ring.

Pro Tips for the Best Ninja Foodi Grill Ribs
- Cut the rack to fit. The Ninja Foodi Grill has limited grate space — cutting the rack into 2–3 sections is not optional.
- Always remove the membrane before cooking — it’s the #1 thing that makes ribs tough.
- Use grapeseed or avocado oil spray on the grill grates — never olive oil, as its smoke point is too low for the Ninja’s high heat.
- Don’t skip the rest period. Resting the ribs for 5–10 minutes after cooking lets the juices redistribute.
- Add sauce in layers. Apply BBQ sauce before and during the final glaze phase — not just at the end. Layering builds flavor.
- Check your temp. A meat thermometer is your best friend. 145°F is safe; 195–203°F is fall-off-the-bone perfect.
- Frozen ribs work too! Thaw overnight in the fridge first, then follow the recipe as normal.
What Kind of Ribs Should I Use?
- Baby Back Ribs: The most tender option, with less fat and a shorter cook time. This is the recommended cut for the Ninja Foodi Indoor Grill.
- St. Louis Style Spare Ribs: Meatier and fattier, with more flavor. They take longer to cook and are best suited for the Ninja Woodfire Grill’s low-and-slow method.
- Country Style Ribs: Technically not ribs (they’re cut from the shoulder), but incredibly easy to grill on the Ninja Foodi. No membrane to remove and they’re ready in under 15 minutes.
How to Store and Reheat Leftover Ribs
- Refrigerator: Allow ribs to cool completely, then wrap tightly in foil or place in an airtight container. They’ll keep for 3–4 days in the fridge.
- Freezer: Wrap individual portions in plastic wrap, then in foil. Place in a freezer-safe bag. They’ll keep for up to 3 months.
- Reheating: The best way to reheat ribs is in the Ninja Foodi Grill on the GRILL setting at around 300°F for 5–8 minutes, or wrapped in foil in the oven at 250°F for 20–25 minutes. Add a splash of apple juice inside the foil to keep them moist.
Frequently Asked Questions
Do you need to wrap ribs in foil when using the Ninja Foodi Grill? It’s not strictly required, but I highly recommend it for the first phase of cooking. Wrapping creates steam that keeps the meat moist and tender. The final 5–8 minutes unwrapped on the hot grill gives you that caramelized crust.
Should I put BBQ sauce on ribs before or after grilling? Both! Brush on a light layer before placing them on the grill, then add more after flipping during the final glazing stage. Sauce applied too early can burn on high heat.
What temperature do ribs need to reach in the Ninja Foodi? 145°F is the USDA-safe minimum for pork, but for truly fall-off-the-bone ribs, aim for 195–203°F. At this temperature, the collagen has fully broken down into gelatin, giving you that tender texture.
Can I cook frozen ribs in the Ninja Foodi Grill? Yes, but thaw them first for best results. Place frozen ribs in the fridge overnight. If you cook from frozen, add 15–20 minutes to your cook time and check the internal temp carefully.
What’s the difference between the Ninja Foodi Indoor Grill and the Ninja Woodfire Grill for ribs? The Ninja Foodi Indoor Grill is faster (about 30 minutes), easier, and great for weeknights. The Ninja Woodfire adds real wood smoke flavor and a smoke ring for a more authentic BBQ result — but takes 2.5–3.5 hours total. Both make delicious ribs!
Can I use the Ninja Foodi Grill to make beef ribs? Yes! Beef back ribs work great on the Ninja Foodi Grill. They’re thicker and need a few extra minutes on each side. Use the same dry rub and follow the same method — just target 190–203°F internal temp for tenderness.

More Ninja Foodi Grill Recipes You’ll Love
Air Fryer St. Louis Style Ribs
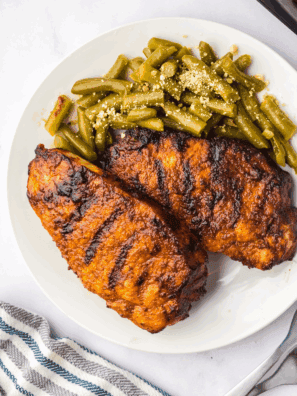
Ninja Foodi Grill Chicken Thighs
Did you make these Ninja Foodi Grill Ribs? Leave a ⭐ rating and comment below — I’d love to hear how they turned out! Tag @forktospoon on Instagram so I can see your rib masterpiece!

Ninja Foodi Grill Ribs (+ Ninja Woodfire Instructions!)
Description
Ingredients
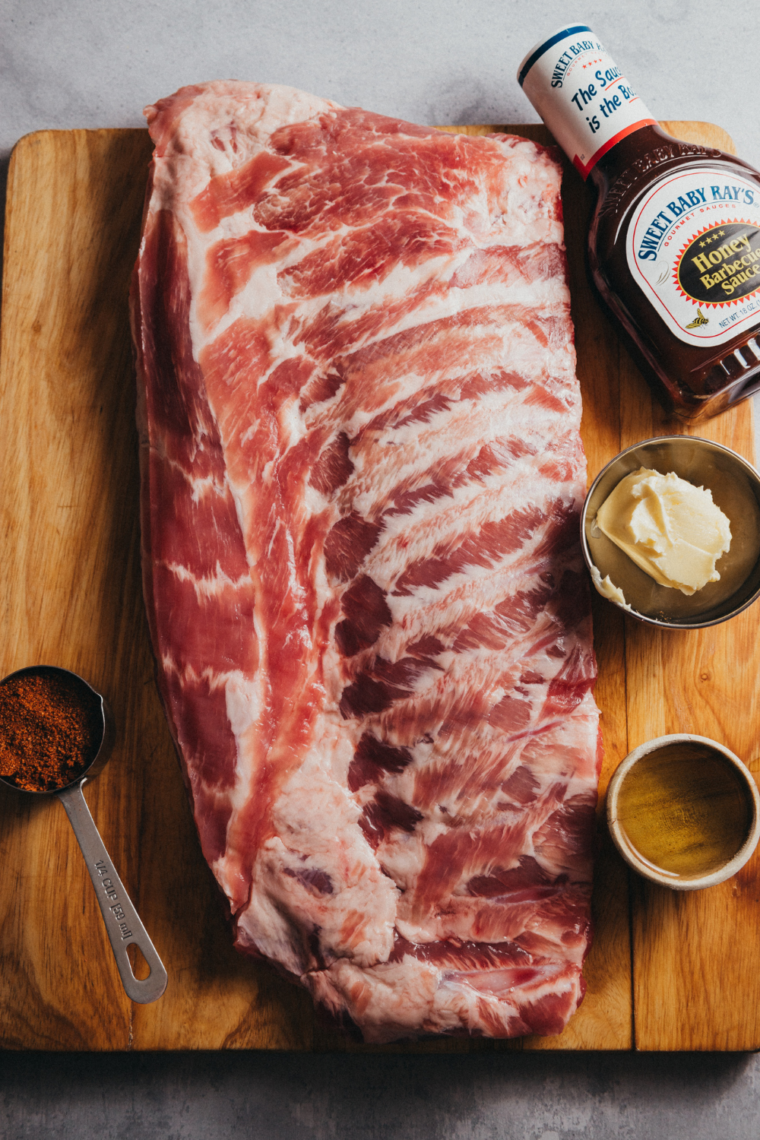
- 2 pounds baby back pork ribs, one full rack
- 2 tablespoons brown sugar
- 1 teaspoon smoked paprika
- 1 teaspoon garlic powder
- 1 teaspoon onion powder
- ½ teaspoon black pepper
- 1 teaspoon kosher salt
- ¼ teaspoon cayenne pepper, optional, for heat
- ½ cup your favorite BBQ sauce, plus more for serving
Optional for Ninja Woodfire only:
- 1 cup Ninja Wood Pellets, Competition Blend or Hickory recommended for ribs
Instructions
How to Prep Ribs (Works for Both Cooking Methods)
- Flip the ribs so the bone side is facing up. Slide a butter knife under the thin silver skin, then grip it with a paper towel and peel it off. This step matters—it helps the seasoning sink in and keeps the ribs tender instead of chewy.
- In a small bowl, combine brown sugar, smoked paprika, garlic powder, onion powder, black pepper, salt, and cayenne (if you want a little heat). Stir until evenly blended.
- Pat the ribs dry so the rub sticks better. Coat both sides generously with the seasoning mix, pressing it into the meat so it really adheres. Let the ribs sit out for about 30 minutes before cooking so the flavors soak in and the meat cooks more evenly.
Method 1: Ninja Foodi Indoor Grill Instructions
- Cut the rack in half or thirds so it fits your grill. Wrap each piece tightly in aluminum foil. This traps steam and helps break down the meat so the ribs turn out extra tender.
- Insert the grill grate and close the hood. Select GRILL, set it to MED (375–400°F), and set the timer for 25 minutes. Press start and let it preheat fully—about 8 minutes.
- Lightly spray the grill grate with avocado or grapeseed oil once preheated. Place the foil packets on the grate, close the hood, and cook for 20 minutes. Flip the packets at the halfway point so they cook evenly.
- Open the foil carefully—hot steam will rush out fast. Remove the ribs and place them directly on the grill grates. Brush BBQ sauce over both sides until fully coated.
- Close the hood and switch to HIGH (500°F). Grill for 5–8 minutes, flipping once and brushing on more sauce, until the ribs develop a sticky, caramelized crust with light char.
- Aim for an internal temp of 195–203°F for tender, fall-apart ribs (145°F is the safe minimum, but higher temps break down collagen for that soft bite). Rest the ribs for 5 minutes before slicing so the juices settle.
Method 2: Ninja Woodfire Outdoor Grill Instructions
- This is the “real BBQ” route. The smoke actually shows up here—no fake flavor shortcuts.
- Fill the pellet box with about 1 cup of Ninja Wood Pellets. Hickory or Competition Blend works best for ribs if you want that classic smoky BBQ bite.
- Close the lid. Turn the left dial to SMOKER. Set the temperature to 225°F and the timer to 2.5 hours. Press the WOODFIRE FLAVOR button (flame icon) to ignite the pellets, then hit start. Let it preheat for about 15 minutes until it’s actively smoking.
- Skip this step and you skip the smoke. Simple as that.
- Place the seasoned ribs directly on the grate, bone side down. Close the lid and smoke at 225°F for 2 to 2.5 hours. This slow cook breaks down collagen and builds deep smoke flavor.
- Remove the ribs and wrap tightly in foil. Add a splash of apple juice or apple cider vinegar before sealing to keep things juicy and build steam.
- Switch the grill to GRILL mode, set it to 300°F, and cook for 30–45 minutes with the foil packet back on the grate.
- Carefully open the foil—steam will hit you fast. Move ribs back to the grill grates and brush with BBQ sauce. Turn heat up to HIGH (around 500°F) and grill for 5–8 minutes, flipping once, until the sauce gets sticky and slightly charred.
- Check for an internal temp of 195–203°F. Let the ribs rest 5–10 minutes before slicing. What you get is tender meat, a real smoke ring, and ribs that don’t need sauce to “fix” anything—they’re already dialed in.
Equipment
- Ninja Foodi Grill, or Ninja Foodi Woodfire Grill
- Woodchips, only for Ninja Foodi Woodfire Grill
Notes
Nutrition
Share this recipe
We can’t wait to see what you’ve made! Mention @forktospoon or tag #forktospoon!