Make the best Instant Pot Spanish rice in just 20 minutes — perfectly fluffy, loaded with tomatoes, garlic, and bold spices.
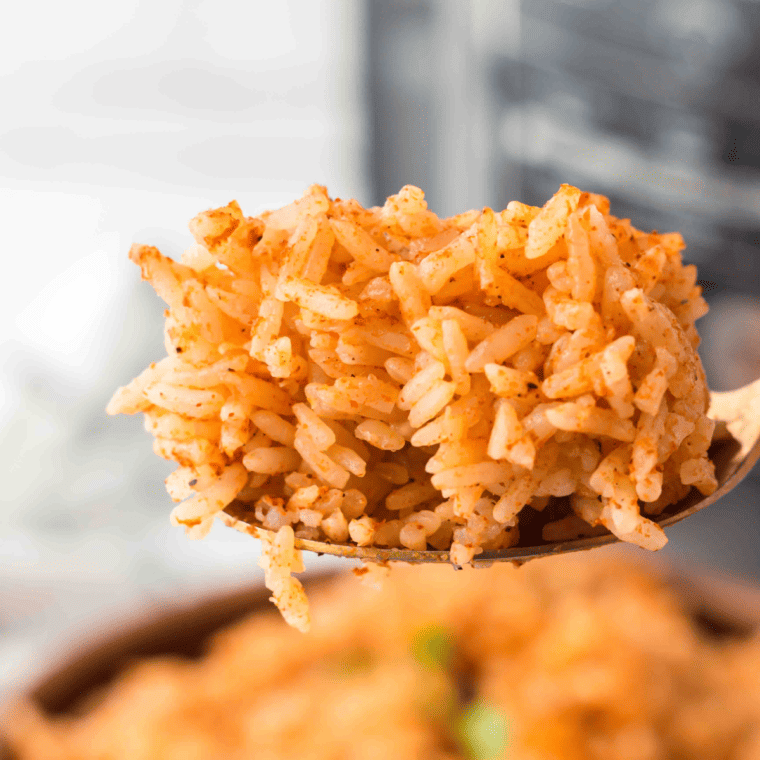
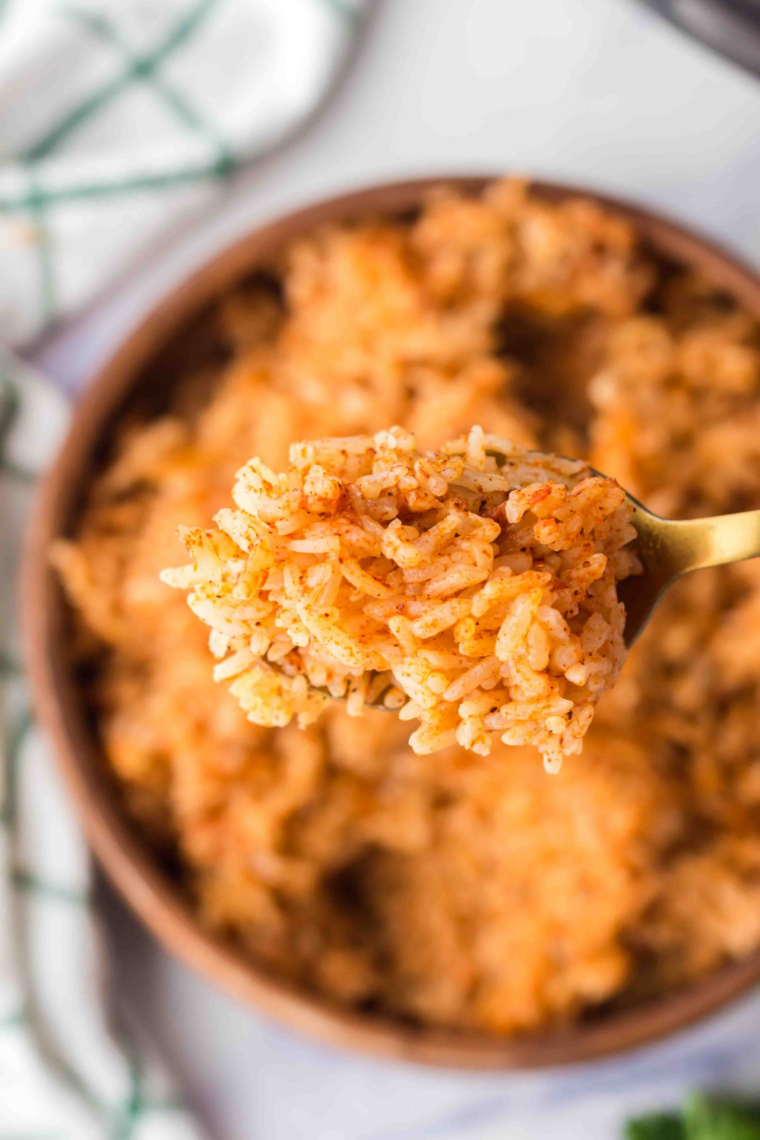
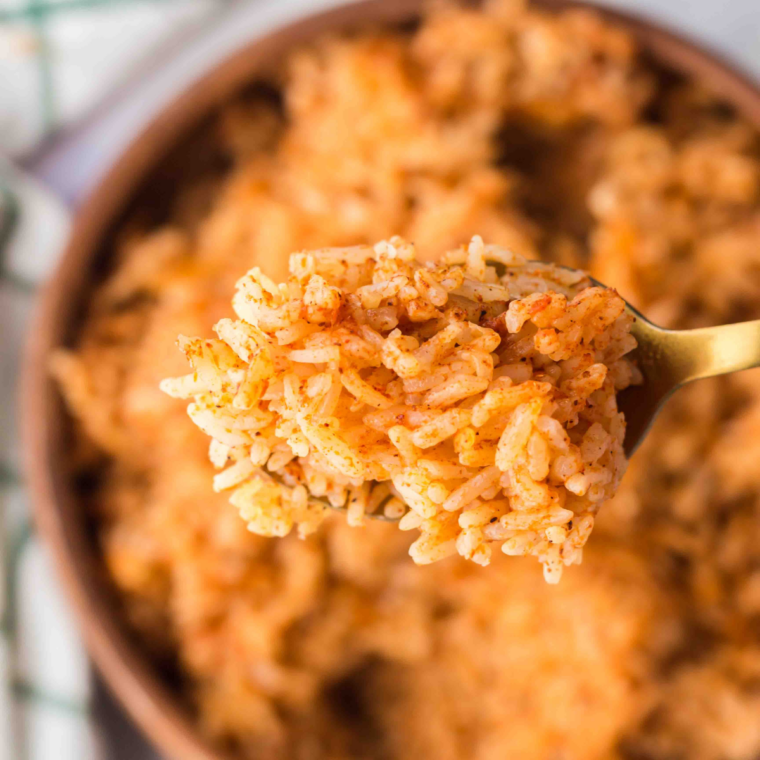
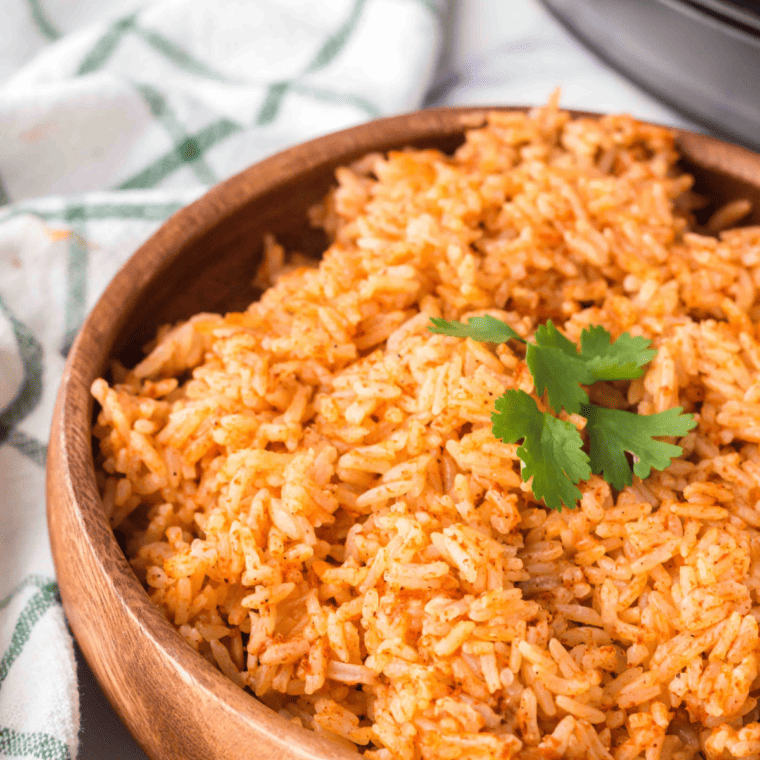
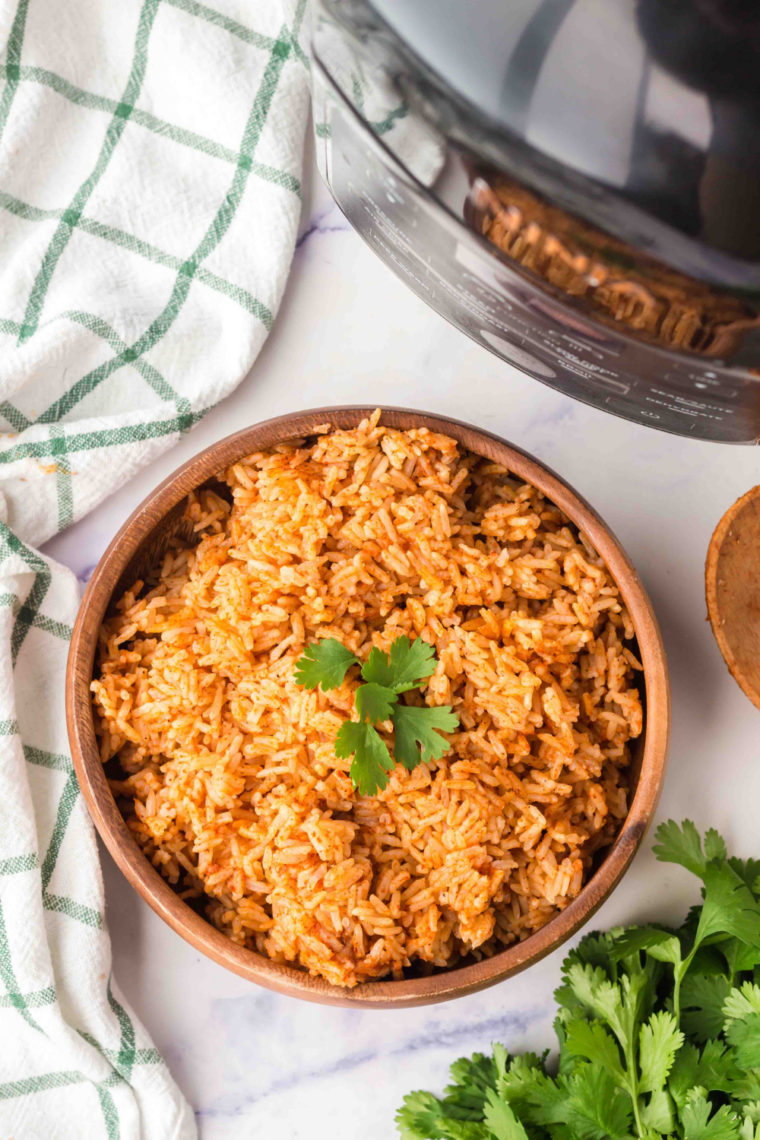
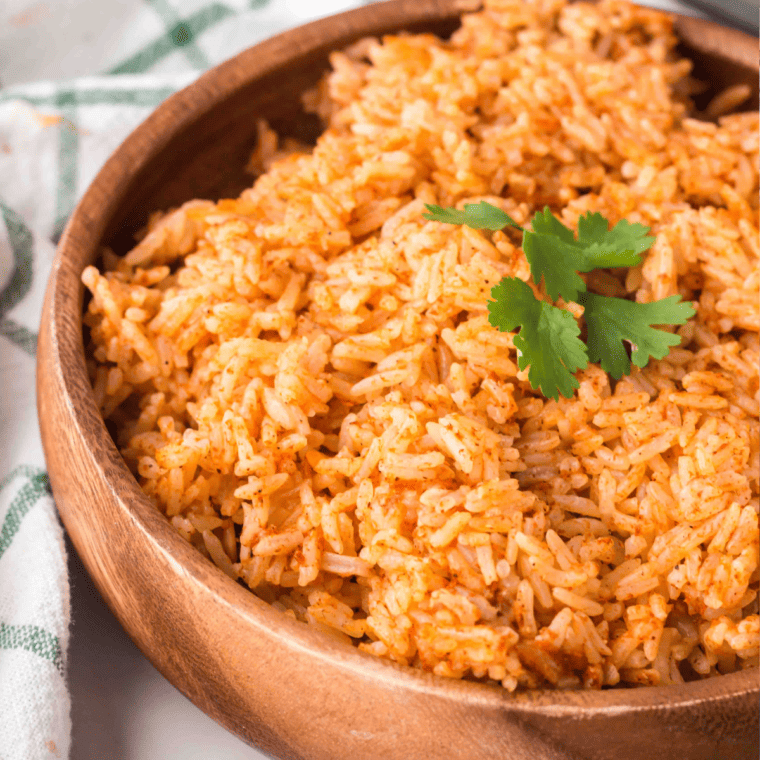
This Instant Pot Spanish Rice is everything you want from a Mexican restaurant side dish — fluffy long-grain rice tinted a deep orange-red from tomatoes, bold with garlic and cumin, and ready in about 20 minutes from start to finish. It is hands-off, one-pot, and far better than any boxed mix.
If you have struggled with getting Instant Pot Spanish rice righh, mushy texture, burn notices, undercooked centers.
Today, I will teach you everything you need to know. The technique makes all the difference, and once you know the method, this becomes one of the easiest side dishes you will ever make.
What Is Spanish Rice?
Spanish rice (also called Mexican rice or arroz rojo — literally “red rice”) is a classic side dish in Mexican and Tex-Mex cuisine. It is made by sautéing long-grain white rice with aromatics until lightly toasted, then cooking it in a seasoned tomato-broth mixture until fluffy and fragrant. The tomatoes give the rice its signature orange-red color, while cumin, chili powder, and garlic bring the bold, savory depth.
Despite the name, Spanish rice as most Americans know it is firmly a Mexican and Tex-Mex dish — the same arroz rojo you find at taquerias and Mexican restaurants alongside enchiladas, tacos, and burritos. It differs from traditional Spanish rice, which typically uses saffron and is associated with paella.
If you are looking for even more Easy Instant Pot Rice Dishes, some of my favorites are INSTANT POT GREEK LEMON RICE, INSTANT POT CHICKEN FRIED RICE, and INSTANT POT VEGETARIAN CHINESE FRIED RICE.
Why the Instant Pot Makes Superior Spanish Rice
The Instant Pot solves the two biggest problems with stovetop Spanish rice. First, the sealed pressure environment creates consistent, uniform heat all around the rice, so every grain cooks evenly — no crunchy bottom, no mushy top. Second, the pressure traps all the steam and tomato liquid, so the rice absorbs every bit of flavor rather than letting it evaporate off.
The result is rice that is fluffier, more evenly cooked, and more deeply flavored than stovetop — and it requires virtually no attention once the lid is sealed.
The #1 Rule: How to Prevent the Instant Pot Burn Notice
The burn notice is the single biggest complaint in every Spanish rice Instant Pot recipe comment section. Here is exactly what causes it and how to prevent it in this recipe.
Why burn notices happen with Spanish rice: Tomatoes and tomato sauce are thick and sugar-rich. When they sink to the bottom of the pot and contact the hot surface during pressurization, the Instant Pot’s sensors detect localized burning and trigger the notice — even if the rest of the pot is fine.
Four steps that prevent it every time:
- Deglaze after sautéing. After you toast the rice and aromatics, add ¼ cup of the broth and use a wooden spoon to scrape any browned bits off the bottom of the pot before adding anything else. This is the single most important step.
- Add the tomato sauce last — and do NOT stir it in. Pour the diced tomatoes or tomato sauce on top of everything but leave it sitting on the surface. Do not stir. The tomato stays on top during pressurization and cannot burn on the bottom.
- Make sure the rice is submerged in liquid. Before sealing the lid, press the rice down gently into the broth with a spoon. Every grain needs to be in contact with liquid.
- Do not skip the natural pressure release. A quick release releases pressure too fast, causing liquid to rush up through the valve — and it produces gummy, unevenly cooked rice. Always natural release for 10 minutes minimum.
Ingredients Needed
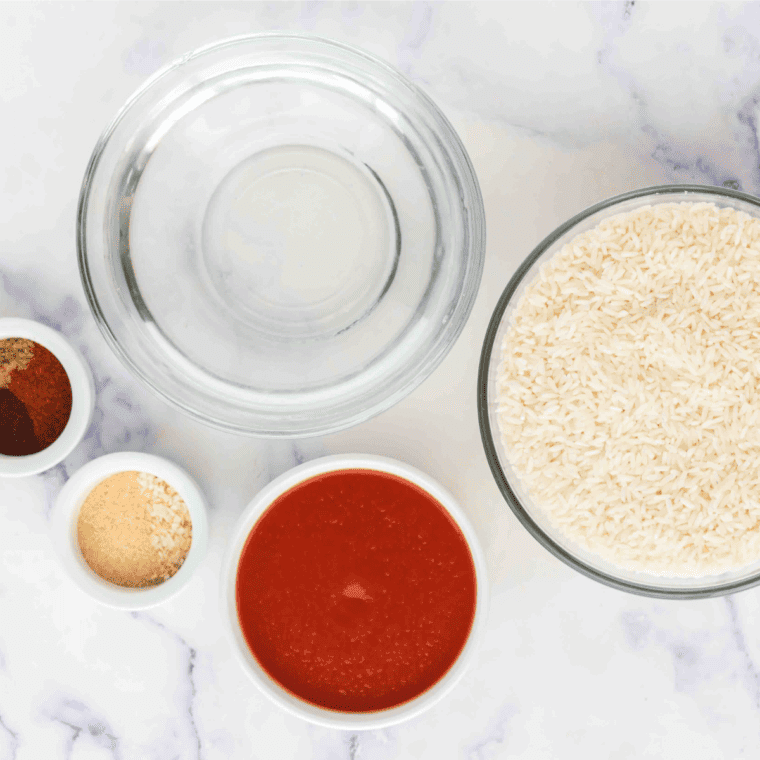
- Olive oil: Helps toast rice and build rich flavor
- Long grain white rice, rinsed: Fluffy base that cooks light and separate
- White onion, diced: Adds savory depth and aromatic flavor base
- Bell pepper, diced: Brings color, sweetness, and mild crunch
- Garlic, minced: Adds bold savory flavor throughout the dish
- Ground cumin: Warm earthy spice that defines classic flavor
- Chili powder or smoked paprika: Adds smoky heat and rich color
- Dried oregano: Adds herbal note and balanced seasoning
- Chicken or vegetable broth: Infuses rice with deep savory flavor
- Diced tomatoes or tomato sauce: Adds moisture and tangy tomato base
- Salt and black pepper: Enhances flavor and balances seasoning
- Fresh cilantro and lime wedges: Bright finish with fresh citrus flavor
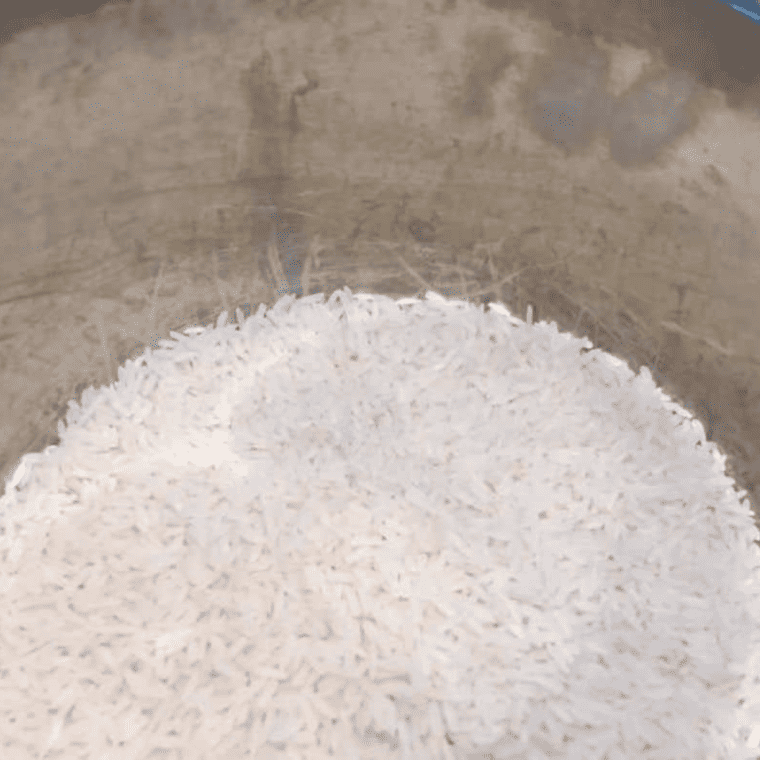
Important: Rinse the rice under cold water until the water runs clear before cooking. Rinsing removes excess surface starch that can make the rice gummy. Drain well in a fine mesh strainer.
Step-by-Step Instructions
Step 1: Sauté the aromatics. Set the Instant Pot to Sauté mode. Add olive oil and heat for 1 minute. Add the diced onion and bell pepper. Sauté for 2–3 minutes, stirring frequently, until the onion is softened and translucent. Add minced garlic and cook for 30 more seconds until fragrant.
Step 2: Toast the rice. Add the rinsed and drained rice to the pot. Stir continuously for 2–3 minutes, until the rice turns slightly golden and smells nutty. This step is not optional — toasting the rice builds a deeper, more complex flavor base and gives the finished dish that restaurant-quality taste. You will notice the grains start to turn from white to lightly golden at the edges.
Step 3: Deglaze — critical for no burn notice. Hit Cancel to stop the Sauté function. Add ¼ cup of the chicken broth and use a wooden spoon to firmly scrape every bit of the browned rice from the bottom of the pot. Do not skip this step. Any stuck bits will trigger the burn notice during pressure cooking.
Step 4: Add seasoning, broth, and rice. Add the remaining broth (1¼ cups), cumin, chili powder, oregano, salt, and pepper. Stir everything together well. Gently press the rice down with a spoon so every grain is submerged in liquid.
Step 5: Add tomatoes — do NOT stir. Pour the diced tomatoes (undrained) or tomato sauce directly on top of the rice. Do not stir. Leave it sitting on the surface. This is the key step that prevents the burn notice.
Step 6: Pressure cook for 4 minutes. Secure the lid and set the pressure valve to Sealing. Select Manual or Pressure Cook on High pressure. Set the cook time to 4 minutes. The Instant Pot will take 8–10 minutes to come to pressure, then the 4-minute countdown begins.
Step 7: Natural pressure release for 10 minutes. When the 4 minutes are up, do not touch the valve. Let the Instant Pot naturally release pressure for 10 full minutes. This rest period is as important as the cook time — the rice continues cooking gently in the residual steam and absorbs all the remaining liquid. After 10 minutes, carefully switch the valve to Venting to release any remaining pressure.
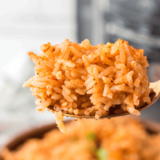
Step 8: Fluff and serve. Open the lid and use a fork to gently fluff the rice. Stir the tomato layer down through the rice. Taste for seasoning and add extra salt if needed. Garnish with fresh cilantro and a squeeze of lime juice. Serve immediately.
Rice Type Cooking Guide
| Rice Type | Cook Time (High Pressure) | Natural Release | Notes |
|---|---|---|---|
| Long-grain white rice | 4 minutes | 10 minutes | Best for this recipe — fluffy, distinct grains |
| Jasmine rice | 3 minutes | 10 minutes | Slightly softer, more fragrant |
| Basmati rice | 4 minutes | 10 minutes | Long, delicate grains — excellent result |
| Brown rice | 22 minutes | 15 minutes | Add ¼ cup extra broth; nuttier flavor |
| Long-grain brown rice | 22–24 minutes | 15 minutes | Firmer texture; adjust liquid ratio to 1:1.25 |
Do not use the Instant Pot’s built-in “Rice” button for this recipe. That setting is designed for plain white rice cooked with water, not seasoned rice cooked with tomatoes and broth. Always use the Manual/Pressure Cook setting.
6 Recipe Variations
1. Chicken Spanish Rice (One-Pot Meal) Add 1 pound of diced boneless chicken breast with the onions in Step 1. Sauté until no longer pink on the outside, then proceed with the recipe. The chicken cooks fully during the pressure cooking stage.
2. Vegetarian/Vegan Version Substitute vegetable broth for chicken broth. Add black beans (rinsed and drained) after cooking by stirring them into the finished rice. The beans warm through from the residual heat.
3. Spicy Version Add 1 diced jalapeño with the onions. Increase chili powder to 1.5 teaspoons and add ¼ teaspoon cayenne pepper. Finish with a splash of hot sauce stirred through after fluffing.
4. Cheesy Spanish Rice After fluffing, sprinkle 1 cup of shredded Mexican blend or pepper jack cheese over the top. Seal the lid for 2 minutes — the residual heat melts the cheese without any additional cooking.
5. Loaded Burrito Bowl Version Add 1 cup of frozen corn and 1 can of drained black beans on top with the tomatoes before pressure cooking. Serve topped with avocado, sour cream, shredded lettuce, and salsa.
6. Smoky Chorizo Spanish Rice Brown ¼ pound of Mexican chorizo in the Sauté step before adding the onions. Drain excess fat if needed. The chorizo gives the rice an incredible smoky, spiced depth.
What to Serve With Instant Pot Spanish Rice
Spanish rice is one of the most versatile side dishes on the table — here is what it pairs with best:
Classic Mexican and Tex-Mex:
- Tacos (beef, chicken, fish, or vegetarian)
- Enchiladas — red, green, or sour cream
- Burritos and burrito bowls
- Fajitas — chicken or steak
- Chiles rellenos
- Tamales
- Quesadillas
Proteins:
- Grilled or baked chicken breast
- Carne asada
- Shrimp with garlic butter
- Slow cooker pulled pork
- Black bean patties for a vegetarian plate
As a main: Serve as the base of a burrito bowl topped with grilled protein, pico de gallo, guacamole, shredded cheese, sour cream, and fresh cilantro. This alone is a complete, satisfying meal.
Storage, Reheating, and Make-Ahead
Storage: Cool completely before storing. Refrigerate in an airtight container for up to 5 days. Spanish rice actually tastes better the next day as the flavors deepen overnight.
Reheating: Add 2 tablespoons of water or broth per cup of rice before microwaving — this restores moisture lost during refrigeration. Microwave in 60-second bursts, stirring between each. Alternatively, reheat in a covered skillet over medium-low heat with a splash of broth for 3–4 minutes.
Freezing: Spanish rice freezes beautifully. Cool completely, portion into zip-lock freezer bags or airtight containers, and freeze for up to 3 months. Thaw overnight in the refrigerator. Reheat with a splash of broth as described above.
Make-ahead: This recipe is ideal for meal prep. Make a full batch on Sunday and use throughout the week in burrito bowls, alongside proteins, or as a base for a quick fried rice variation.
Doubling the recipe: You can double the recipe in a 6-quart Instant Pot — the cook time stays the same. Do not triple it in a 6-quart; you will exceed the maximum fill line. An 8-quart can handle a triple batch.
Frequently Asked Questions
Why does my Instant Pot Spanish rice get a burn notice? The most common cause is tomatoes or tomato sauce sinking to the bottom of the pot and burning against the heating element during pressurization. Two fixes: first, always deglaze the pot with broth after sautéing (scrape every bit of residue from the bottom); second, add the tomato sauce on top of the rice last and do not stir it in. These two steps together eliminate burn notices in almost every case.
What is the best liquid ratio for Instant Pot Spanish rice? 1:1.5 (one cup rice to 1.5 cups liquid) when using diced tomatoes with their liquid, as the tomatoes contribute additional moisture. If using only tomato sauce with no diced tomatoes, increase the broth to 1¾ cups. Always make sure the rice is fully submerged before sealing the lid.
Should I rinse the rice before making Spanish rice in the Instant Pot? Yes. Rinse under cold water until the water runs clear, then drain well. Rinsing removes excess surface starch that can cause the rice to clump and become gummy. Some recipes say to skip rinsing — but for the Instant Pot specifically, rinsed rice produces consistently better, more distinct, fluffy grains.
Can I use brown rice instead of white rice? Yes. Brown rice requires 22–24 minutes on High pressure with a 15-minute natural release. Add an extra ¼ cup of broth to the recipe. The result has a nuttier flavor and slightly chewier texture — excellent in its own right.
Can I make this recipe vegetarian or vegan? Yes — simply substitute vegetable broth for chicken broth. The rest of the recipe is already plant-based. For extra protein, stir in a can of rinsed black beans after cooking.
My rice was undercooked — what happened? The most common cause is not enough natural release time. If you do a quick release immediately after the cook time, the rice has not had time to finish cooking in the residual steam. Always allow at least 10 minutes of natural release before venting. If the rice is still undercooked after that, seal the lid and let it sit on Keep Warm for another 5–10 minutes — the residual heat will finish it.
Can I double this recipe? Yes, in a 6-quart Instant Pot you can double it (2 cups of rice). The cook time stays the same. Do not exceed the maximum fill line (2/3 full for pressure cooking). For larger batches, use an 8-quart Instant Pot.
What is the difference between Spanish rice and Mexican rice? In the United States, the terms are used interchangeably and refer to the same dish — tomato-based, cumin-seasoned rice that accompanies Mexican food. Strictly speaking, traditional Spanish rice from Spain is quite different (typically includes saffron and is associated with paella), but in American cooking, Spanish rice and Mexican rice are the same recipe.
More Instant Pot Recipes
Don’t Forget To Pin!
Instant Pot Spanish Rice (Easy, Fluffy, Restaurant-Quality in 20 Minutes!)
Description
Ingredients
- 2 tablespoons olive oil
- 1 cup long-grain white rice, rinsed and drained
- ½ cup white onion, diced
- ½ cup bell pepper, diced (any color)
- 2 cloves garlic, minced
- 1 teaspoon ground cumin
- 1 teaspoon chili powder, or smoked paprika
- ½ teaspoon dried oregano
- 1½ cups chicken broth, or vegetable broth
- 14 ounces diced tomatoes,, undrained
- Salt and black pepper to taste
- Fresh cilantro and lime wedges for serving
Instructions
- Set Instant Pot to Sauté. Add oil and heat 1 minute. Add onion and bell pepper; sauté 2–3 minutes until softened. Add garlic; cook 30 seconds.
- Add rinsed rice. Toast for 2–3 minutes, stirring constantly, until grains turn lightly golden and smell nutty.
- Hit Cancel. Add ¼ cup broth and scrape all browned bits from the bottom of the pot with a wooden spoon (prevents burn notice).
- Add remaining broth, cumin, chili powder, oregano, salt, and pepper. Stir to combine. Press rice down so it is fully submerged.
- Pour diced tomatoes on top. Do NOT stir.
- Seal the lid. Set valve to Sealing. Pressure Cook on High for 4 minutes.
- When done, allow 10-minute natural pressure release. Then switch valve to Venting to release remaining pressure.
- Open lid. Fluff with a fork. Stir tomatoes through the rice. Season to taste. Garnish with cilantro and lime. Serve immediately.
Equipment
- Instant Pot Pressure Cooker, or Ninja Foodi Pressure Cooker
- Ladle
Notes
Nutrition
Share this recipe
We can’t wait to see what you’ve made! Mention @forktospoon or tag #forktospoon!