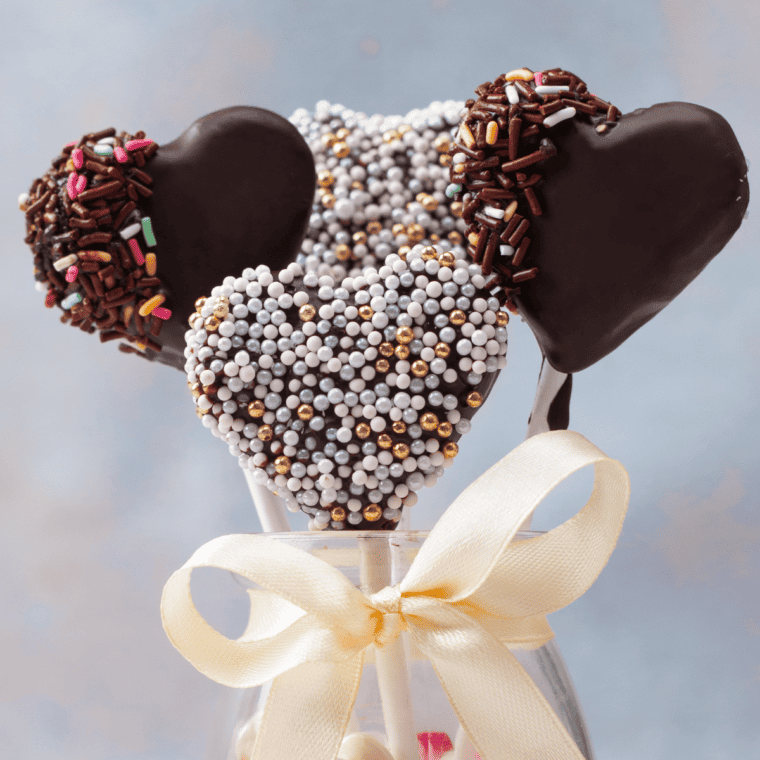
Easy Valentine’s Day Cake Pops — Valentine’s Day is just around the corner, and what better way to show your affection than with homemade cake pops?
These adorable and delicious treats are perfect for gifting or enjoying with your special someone. Follow our simple recipe and tips to make Valentine’s Day extra sweet!
These Easy Valentine’s Day Cake Pops are tasty and fun to get creative in the kitchen.
Whether you’re making them for a loved one, friends, or just for yourself, they’re sure to bring a smile to everyone’s face. Happy Valentine’s Day and happy baking!
Easy Valentine’s Day Heart Cake Pops
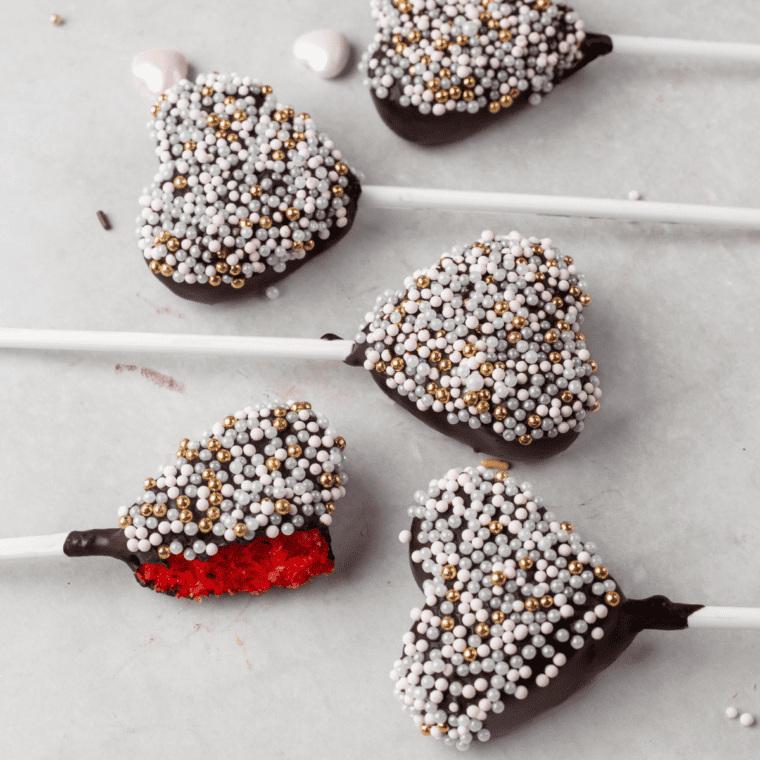
Valentine’s Day is the perfect occasion to express love and affection, and what better way to do so than with homemade Easy Valentine’s Day Heart Cake Pops? These delightful treats combine cake indulgence with the charm of bite-sized confections, making them an ideal gift for that special someone or a fun project to share with the kids. To begin, bake your favorite cake flavor, let it cool, then crumble it into a fine texture. Blend the crumbs with a creamy frosting until the mixture becomes moldable. Shape this mixture into hearts using a cookie cutter or hand to add a personal touch of love.
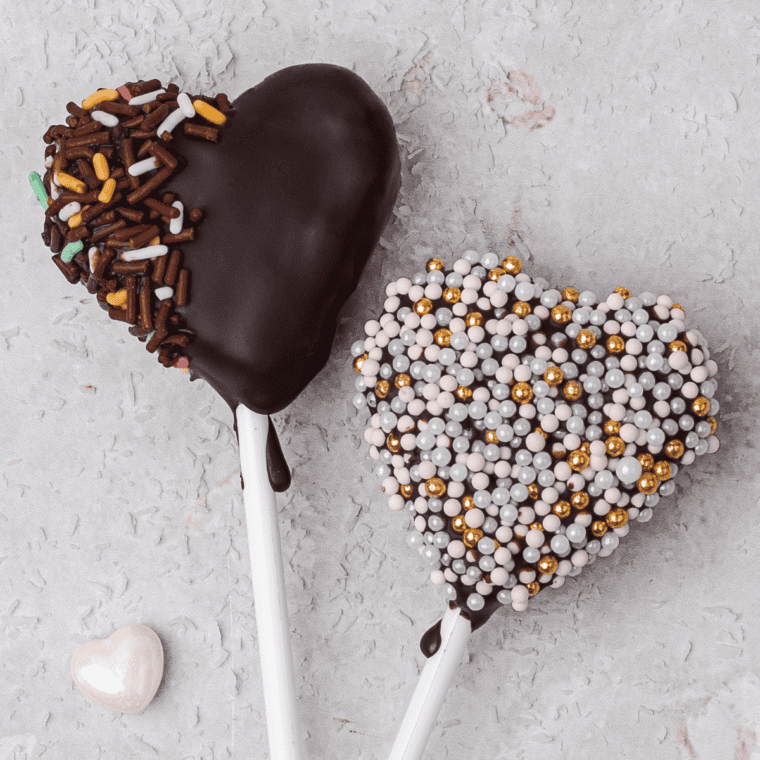
Once your heart-shaped cake bases are ready, dip them into melted chocolate or candy melts tinted with romantic red, pink, and white hues. This step not only adds a layer of sweet decadence but also seals in the moisture of the cake, ensuring each bite is as luscious as it is visually appealing. Embellish your cake pops with Valentine-themed decorations like sprinkles, edible glitter, or even tiny fondant roses for a more elegant touch. Insert a lollipop stick into each heart, transforming them into delightful pops ready for sharing. These Easy Valentine’s Day Heart Cake Pops are not just treats; they’re a playful and heartfelt expression of love, perfect for spreading joy and sweetness on this special day.

Why You Will Love Making Heart Cake Pops
Making Heart Cake Pops, especially for occasions like Valentine’s Day, is a delightful experience that offers more than just the joy of baking. Here’s why you will love making these charming treats:
- Creative Expression: Crafting Heart Cake Pops allows you to express your creativity. From choosing flavors to decorating with various colors and toppings, each step is an opportunity to make something unique and personal. Whether you prefer classic chocolate, vibrant red velvet, or even a confetti mix, the variety of options ensures your cake pops are not just treats but also a reflection of your artistic flair.
- Bonding Activity: Making these cake pops can be a wonderful way to spend time with loved ones. It’s a fun, hands-on activity for kids, friends, and couples. Rolling, shaping, and decorating these heart-shaped delights offers a chance to bond, share laughter, and create lasting memories.
- Versatility and Portability: Heart Cake Pops are incredibly versatile. They can be a sweet gesture for a significant other, a cute gift for friends and family, or a charming addition to a Valentine’s Day party. Their individual serving size and the convenience of being on a stick make them easy to distribute without needing plates or utensils.
- Learning New Skills: If you’re new to baking or looking to expand your culinary skills, making cake pops is a great learning experience. You’ll gain insight into the nuances of baking and decorating, from achieving the perfect cake consistency to mastering the art of melting chocolate.
- The Joy of Gifting: There’s something special about giving a homemade gift. Each Heart Cake Pop symbolizes your time, effort, and affection. Presenting these lovely treats to others not only spreads joy but also shows your appreciation and care in a very personal and sweet way.
- Sensory Satisfaction: Making these cake pops is a feast for the senses – from the aroma of freshly baked cake to the tactile pleasure of shaping and decorating and, finally, the taste of your delicious creations. It’s an immersive experience that delights at every stage.
In essence, making Heart Cake Pops is more than just a baking project; it’s a journey filled with creativity, sharing, learning, and a lot of love and sweetness. Whether you’re a seasoned baker or a beginner, the process will surely bring a smile to your face and warmth to your heart.
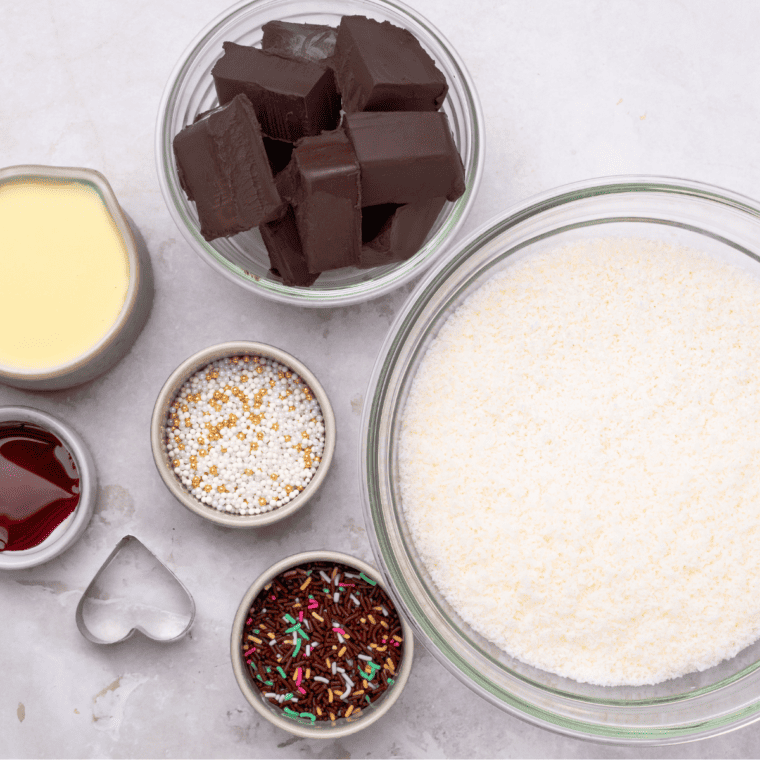
Ingredients Needed For Easy Valentine’s Day Cake Pops
Embark on a sweet culinary adventure this Valentine’s Day with these easy-to-make cake pops. Each ingredient in this recipe plays a crucial role in creating these delightful treats that are perfect for sharing with your loved ones.
Remember the step-by-step directions and detailed ingredient list are below, in the printable recipe card at the bottom of the post, as well as the nutritional information.
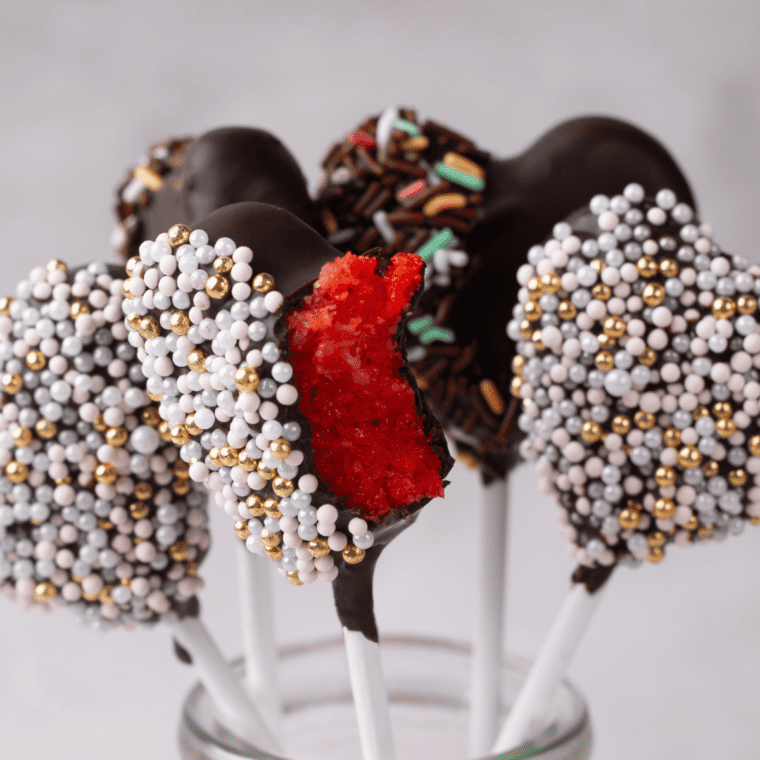
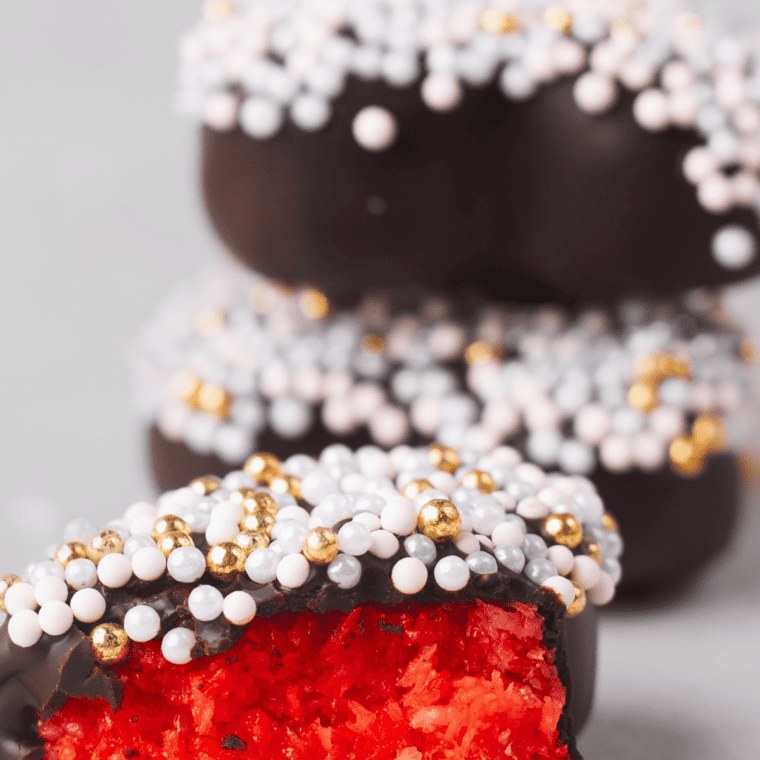
- Your Favorite Cake Mix: Choose a cake mix that resonates with the occasion – red velvet for a classic Valentine’s feel or chocolate for rich indulgence. This base will determine the primary flavor and color of your cake pops.
- Vanilla Frosting: A smooth and creamy vanilla frosting binds the cake crumbs together and adds a rich flavor, complementing any cake mix you choose.
- White and Pink Candy Melts: These candy melts will serve as the outer shell of your cake pops, providing a sweet, smooth coating. White and pink colors are perfect for the Valentine’s theme, adding a touch of elegance and festivity.
- Sprinkles and Decorations: Opt for heart-shaped sprinkles, red and pink sugar, or any Valentine ‘s-themed decorations to add a festive touch. These embellishments are not just for looks; they add texture and a bit of extra sweetness.
- Lollipop Sticks: These sticks are essential for giving your cake pops their classic, easy-to-enjoy form, turning them into perfect hand-held treats for your Valentine’s celebration.
With these key ingredients, you’re all set to create delightful Valentine’s Day cake pops that are as fun to make as they are to eat!
How To Make Easy Valentine’s Day Cake Pops
Making Easy Valentine’s Day Cake Pops is a fun and rewarding process that combines baking, crafting, and decorating. Here’s a straightforward guide on how to create these festive treats:
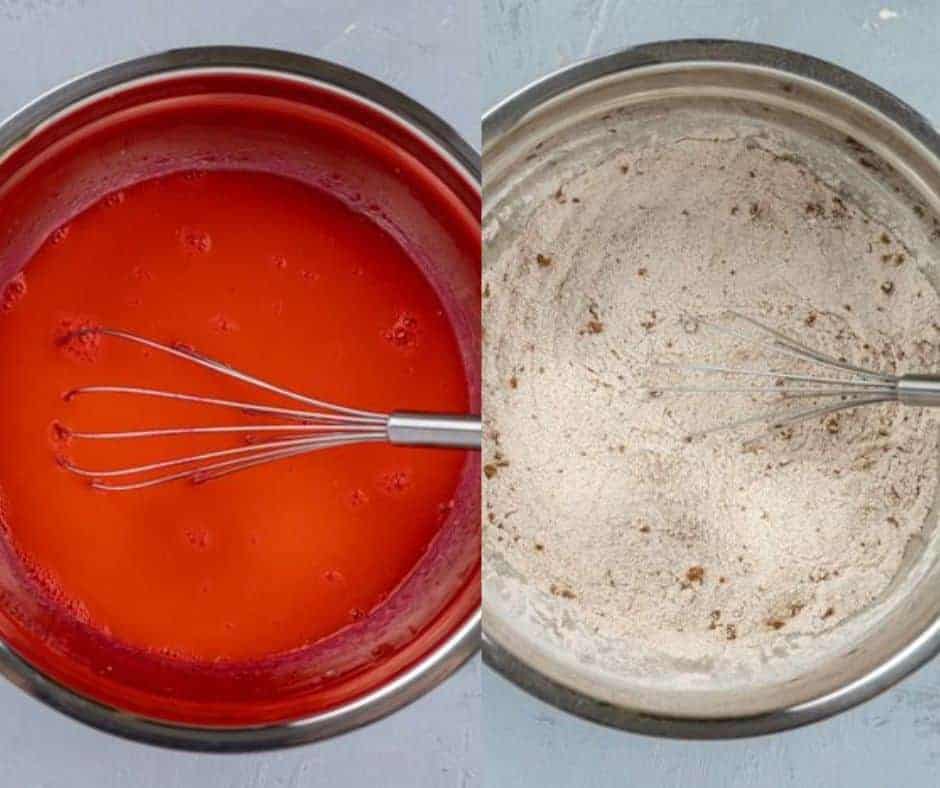
Bake the Cake: Bake your cake mix according to the package instructions. For a Valentine’s Day theme, you might consider flavors like red velvet or chocolate. Once baked, allow the cake to cool completely.

Crumble and Mix: After the cake has cooled, crumble it into fine crumbs using your hands or a food processor. In a large bowl, mix the cake crumbs with vanilla frosting. Start with a small amount of frosting and gradually add until the mixture is moist enough to hold its shape when formed.
Form the Cake Pops: Scoop out small portions of the cake mixture and roll them into balls. If you’re feeling creative, you can shape them into hearts for a more festive look. Place the formed cake balls on a baking sheet lined with parchment paper and refrigerate for 1-2 hours until firm.
Prepare the Candy Melts: While the cake balls are chilling, melt the white and pink candy melts in separate bowls. You can do this using a microwave in 30-second intervals, stirring between each interval, or using a double boiler.
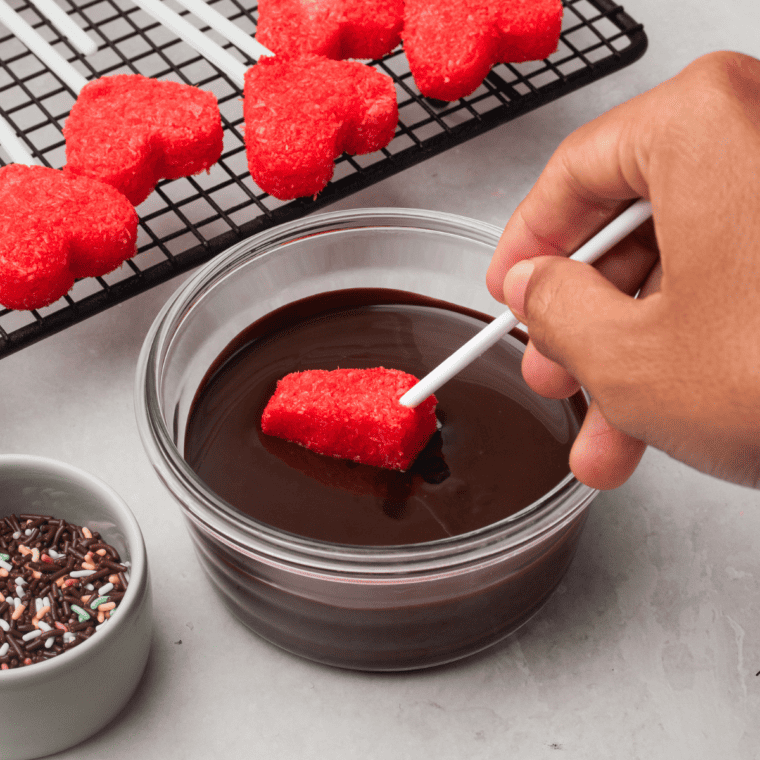
Dip the Sticks: Take a lollipop stick and dip one end into the melted candy about half an inch. Then, insert the dipped end into a cake ball. This helps the cake ball stay secure on the stick when dipped in the coating.
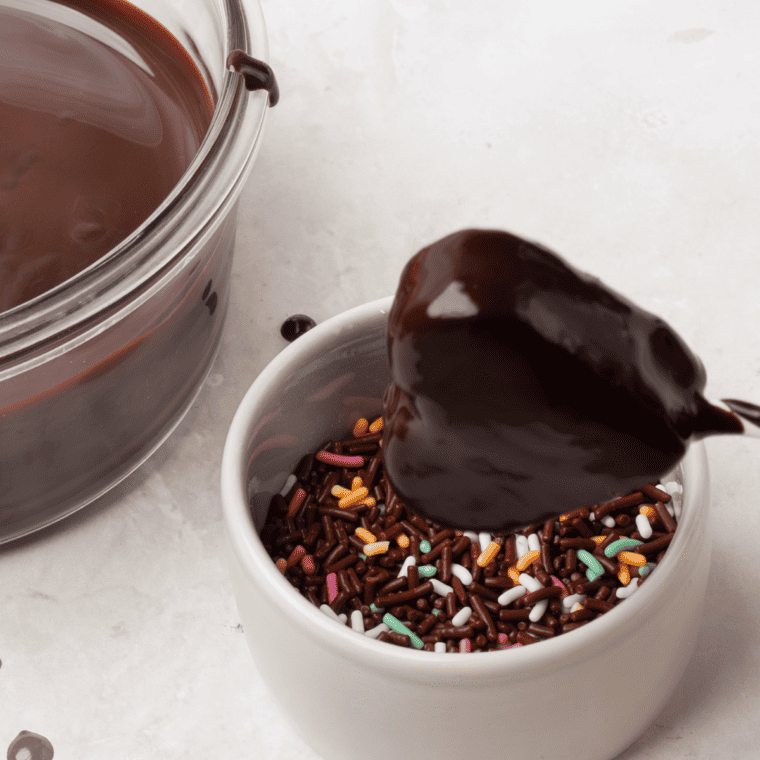
Coat the Cake Pops: Dip each cake pop into the melted candy once the sticks are inserted. Gently tap off any excess coating. If the candy coating is too thick, you can thin it with coconut oil or vegetable shortening.
Decorate: Before the coating sets, decorate your cake pops with sprinkles, edible glitter, or any other Valentine ’s-themed decorations. This step should be done quickly, as the candy coating can harden fast.
Set the Cake Pops: Stick the cake pops upright in a styrofoam block or a cake pop stand to let them set completely. This usually takes about an hour.
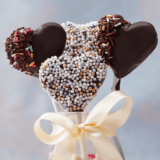
Serve or Gift: Once set, your Valentine’s Day cake pops are ready to be served or packaged as gifts. You can wrap them individually in cellophane and tie them with a ribbon for a charming presentation.
Enjoy the process and the delightful results of your homemade Valentine’s Day cake pops! They’re perfect for sharing with loved ones or adding a sweet touch to your Valentine’s Day celebration.
Recipe Variations
Experimenting with recipe variations can make your Easy Valentine’s Day Cake Pops even more special and personalized. Here are some creative ideas to inspire your baking:
- Flavor Twists:
- Red Velvet and Cream Cheese: Mix red velvet cake mix with cream cheese frosting for a classic combination.
- Chocolate and Raspberry: Pair a rich chocolate cake with raspberry-flavored frosting for a fruity twist.
- Lemon and White Chocolate: Use lemon cake with vanilla frosting coated in white chocolate for a zesty option.
- Coating Varieties:
- Dark Chocolate Dip: Melt dark chocolate for a more sophisticated, less sweet coating.
- Colored White Chocolate: Use food coloring to tint white chocolate in various shades of pink and red.
- Butterscotch or Caramel: Melt butterscotch or caramel chips for a gooey, rich coating.
- Decorative Elements:
- Themed Sprinkles: Choose sprinkles in the shapes of hearts, lips, or use red and pink colors.
- Drizzled Toppings: Drizzle a contrasting color of melted candy or chocolate over the coated pops for an artistic effect.
- Edible Glitter or Gold Leaf: Add a touch of glamour with edible glitter or small pieces of gold leaf.
- Inside Surprises:
- Cookie Dough Center: Encase a small ball of eggless cookie dough inside the cake mixture.
- Jam or Jelly Filling: Before forming the balls, insert a small amount of strawberry or raspberry jam in the center for a fruity surprise.
- Alternative Bases:
- Brownie Pops: Substitute cake with brownies for a denser, richer texture.
- Doughnut Pops: Use crumbled doughnuts mixed with frosting for a unique twist.
- Dietary Adjustments:
- Gluten-Free Options: Use a gluten-free cake mix and ensure all other ingredients meet dietary needs.
- Vegan Variations: Opt for vegan cake mixes, plant-based frostings, and dairy-free chocolate.
- Packaging Ideas:
- Bouquet Style: Arrange the cake pops in a vase or a decorated jar to resemble a bouquet.
- Individual Boxes: Present them in small boxes for an elegant gift.
These variations not only cater to different tastes but also add an element of surprise and delight to your Valentine’s Day celebration. Feel free to mix and match these ideas to create your own unique batch of Valentine’s Day cake pops!
Pro Tips
Creating Easy Valentine’s Day Cake Pops can be a joyful and fulfilling baking endeavor. To ensure your cake pops are as delightful to make as they are to eat, here are some pro tips:
- Perfect Cake Consistency: The key to successful cake pops is the texture of the cake and frosting mixture. It should be moist enough to hold together but not so wet that it becomes gooey. If the mixture is too dry, add more frosting; if it is too wet, add more cake crumbs.
- Chill Before Dipping: Refrigerate the formed cake balls for at least an hour before dipping them into the candy melts. This helps them maintain their shape and prevents them from falling apart during dipping.
- Smooth Candy Coating: To achieve a smooth, even coating, ensure your candy melts are completely and lump-free. You can thin the coating with vegetable oil or shortening if it is too thick.
- Avoid Cracks: Avoid drastic temperature changes to prevent the candy shell from cracking. Let the chilled cake balls come to near room temperature before dipping them in the warm candy melts.
- Decorate Quickly: Apply any sprinkles or decorative elements immediately after dipping, as the candy coating hardens quickly. Having your decorations ready and within reach is helpful.
- Use a Styrofoam Block: A Styrofoam block is a great tool for holding the cake pops while they set. This keeps them upright and prevents smudging of the candy coating.
- Experiment with Flavors and Colors: Don’t be afraid to try different cake flavors, frosting combinations, and candy melt colors. Valentine’s Day is associated with pinks and reds, but you can get creative with other color schemes and flavors.
- Packaging is Key for Gifting: Consider decorative packaging if you plan to gift your cake pops. Clear cellophane bags, ribbons, and personalized tags add a lovely touch.
- Practice Makes Perfect: If you’re new to making cake pops, don’t worry if your first few attempts aren’t perfect. Practice will help you get a feel for the right consistency and coating technique.
- Have Fun!: Remember, the process should be enjoyable. Embrace any imperfections, and have fun with the creative process.
By keeping these pro tips in mind, your Easy Valentine’s Day Cake Pops will look and taste fantastic and bring a lot of joy and satisfaction in the making.
Faq’s
Can I use homemade cake instead of cake mix? Absolutely! You can use any cake recipe you prefer. Just ensure it’s fully cooled before crumbling for the cake pops.
How do I get the right consistency for the cake and frosting mixture? The mixture should be moist enough to roll into balls without falling apart. Start with a small amount of frosting and gradually add more until you achieve the desired consistency.
How long should I chill the cake balls before dipping? Chill the cake balls for at least 1-2 hours. This helps them firm up and makes them easier to dip without falling apart.
My candy melts are too thick. How can I thin them? You can thin candy melts by adding a small amount of coconut oil or vegetable shortening and mixing until you reach a smooth, dipable consistency.
How do I prevent the cake pops from falling off the sticks? Dip the stick into the melted candy before inserting it into the cake ball. Let it set for a few minutes before dipping the entire cake pop.
The coating on my cake pops is cracking. What am I doing wrong? Cracking usually happens due to a temperature difference between the cake balls and the coating. Try letting your chilled cake balls warm up slightly before dipping them into the melted candy.
Can I make these cake pops gluten-free? Use a gluten-free cake mix and ensure all other ingredients, including the candy melts, are gluten-free.
How can I store the finished cake pops and how long will they last? Store them in an airtight container in the refrigerator. They typically last for about a week.
Can I freeze cake pops? Yes, you can freeze cake pops either before or after dipping them in candy melts. Just make sure they’re well-wrapped or in an airtight container.
Are there any vegan options for these cake pops? Yes, use a vegan cake recipe and vegan frosting. There are also vegan-friendly candy melts available.
More Air Fryer Recipes
- AIR FRYER S’MORES
- AIR FRYER FROZEN FRUIT PUFF PASTRIES TURNOVERS
- EASY AIR FRYER CINNAMON ROLLS
- EASY AIR FRYER APPLE DUMPLINGS
- AIR FRYER TWIX BARS
- EASY AIR FRYER CANNOLI
- AIR FRYER ELEPHANT EARS
Don’t Forget To Pin!
Easy Valentine’s Day Cake Pops
Description
Ingredients
- 1 Cake, Prepared
- 1 cup vanilla frosting
- 1 cup red candy melts
- 1 cup dark chocolate
- 1 cup sprinkles
Instructions
- Bake the Cake: Begin by baking your chosen cake mix according to the package instructions. You might consider flavors like red velvet or chocolate for a Valentine’s Day theme. Once baked, allow the cake to cool completely.
- Crumble and Mix: After the cake has cooled, crumble it into fine crumbs using your hands or a food processor. In a large bowl, mix the cake crumbs with vanilla frosting. Start with a small amount of frosting and gradually add more until the mixture is moist enough to hold its shape when formed.
- Form the Cake Pops: Scoop out small portions of the cake mixture and roll them into balls. If you’re feeling creative, you can shape them into hearts for a more festive look. Place the formed cake balls on a baking sheet lined with parchment paper and refrigerate for about 1-2 hours, until they are firm.
- Prepare the Candy Melts: While the cake balls are chilling, melt the white and pink candy melts in separate bowls. You can do this using a microwave in 30-second intervals, stirring between each interval, or using a double boiler.
- Dip the Sticks: Take a lollipop stick and dip one end into the melted candy about half an inch. Then insert the dipped end into a cake ball. This helps the cake ball stay secure on the stick when dipped in the coating.
- Coat the Cake Pops: Once the sticks are inserted, dip each cake pop into the melted candy. Gently tap off any excess coating. If the candy coating is too thick, you can thin it with a bit of coconut oil or vegetable shortening.
- Decorate: Before the coating sets, decorate your cake pops with sprinkles, edible glitter, or any other Valentine’s-themed decorations. This step should be done quickly as the candy coating can harden fast.
- Set the Cake Pops: Stick the cake pops upright in a styrofoam block or a cake pop stand to let them set completely. This usually takes about an hour.
- Serve or Gift: Once set, your Valentine’s Day cake pops are ready to be served or packaged as gifts. For a charming presentation, you can wrap them individually in cellophane and tie them with a ribbon.
Equipment
- Heart Cookie Cutter
- Lollipop Sticks
Nutrition
Share this recipe
We can’t wait to see what you’ve made! Mention @forktospoon or tag #forktospoon!