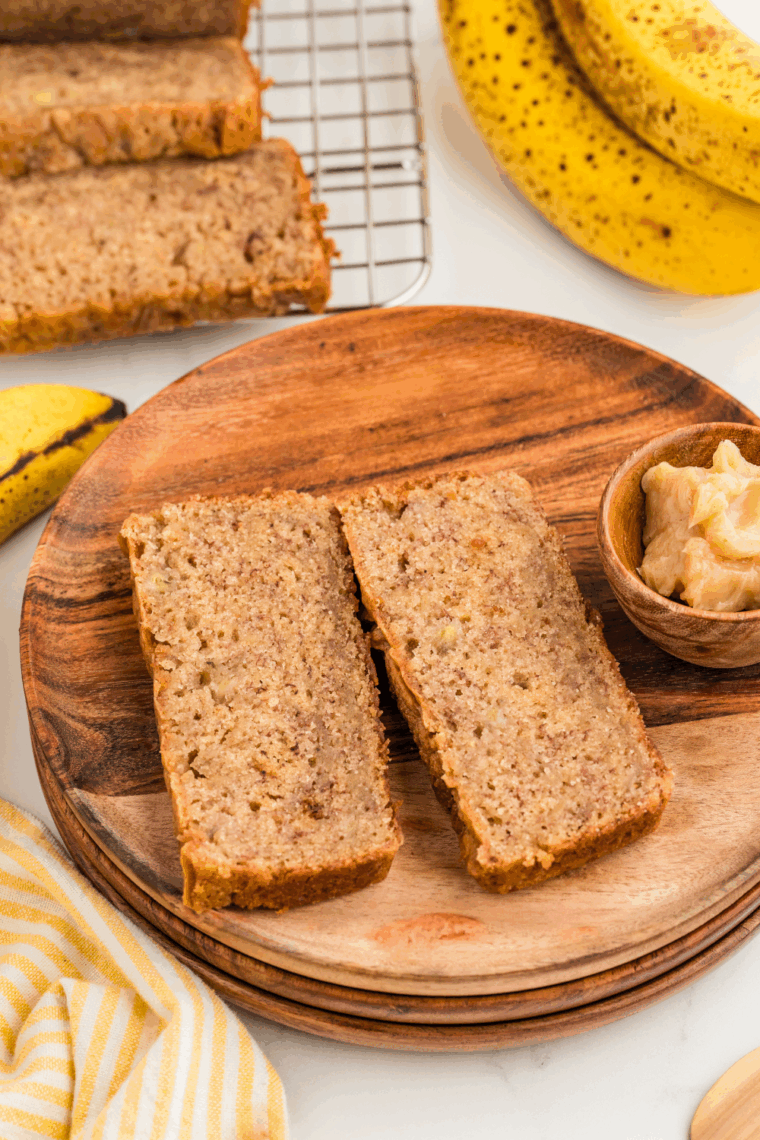
This Easy Banana Bread Recipe with Shortening is moist, tender, and packed with rich banana flavor. Quick to mix and perfect for breakfast, snacks, or dessert, it’s a foolproof classic everyone will love.

This Easy Banana Bread Recipe with Shortening is a classic twist on traditional banana bread, giving you a moist, tender loaf with rich banana flavor.
Using shortening, like Crisco keeps the bread soft and perfectly textured, making it ideal for breakfast, snacks, or an anytime sweet treat.
Quick to mix and simple to bake, this recipe is perfect for both beginner and experienced bakers who want a reliable, delicious banana bread every time.
Why You Will Love This Recipe!
- Moist and Tender: Shortening helps create a soft, perfectly moist texture that lasts longer than butter-based recipes.
- Rich Banana Flavor: Packed with ripe bananas, every bite delivers natural sweetness and depth of flavor.
- Quick and Easy: Minimal ingredients and simple steps make this a hassle-free recipe for any skill level.
- Versatile Snack or Dessert: Great for breakfast, an afternoon snack, or even a cozy dessert with a cup of coffee.
- Customizable: Easily add chocolate chips, nuts, or cinnamon for a personalized twist.
Ingredients Needed
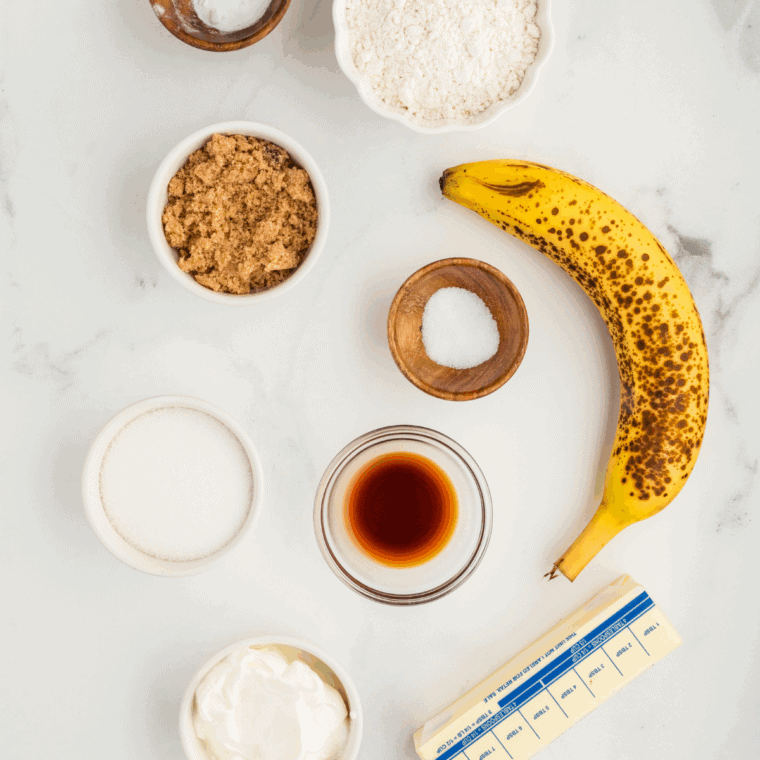
- Ripe bananas – sweet, soft bananas for natural flavor and moisture
- Shortening – keeps bread tender, soft, and perfectly moist
- Granulated sugar – adds sweetness and helps with light texture
- Eggs – bind ingredients and add structure to the loaf
- Vanilla extract – enhances sweetness and adds warm aromatic flavor
- All-purpose flour – forms the base and gives bread structure
- Baking soda – helps the bread rise and stay fluffy
- Salt – balances sweetness and enhances overall flavor
How To Make Banana Bread Recipe With Shortening
Step One: Preheat your oven to 350°F (175°C). Grease a 9×5-inch loaf pan with shortening or line it with parchment paper to prevent sticking.
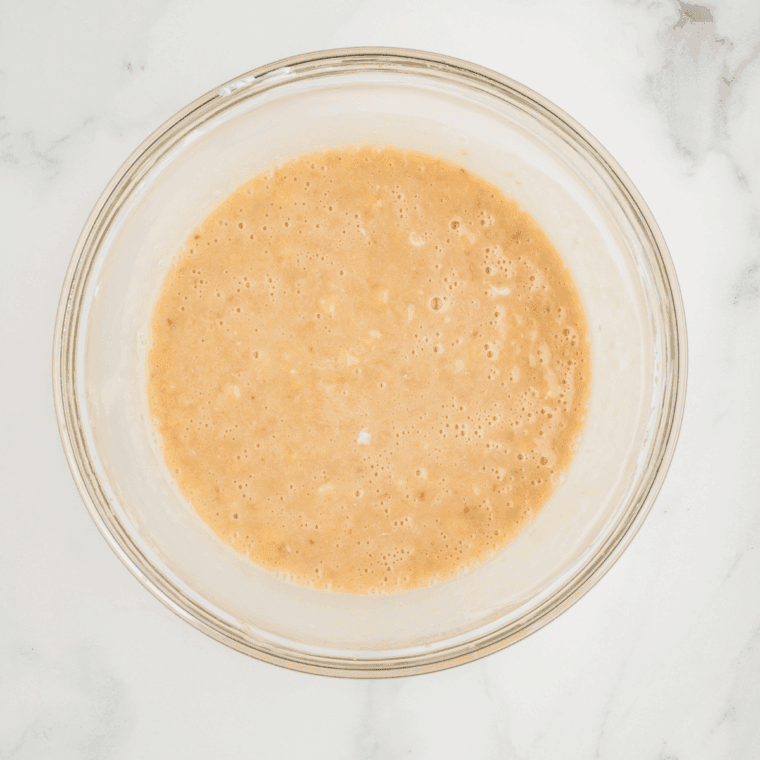
Step Two: In a medium bowl, mash ripe bananas until smooth. A few small lumps are okay—they add texture and flavor.
Step Three: Add shortening, granulated sugar, eggs, and vanilla extract to the mashed bananas. Beat until smooth and well combined.
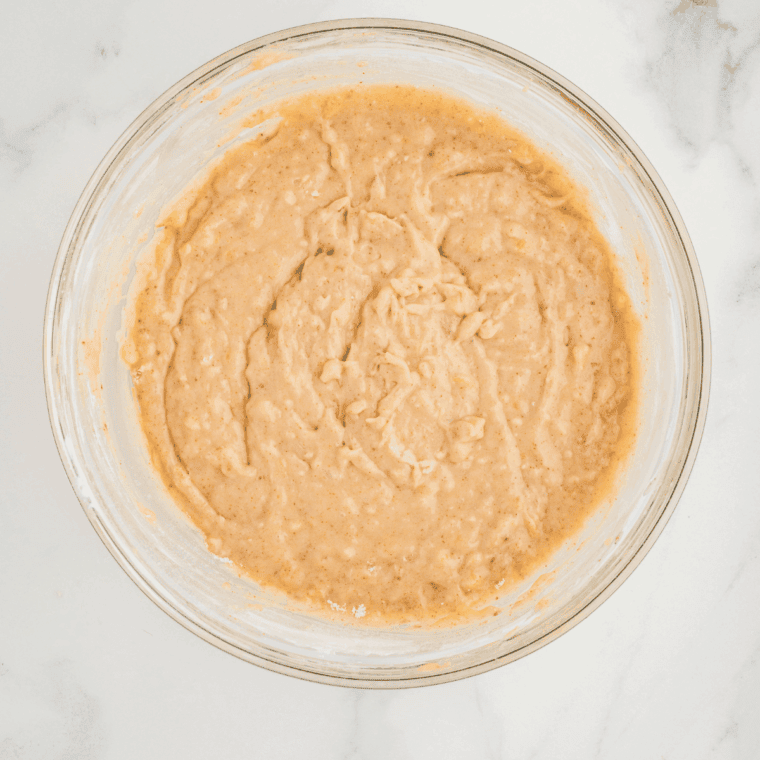
Step Four: In a separate bowl, whisk together all-purpose flour, baking soda, and salt. Gradually add the dry ingredients to the banana mixture, folding gently with a spatula just until combined. Avoid overmixing to keep the bread tender.
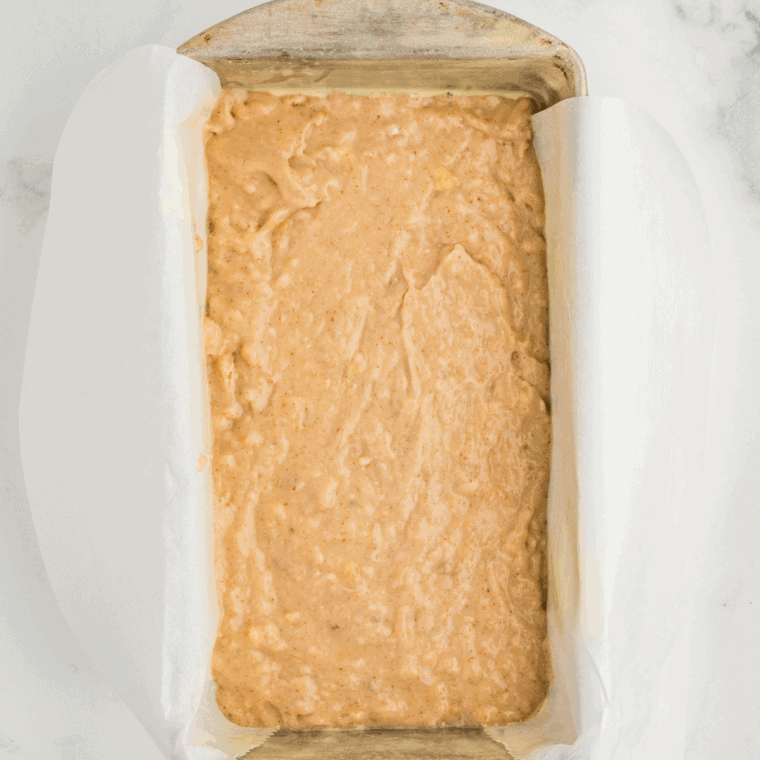
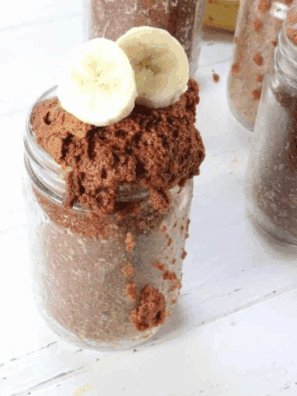
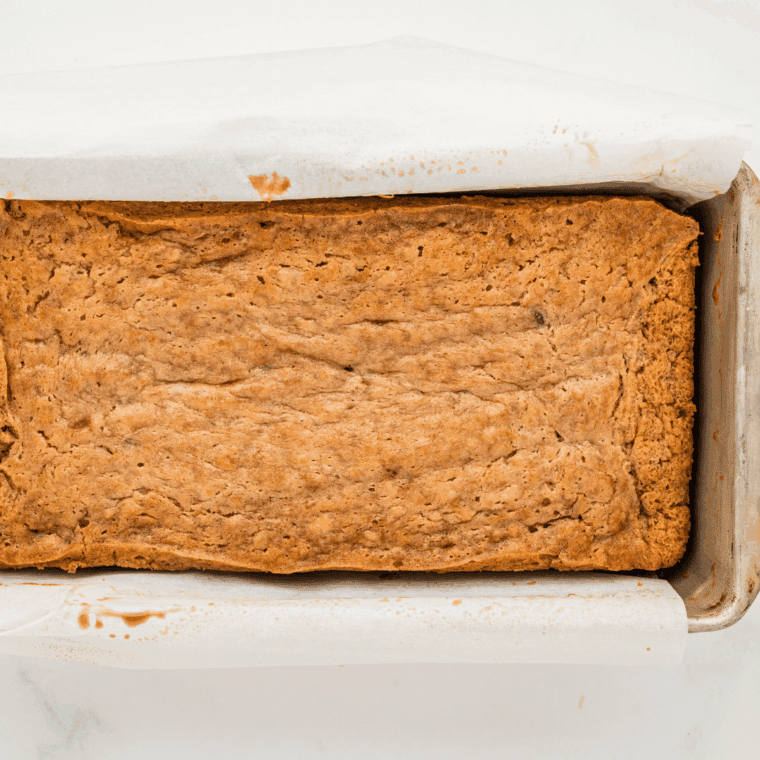
Step Five: Pour the batter into the prepared loaf pan and smooth the top. Bake in the preheated oven for 55–65 minutes, or until a toothpick inserted in the center comes out clean.
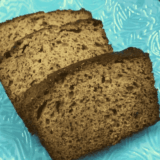
Step Six: Allow the bread to cool in the pan for 10–15 minutes, then transfer to a wire rack to cool completely before slicing. Serve plain or with butter for a delicious treat.
Easy Banana Bread Recipe With Shortening Recipe Tips
- Use very ripe bananas: The riper, the sweeter and more flavorful the bread.
- Don’t overmix: Gently fold the dry ingredients into the wet to keep the bread tender.
- Measure flour correctly: Spoon and level to prevent dense or dry bread.
- Check for doneness: Insert a toothpick in the center; it should come out clean.
- Add mix-ins if desired: Chocolate chips, nuts, or cinnamon can enhance flavor and texture.
Storing, Freezing & Reheating Instructions
- To Store: Keep leftover banana bread in an airtight container at room temperature for up to 3 days, or in the fridge for up to 1 week.
- To Freeze: Wrap the loaf tightly in plastic wrap and place in a freezer-safe bag. Freeze for up to 3 months. Thaw overnight in the fridge before serving.
- To Reheat: Warm slices in a preheated oven at 325°F for 5–10 minutes, or microwave for 20–30 seconds until heated through.

Easy Banana Bread Recipe With Shortening Recipe Faqs
Can I use butter instead of shortening? Yes, you can substitute butter for shortening, but the bread may be slightly denser and less tender.
How ripe should the bananas be? Use very ripe bananas with plenty of brown spots—they’re sweeter and mash easily for a moist loaf.
Can I add nuts or chocolate chips? Absolutely! Fold in chopped walnuts, pecans, or chocolate chips for extra texture and flavor.
How do I know when the bread is done? Insert a toothpick in the center; it should come out clean or with a few moist crumbs.
Can I make this recipe in muffin tins instead of a loaf pan? Yes, bake for 18–22 minutes or until a toothpick comes out clean. Adjust baking time as needed.
How should I store leftover banana bread? Store in an airtight container at room temperature for up to 3 days, or in the fridge for up to 1 week.
More Easy Recipes
- CRANBERRY WALNUT BREAD
- LEMON BLUEBERRY BREAD
- CRANBERRY ORANGE NUT BREAD
- ZUCCHINI PUMPKIN QUICK BREAD
- BANANA NUT BREAD
Don’t Forget To Pin!
Share Your Creations! Are you active on Facebook? Join our Air Fryer Recipes Group, where hundreds of thousands of Air Fryer enthusiasts gather and share your photos! I’m always thrilled to see what you’ve made. For those on Instagram, don’t forget to tag me @forktospoon – I can’t wait to admire your culinary adventures!
Easy Banana Bread Recipe With Shortening
Description
Ingredients
- 3 medium Ripe banana, mashed (about 1 ½ cups)
- 1/2 cup Shortening, 1 stick
- 1 cup Granulated sugar
- 2 large Eggs
- 1 teaspoon Vanilla extract
- 2 cups All-purpose flour,
- 1 teaspoon Baking soda ,
- 1/2 teaspoon Salt,
Instructions
- Preheat oven to 350°F (175°C). Grease a 9×5-inch loaf pan with shortening or line it with parchment paper.
- In a medium bowl, mash the ripe bananas until smooth. Small lumps are okay for texture.
- Add shortening, sugar, eggs, and vanilla extract to the mashed bananas. Beat until smooth and well combined.
- In a separate bowl, whisk together flour, baking soda, and salt.
- Gradually fold dry ingredients into the banana mixture until just combined. Avoid overmixing to keep the bread tender.
- Pour batter into prepared loaf pan and smooth the top. Bake 55–65 minutes, or until a toothpick inserted in the center comes out clean.
- Allow bread to cool in the pan for 10–15 minutes, then transfer to a wire rack. Slice and serve warm or at room temperature.
Equipment
- Cooking Spray
- Mini Loaf Pans, Oven Safe
Nutrition
Share this recipe
We can’t wait to see what you’ve made! Mention @forktospoon or tag #forktospoon!