
Crisp, fanned-out edges. A soft, buttery middle. Garlic herb butter melting down into every single slice. These air fryer hasselback potatoes are the side dish that makes a weeknight dinner look like you planned it for a week.

They also happen to be the recipe I get the most questions about, and almost all of those questions come down to two things: how to slice them without ruining them, and how to get the center fully tender. Both are covered below, along with exact timing for small, medium, and large potatoes.
What Are Hasselback Potatoes?
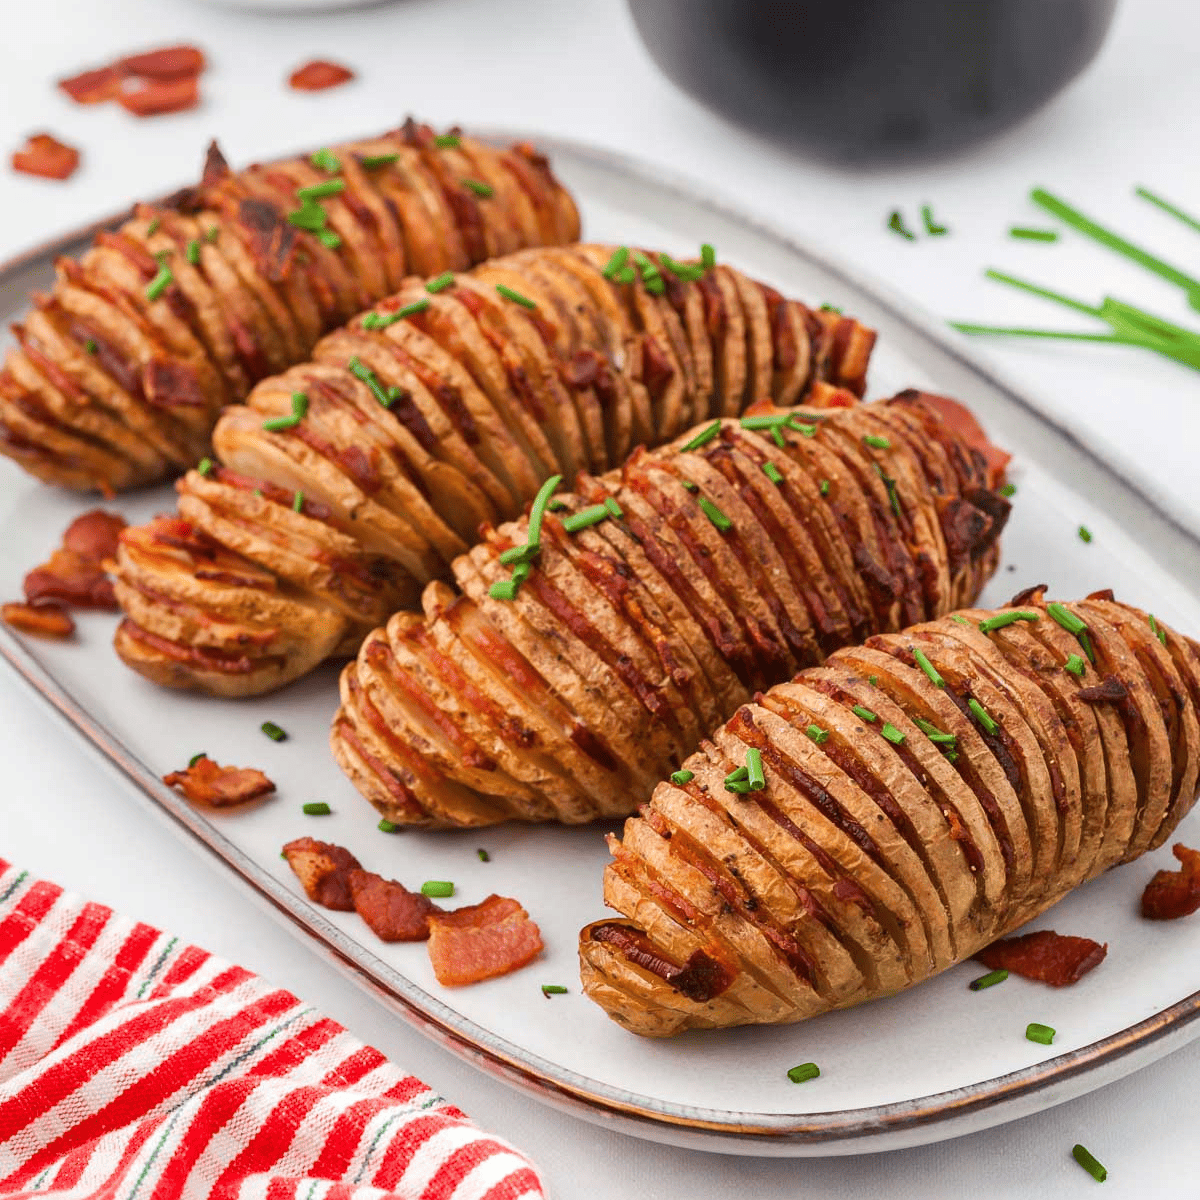
Hasselback potatoes are a Swedish side dish, named for the Stockholm restaurant where they were first served. A whole potato is sliced almost all the way through at thin, even intervals, leaving the base intact so the potato holds together and fans open as it cooks.
Those cuts are the whole point. They create dozens of thin edges that crisp up like potato chips while the base of the potato stays soft and creamy, and they give butter, oil, and seasoning somewhere to go besides the outside skin.
The air fryer is genuinely better at this than the oven. Circulating hot air gets into the gaps between the slices and dries out those thin edges quickly, which is exactly what makes them crisp. It’s the same reason air fryer accordion potatoes turn out so well, and it’s what got me experimenting with hasselbacks in the first place.
Why You’ll Love This Recipe
- They crisp better than oven-baked. The concentrated air flow hits the cut edges directly, so you get more crunch in less time and without heating your whole kitchen.
- Five real ingredients. Potatoes, butter, garlic, herbs, salt and pepper. Nothing you need a special trip for.
- They look impressive and aren’t. These land on a holiday table and people assume they were difficult. They’re a potato and a knife.
- Endlessly customizable. Cheese, bacon, sour cream, different herbs, a spicy version. There’s a whole variations section below.
- The oven stays free. On a big cooking day, that alone is worth it.
Ingredients
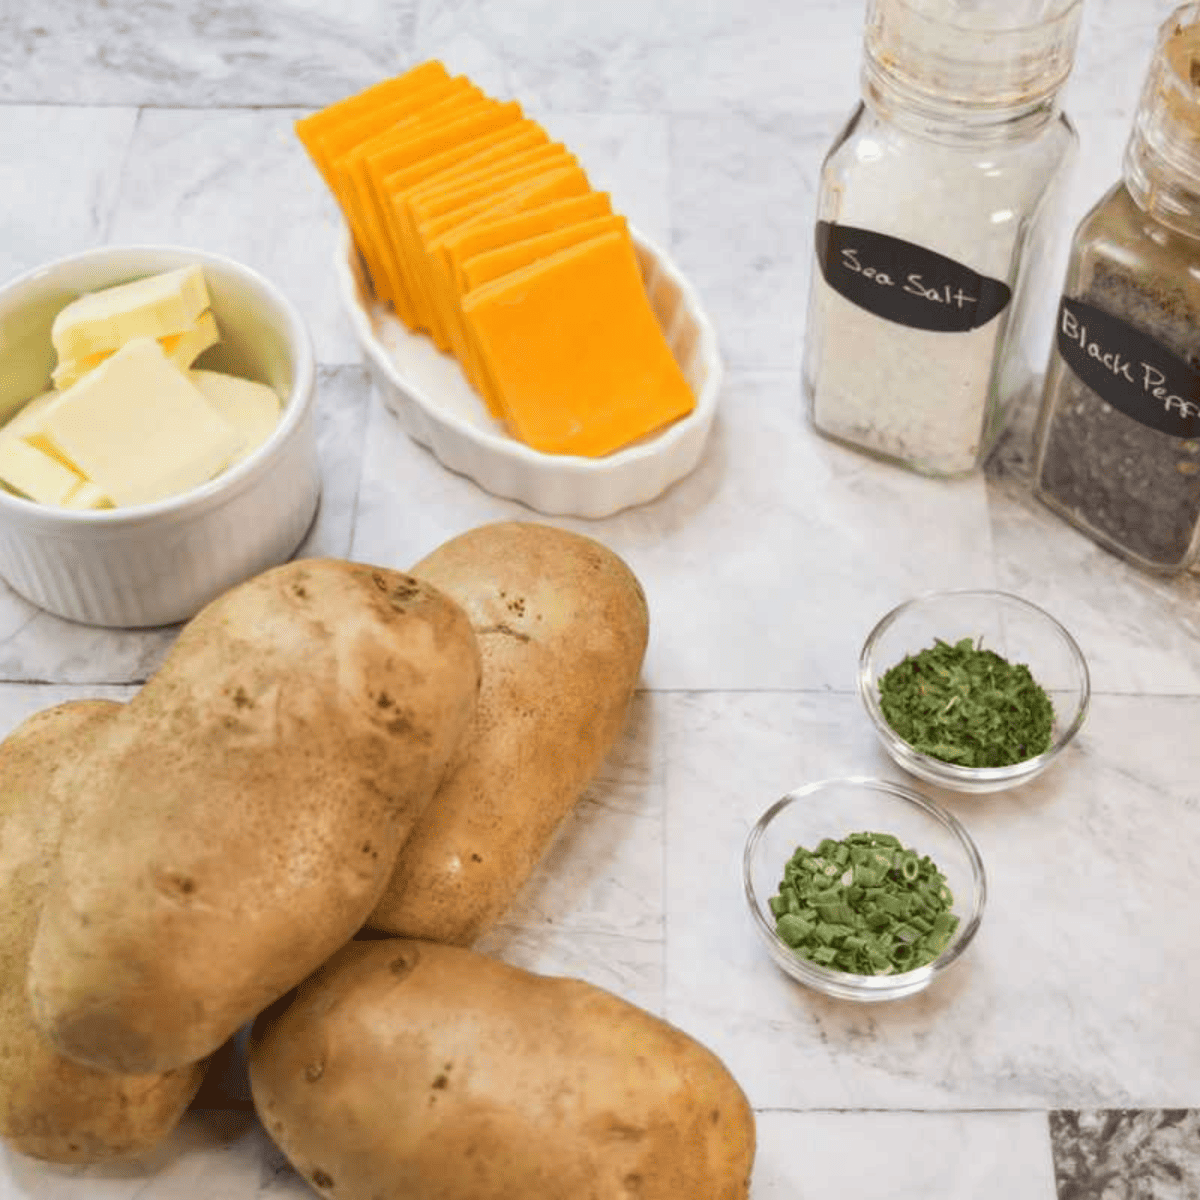
- Russet potatoes: Starchy russets are the best potato for hasselbacks. The high starch content gives you a fluffy interior and edges that genuinely crisp instead of going leathery. Choose medium potatoes, roughly 6 to 8 ounces each. Very large potatoes are harder to slice evenly and take significantly longer to cook through.
- Butter: Salted butter, melted. It carries the garlic and herbs down into the slices and gives you that golden color. Olive oil works if you want a dairy-free version.
- Fresh garlic: Minced. Fresh is noticeably better here than garlic powder, though powder will do in a pinch. Add it to the butter rather than directly onto the potato so it doesn’t scorch.
- Fresh herbs: Parsley, thyme, and rosemary are the combination I keep coming back to. Use one or all three.
- Salt and black pepper: Season generously. Potatoes need more salt than people expect.
- Olive oil: A light coat before the butter goes on. This is a small step that makes a real difference to the crisp, and I explain why below.
How to Cut Hasselback Potatoes
This is the part everyone worries about, and it’s much more forgiving than it looks. The goal is thin, even slices that stop about ½ inch from the bottom so the potato stays in one piece.
The chopstick method: Lay a chopstick, a wooden spoon handle, or a pencil along each side of the potato. Slice straight down until your knife hits the chopsticks. They physically stop the blade before it can cut through the base. This is the single best trick for beginners and I still use it.
Cut a flat base first. Slice a thin sliver off the flattest side of the potato and set the potato on that cut side. A potato that doesn’t roll is a potato you can slice evenly.
Slice about ¼ inch apart. Thinner slices fan open more and crisp more, but they’re fragile and can break at the base. Thicker than ⅓ inch and the middle takes much longer to cook. A quarter inch is the sweet spot.
Use a sharp knife and go slowly. A dull knife tears through the starch and drags the slices apart. Take your time — the cuts are the entire recipe.
If you slice through, keep going. A potato that’s cut all the way through in one spot still cooks and still tastes great. Nobody at the table is measuring.
How to Make Air Fryer Hasselback Potatoes
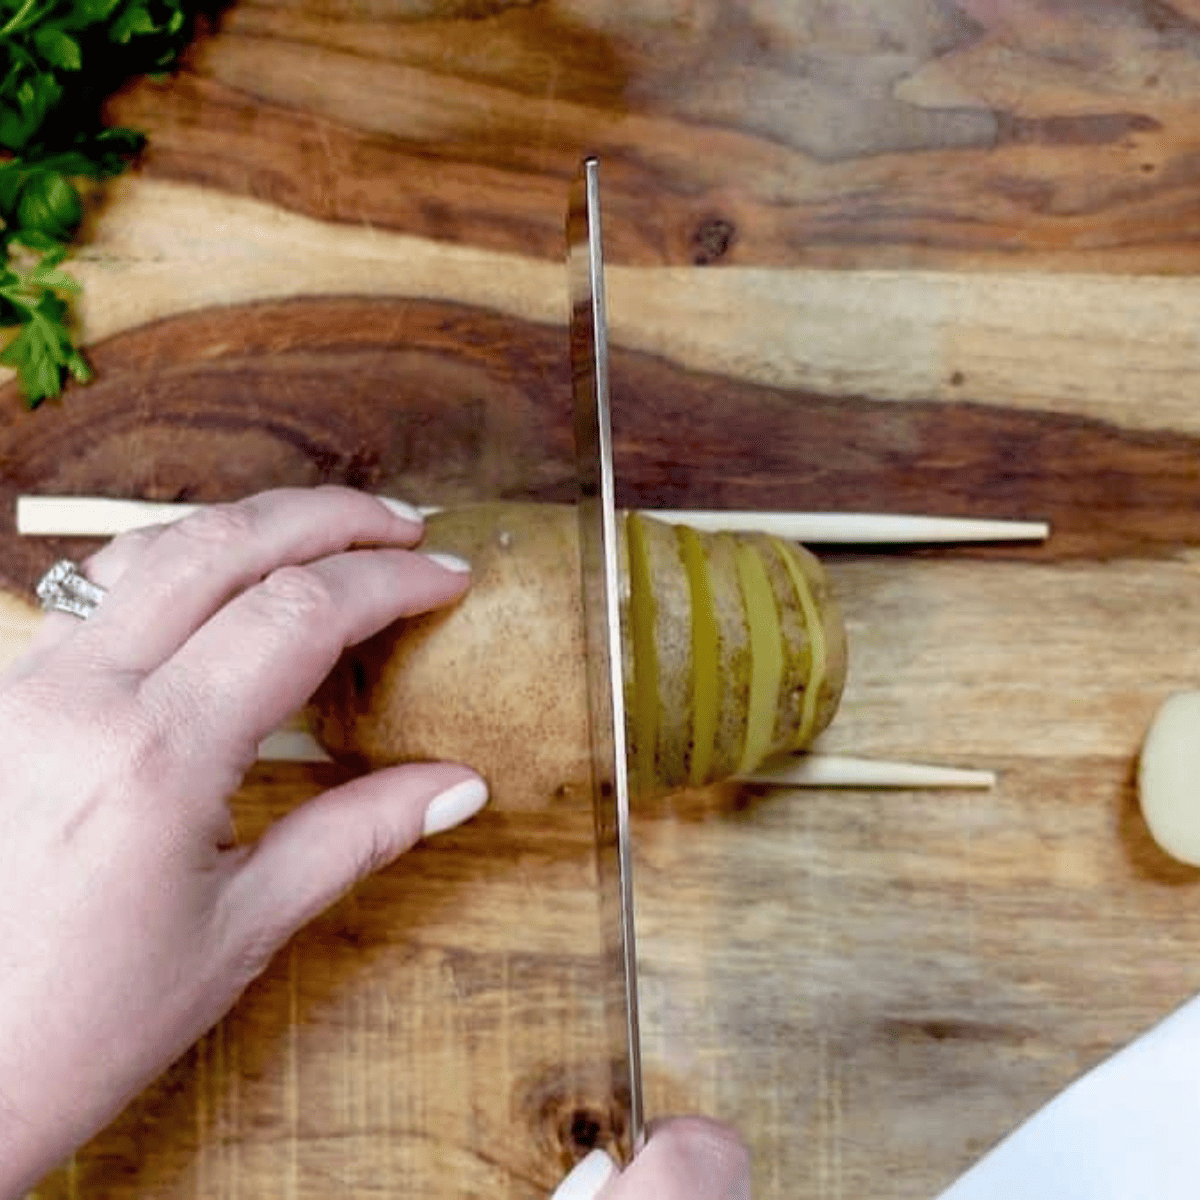
Step 1: Prep the potatoes. Scrub them well and dry them completely. Wet skin steams instead of crisping. Leave the skin on — it’s where a lot of the texture comes from.
Step 2: Slice. Cut a flat base, set the potato between two chopsticks, and slice ¼ inch apart down the length, stopping about ½ inch from the bottom.
Step 3: Soak, if you have time. Ten to fifteen minutes in cold water rinses excess starch out from between the slices and helps them separate and crisp. This is optional but it’s the difference between good and very good. Pat them completely dry afterward.
Step 4: Preheat the air fryer to 375°F. Preheating matters here. A cold basket means the potatoes spend the first several minutes warming up instead of cooking, and you lose crisp.
Step 5: Oil and season. Brush the potatoes lightly with olive oil, working a little between the slices, and season with salt and pepper. Oil first, butter later — butter’s milk solids will brown and burn over a 30-minute cook, so it goes on partway through.
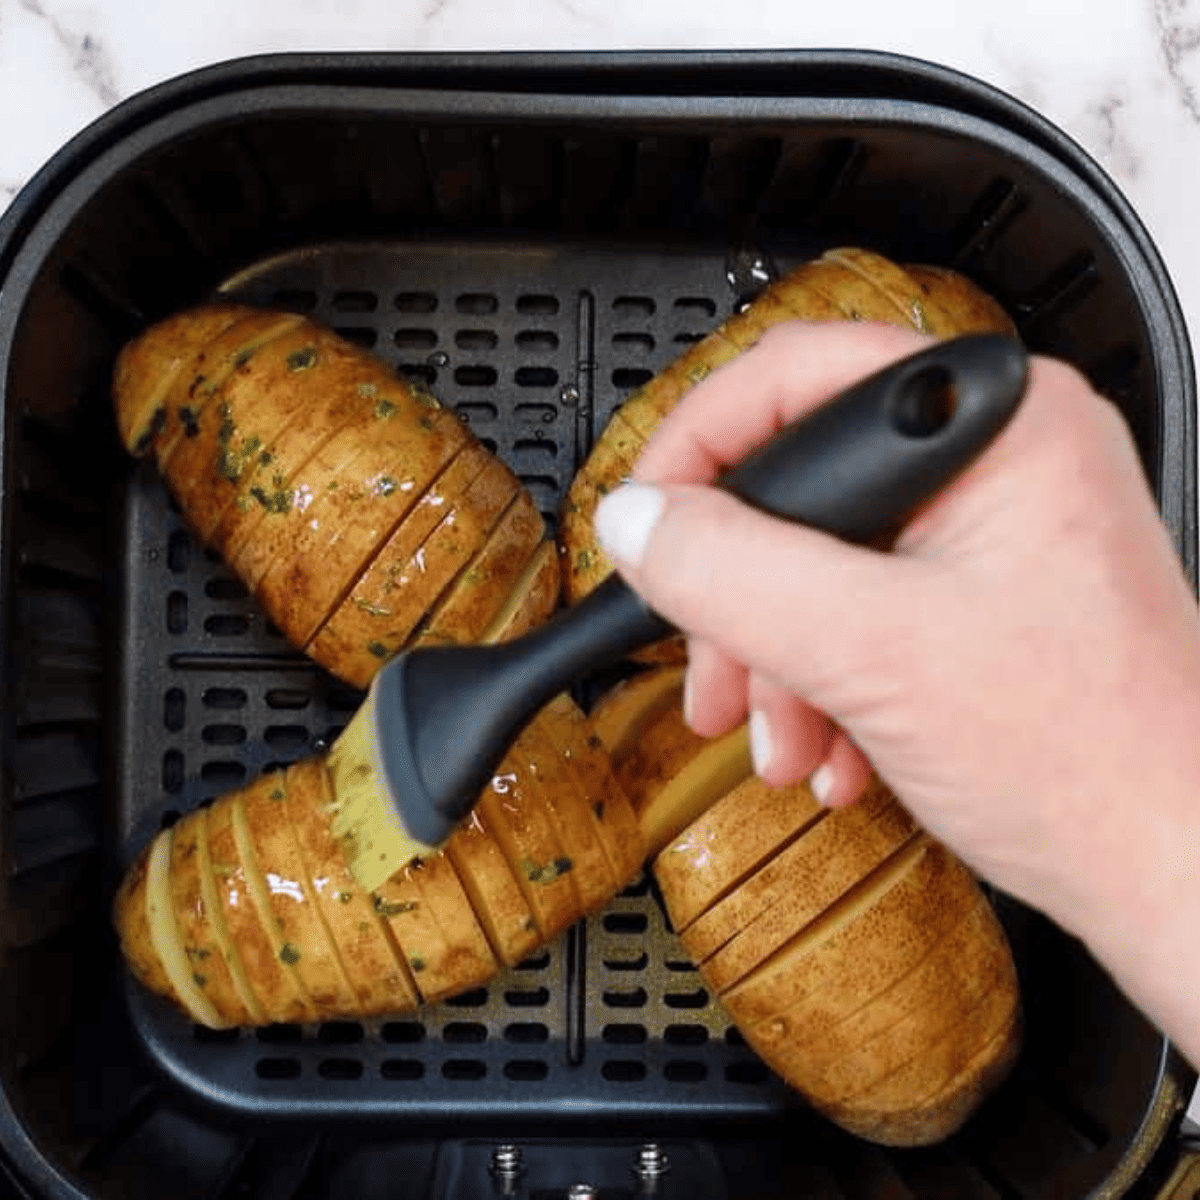
Step 6: Air fry for 20 minutes. Arrange the potatoes cut side up in a single layer with space between them. Crowding the basket traps steam and you’ll get soft potatoes instead of crisp ones. Cook in batches if you need to.
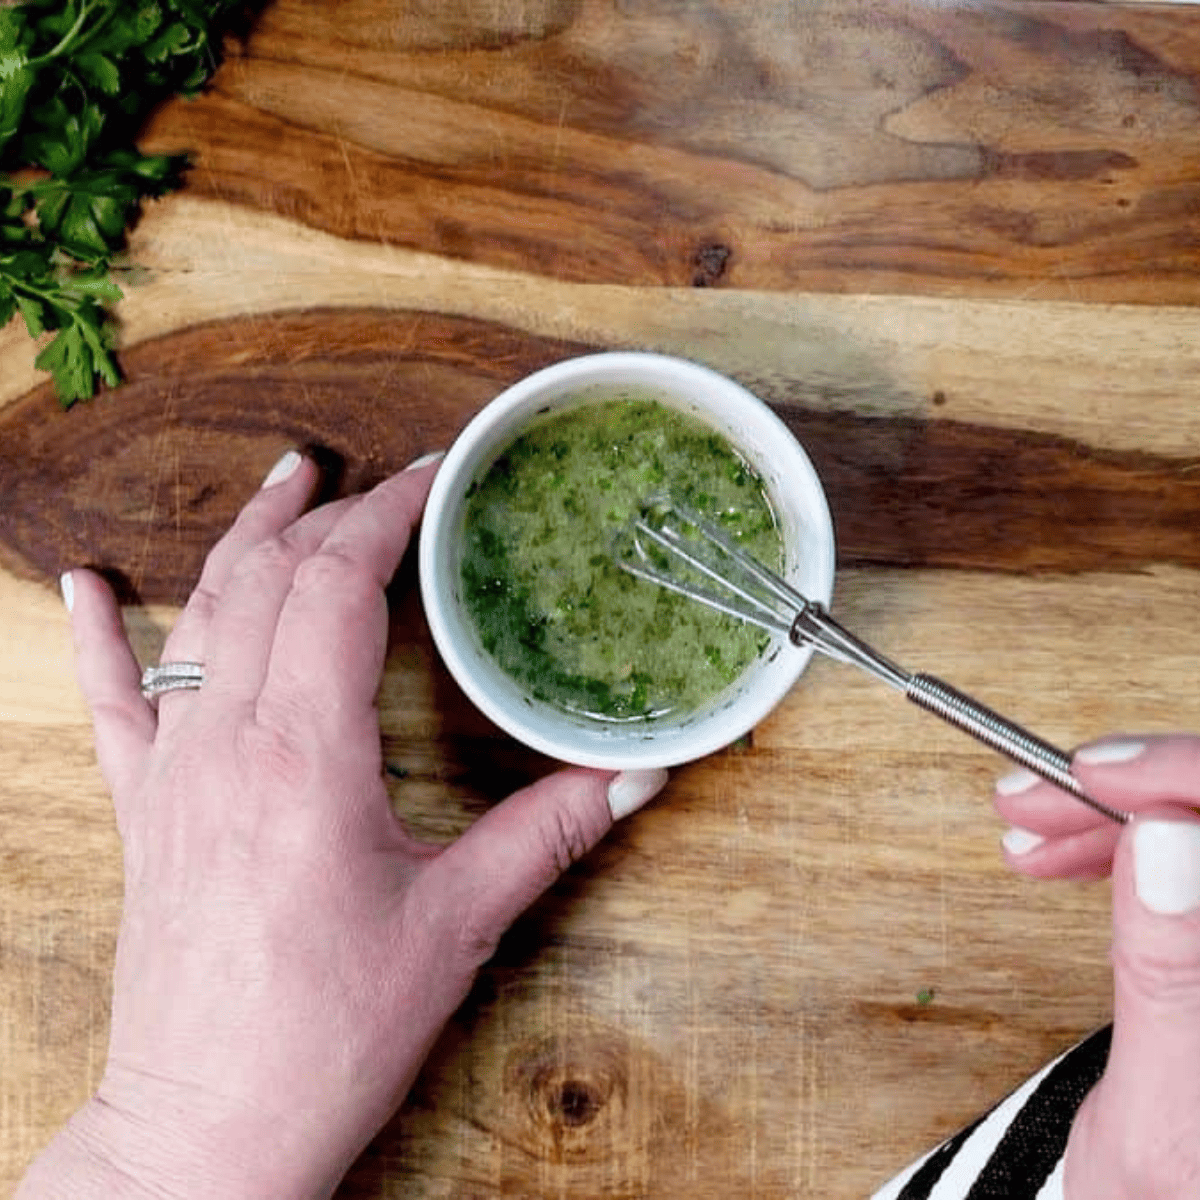
Step 7: Make the garlic herb butter. While they cook, stir the melted butter together with the minced garlic, parsley, thyme, and rosemary.
Step 8: Brush and finish. Open the basket, brush the garlic butter generously over the potatoes and down into the slices, and air fry another 10 to 15 minutes, until a knife or skewer slides into the thickest part of the potato with no resistance. The slices should be visibly fanned open and browned at the edges.
Step 9: Serve immediately. Brush with any remaining butter, add flaky salt and fresh parsley, and get them to the table while they’re crisp.
Air Fryer Time and Temperature
Total cook time depends almost entirely on the size of your potatoes. Times below are at 375°F, with the garlic butter added in the last third of cooking.
| Potato size | Weight each | Total time at 375°F |
|---|---|---|
| Small | 4–5 oz | 22–26 minutes |
| Medium | 6–8 oz | 30–35 minutes |
| Large | 10–12 oz | 40–45 minutes |
Air fryers vary a lot by model, so treat these as a starting point. The doneness test is always the same: a knife should slide into the center of the potato with no resistance at all. If there’s any drag, it needs more time. For more on how different machines behave, my air fryer recipe index has timing notes across a range of basket and oven-style models.
Tips for the Crispiest Hasselback Potatoes
- Dry potatoes crisp; wet potatoes steam. Dry them after washing and again after soaking.
- Don’t crowd the basket. Space between the potatoes lets air circulate. Two batches beats one soggy batch.
- Oil first, butter second. Butter added at the start will brown too far before the potato is cooked.
- Fan the slices open. After the first 15 minutes, the potato has softened enough that you can gently press the slices apart with a fork or the back of a spoon. This lets butter and hot air reach the inside faces.
- Salt between the slices. Season down into the cuts, not just across the top.
- Medium potatoes are the easiest. Large ones look dramatic but the center takes forever to cook and the outside can overshoot.
Variations and Substitutions
- Cheesy hasselbacks: Tuck thin slices of cheddar, gruyère, or mozzarella into the cuts in the last 5 minutes. If you want the full version, I have a dedicated recipe for air fryer cheesy hasselback potatoes.
- Bacon and blue cheese: Crumbled bacon and blue cheese pushed between the slices is a genuinely great combination — that one has its own recipe here.
- Vegan: Swap the butter for good olive oil or a plant-based butter. Everything else stays the same.
- Spicy: Add cayenne, red pepper flakes, or chipotle powder to the butter.
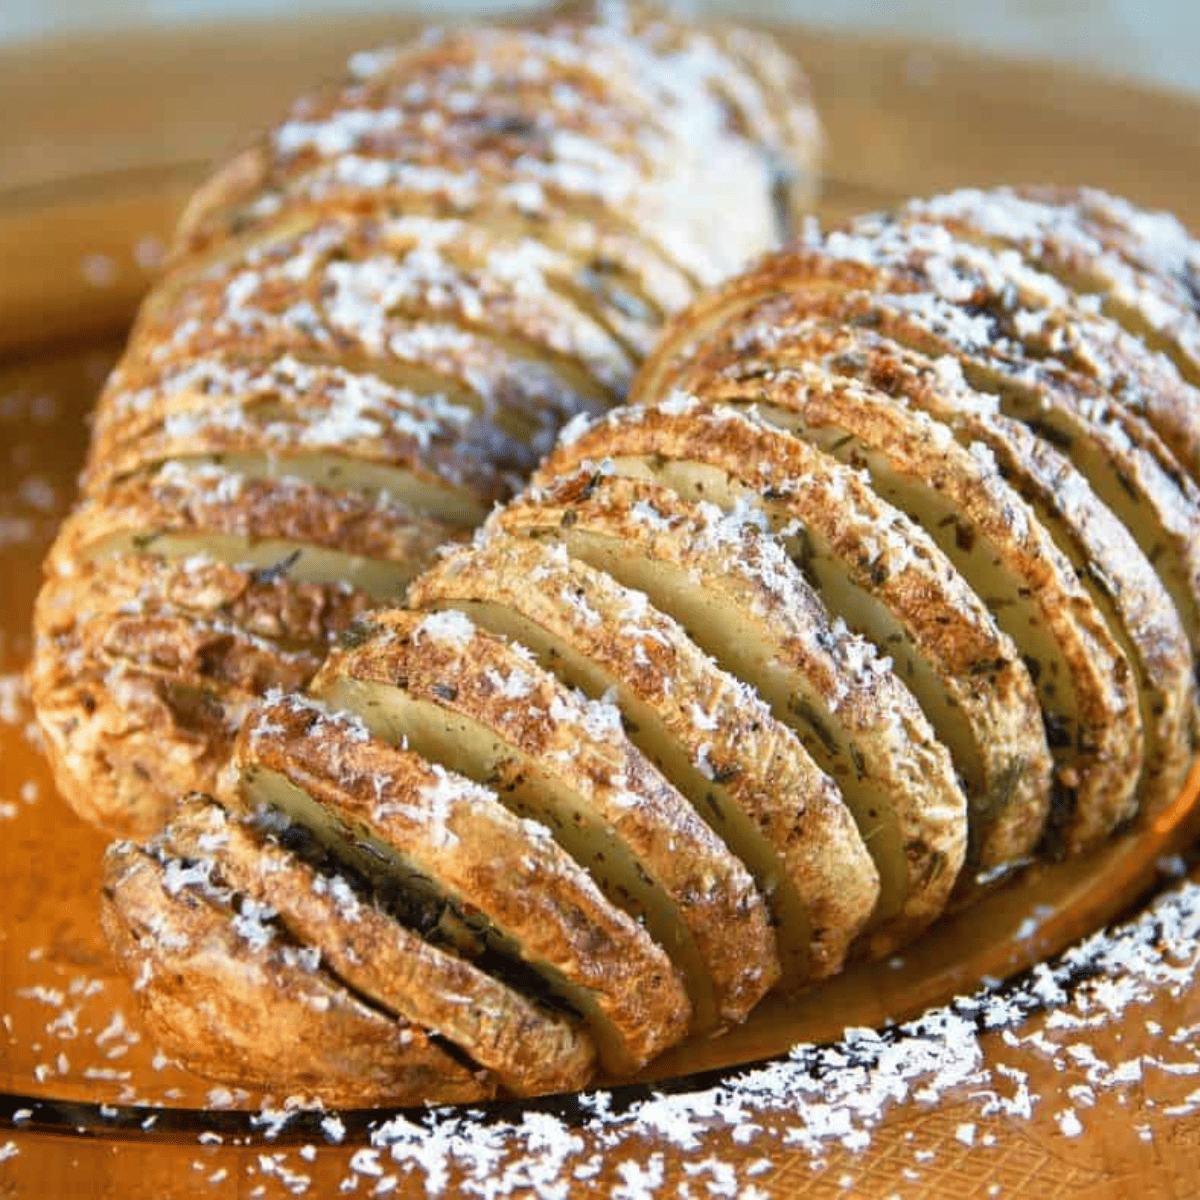
- Parmesan crusted: Finely grated parmesan over the top in the last 5 minutes. Similar idea to my air fryer parmesan crusted potatoes, which uses smaller potatoes and the same crisping principle.
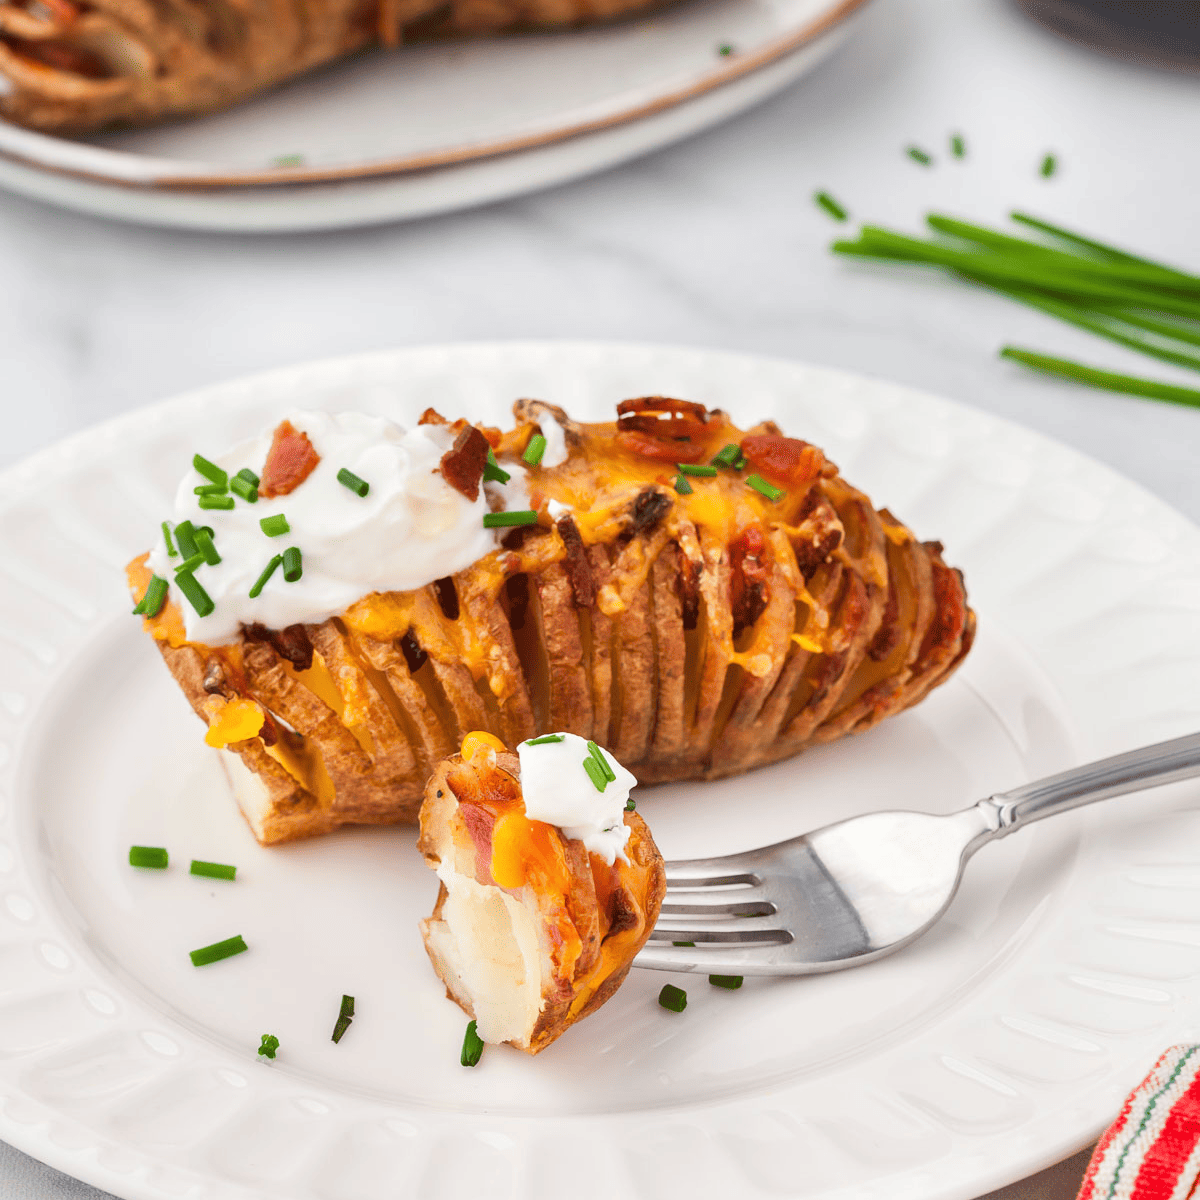
- Loaded: Sour cream, chives, bacon, and cheddar after cooking, like a baked potato that fans open.
- Sweet potato hasselbacks: Use medium sweet potatoes, swap the garlic and herbs for cinnamon and a drizzle of maple syrup, and expect 25 to 30 minutes at 375°F. Sweet potatoes are denser and won’t crisp quite as sharply.
- Other potato varieties: Yukon Golds are the best substitute — a little waxier, a little more buttery, slightly less crisp. Red potatoes work but hold their shape more firmly and fan less.
Troubleshooting
The middle is still hard. This is the most common problem and it’s almost always potato size. A large russet needs 40 minutes or more. Lower the temperature to 350°F and give it another 10 minutes so the center catches up without the edges burning.
The slices didn’t fan open. Either the cuts were too thick, or they weren’t deep enough. Cut ¼ inch apart and go down to about ½ inch from the bottom. You can also help them along by gently prying the slices apart halfway through cooking.
They’re soft, not crisp. Usually a crowded basket, damp potatoes, or a skipped preheat. All three trap steam. Also check that the butter went on partway through rather than at the start.
The garlic burned. Fresh garlic in butter at the beginning of a 30-minute cook will scorch. Add the garlic butter in the last 10 to 15 minutes, or use garlic powder if you want to season from the start.
They fell apart. The base was cut too thin. Leave a full ½ inch. They’ll still taste fine — serve them as a rustic pile and nobody will comment.
Storage and Reheating
Refrigerator: Hasselbacks are best fresh, since the crisp edges soften as they cool. If you have leftovers, cool them completely and store in an airtight container in the fridge for 2 to 3 days.
Reheating: The air fryer is the only good option. Reheat at 375°F for 4 to 5 minutes and the edges crisp right back up. The microwave will make them soft and slightly rubbery.
Make ahead: Don’t cook these in advance. You can slice them up to a few hours ahead and hold them in cold water in the fridge, which prevents browning and doubles as the starch soak. Dry them thoroughly before cooking.
Freezing: Not recommended. The texture doesn’t survive it.
What to Serve With Hasselback Potatoes
These are a steakhouse side at heart. They’re excellent with grilled flank steak or a pile of air fryer steakhouse wings.
For something leaner, Ninja Foodi garlic chicken works beautifully — the garlic echoes the butter on the potatoes. Air fryer turkey thighs are another good match, and both the turkey and the potatoes can be timed to finish together.
If you’re building a potato-forward spread, air fryer chili lime potatoes and air fryer Greek potatoes bring different flavor directions, and air fryer cheesy potatoes are the crowd-pleaser of the group.
Frequently Asked Questions
What is the best potato for hasselback potatoes? Russet potatoes. Their high starch content gives you a fluffy interior and edges that crisp properly. Yukon Golds are the next best choice — slightly waxier and more buttery, with a little less crunch.
Do I need to peel the potatoes? No, and I’d recommend against it. The skin adds texture and helps hold the potato together while it fans open. Just scrub it well.
What temperature should I air fry hasselback potatoes? 375°F is the sweet spot — hot enough to crisp the edges, gentle enough that the center cooks through before the outside overcooks. Drop to 350°F if you’re working with unusually large potatoes.
Why aren’t my hasselback potatoes crispy? The three usual culprits are a crowded basket, potatoes that weren’t dried properly, or skipping the preheat. All three create steam, and steam is the enemy of crisp.
Can I make hasselback potatoes in the oven? Yes. Bake at 400°F for 50 to 60 minutes, brushing with the garlic butter in the last 20 minutes. The air fryer is faster and produces crisper edges, but the oven handles larger quantities.
How do I keep from slicing all the way through? Place a chopstick or wooden spoon handle along each side of the potato. Your knife hits the chopstick and stops before it reaches the base. It works every time.
Can I use garlic powder instead of fresh garlic? Yes. Use about ½ teaspoon of garlic powder in place of the teaspoon of fresh minced garlic. Garlic powder has the advantage of not burning, so you can add it at the beginning of cooking.
Can I make these dairy-free? Absolutely. Replace the butter with olive oil or a plant-based butter and follow the recipe exactly as written.

Air Fryer Hasselback Potatoes
Description
Ingredients
- 4 medium russet potatoes, about 6–8 oz each
- 1 tablespoon olive oil
- 4 tablespoons butter, melted
- 1 teaspoon garlic, minced (about 2 cloves)
- 1 teaspoon fresh parsley, chopped, plus more for serving
- 1 teaspoon fresh thyme, chopped
- 1 teaspoon fresh rosemary, chopped
- 1 teaspoon salt
- ½ teaspoon black pepper
Instructions
- Prep. Scrub the potatoes and dry them completely. Slice a thin sliver off the flattest side of each potato so it sits flat without rolling.
- Slice. Place a chopstick or wooden spoon handle along each side of a potato. Cut straight down at ¼-inch intervals along the length of the potato, letting the chopsticks stop your knife about ½ inch from the bottom. Repeat with the remaining potatoes.
- Soak (optional). Place the sliced potatoes in cold water for 10–15 minutes to rinse out excess starch, then pat them completely dry inside and out.
- Preheat. Preheat the air fryer to 375°F.
- Season. Brush the potatoes with olive oil, working a little between the slices, and season with the salt and pepper.
- First cook. Arrange the potatoes cut side up in a single layer in the air fryer basket, leaving space between them. Air fry at 375°F for 20 minutes.
- Make the garlic butter. Stir together the melted butter, minced garlic, parsley, thyme, and rosemary.
- Butter and finish. Gently press the slices apart with a fork, brush the garlic herb butter generously over the potatoes and down into the cuts, and air fry another 10–15 minutes, until a knife slides into the center of the thickest potato with no resistance and the edges are golden and crisp.
- Serve. Brush with any remaining butter, top with flaky salt and fresh parsley, and serve immediately.
Equipment
- Cooking Spray
- Parchment Paper
Notes
- Timing by size: small potatoes (4–5 oz) 22–26 minutes; medium (6–8 oz) 30–35 minutes; large (10–12 oz) 40–45 minutes. Always cook to the knife test, not the clock.
- Don’t crowd the basket. Cook in two batches if the potatoes are touching.
- Add the butter partway through. Butter added at the start will brown too far and the garlic will scorch over a 30-minute cook.
- Reheat in the air fryer at 375°F for 4–5 minutes to bring back the crisp edges.
Nutrition
Share this recipe
We can’t wait to see what you’ve made! Mention @forktospoon or tag #forktospoon!



Pat
Making these tonight! yum! /adding thinly sliced red onion between the potato slices
Ginny
I love your recipes!
Jen
Btw, these recipes on this site, especially for air fryers look fantastic!
Jen
This is awesome! Thank you for the recipe!