Golden panko crust. Juicy chicken. A molten garlic herb butter center that spills out with every cut. This is the homemade version that beats the restaurant — and it’s ready in 30 minutes.

This homemade Air Fryer Chicken Kiev is one of those recipes that looks incredibly impressive but is secretly straightforward once you know the technique. A crispy panko-crusted chicken breast wrapped around a pocket of herby, garlicky melted butter, it’s classic, comforting, and genuinely stunning on the plate.
I’ve been making Chicken Kiev for years, and moving it to the air fryer was a revelation. The hot circulating air crisps the breadcrumb coating to a deep golden crunch on every side, no flipping required, no oil splattering, no babysitting. And the high heat seals the outside so fast that the garlic herb butter stays locked inside, oozing out in the most satisfying way the moment you cut in.
In this post I’m covering everything: the perfect herb butter (with five variations), exactly how to seal the chicken so the butter doesn’t leak, a cook time guide for fresh, chilled, and frozen chicken kiev, and every tip I’ve learned from making this recipe dozens of times. Let’s get into it.
⭐ Why This Recipe Works!
The secret to great Chicken Kiev is cold butter and a tight seal. Chilling the herb butter before stuffing means it melts slowly during cooking, basting the chicken from the inside. A proper three-stage breading (flour → egg → panko) creates a sealed shell that keeps every drop of butter right where it belongs.
What Is Chicken Kiev?
A Little History
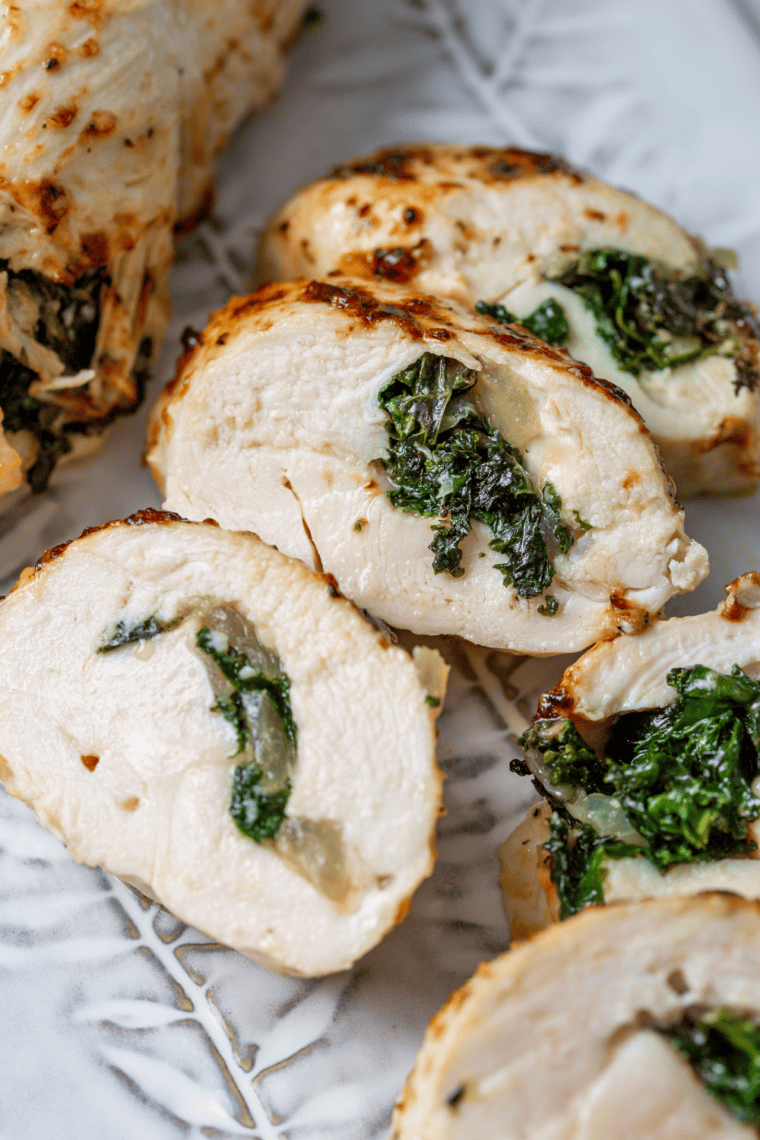
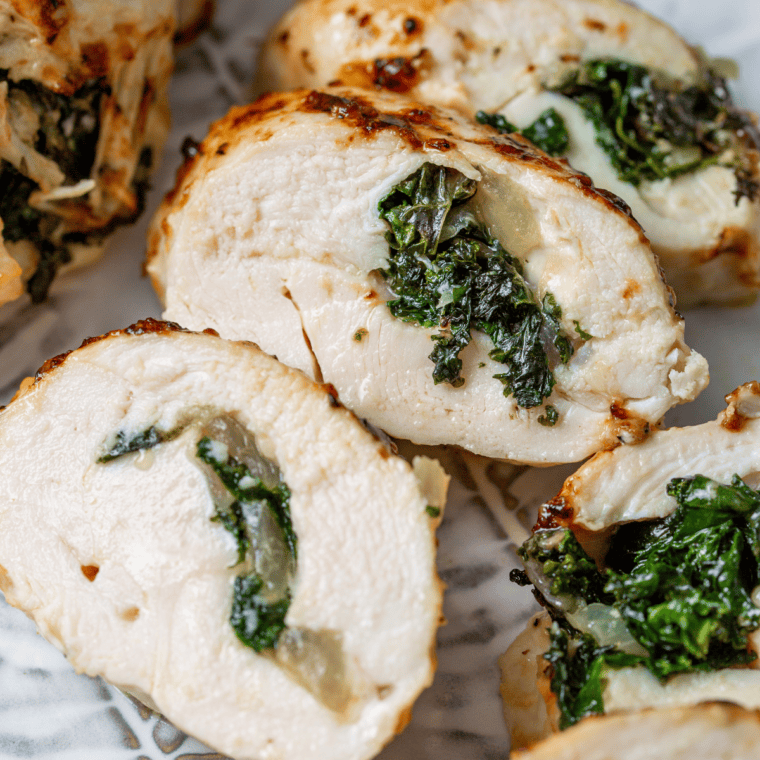
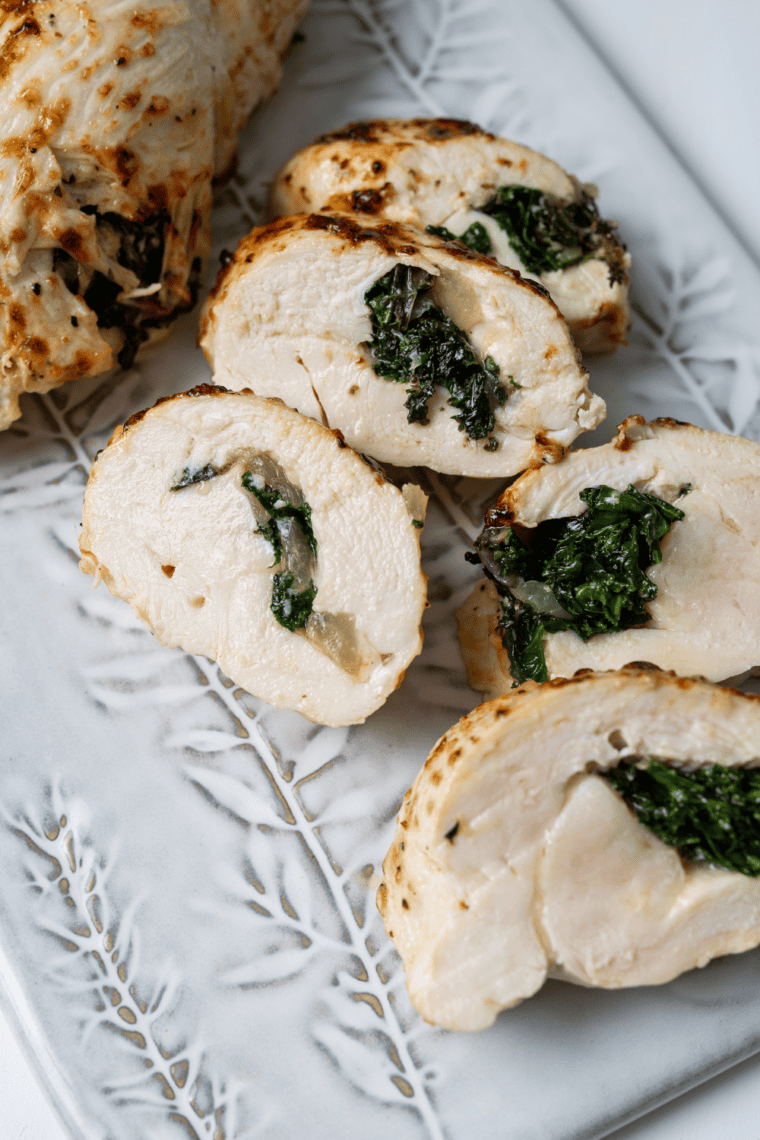
At its core, Chicken Kiev is about two things working together perfectly: a crispy, golden exterior and a rich, buttery, herb-filled interior. When you slice into a properly made Chicken Kiev, garlic herb butter pours out like a sauce — no gravy needed. It’s one of the most satisfying cuts you’ll ever make at the dinner table.
Why Make Chicken Kiev in the Air Fryer?
- Crispier crust, less oil. Traditional Chicken Kiev is deep fried. The air fryer replicates that crunch with a light spray of oil — you get the same golden result with far less fat.
- Even cooking on all sides. Circulating hot air reaches the bottom, sides, and top of the chicken simultaneously. No need to flip mid-cook or rotate the pan.
- Faster than the oven. An oven-baked Chicken Kiev takes 35-40 minutes. The air fryer does it in 20-25 minutes, and the crust is superior.
- Less mess. No hot oil, no splattering, easy cleanup. Just wipe out the basket.
- Consistent results. Once you know your air fryer’s timing, this recipe comes out perfectly every single time.

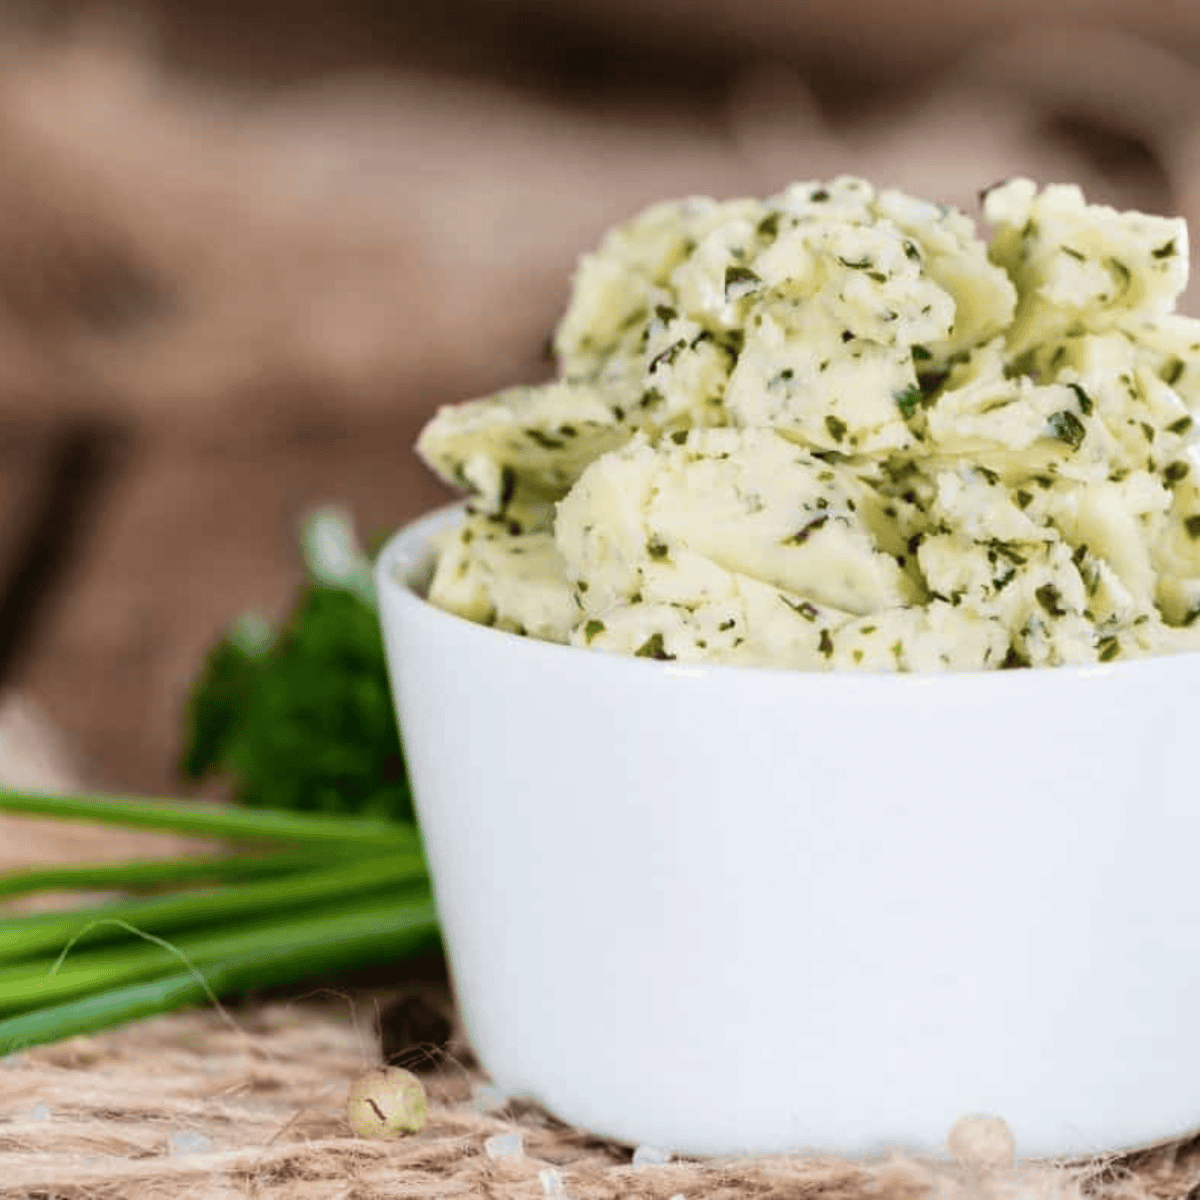
The Herb Butter — The Star of the Show
The herb butter is what separates a good Chicken Kiev from an unforgettable one. It’s simple to make and can be prepared up to 3 days ahead and kept in the fridge, or frozen for up to a month. Here’s the classic combination, plus five variations to try:
Classic Garlic Herb Butter
Combine 4 tablespoons softened unsalted butter with 3 cloves minced garlic, 3 tablespoons fresh flat-leaf parsley (finely chopped), ½ tsp lemon zest, ¼ tsp salt, and ¼ tsp black pepper. Mix thoroughly, shape into a log on plastic wrap, roll tight, and refrigerate for at least 30 minutes until firm. Cold butter is essential — it won’t leak during cooking.
💡 Make Ahead Tip: Make your herb butter log the night before and refrigerate overnight. Cold, firm butter is dramatically easier to stuff into the chicken pocket and far less likely to leak during air frying. Warm or room-temperature butter will run out immediately.
Five Herb Butter Variations
🌿 Classic Garlic Parsley: The original. Butter, garlic, flat-leaf parsley, lemon zest. Timeless and perfect. Use fresh parsley — dried doesn’t compare.
🧄 Roasted Garlic & Tarragon: Roast a whole garlic head, squeeze out the cloves, and mix with butter and fresh tarragon. Deeper, sweeter, more complex flavor.
🌶️ Chili & Herb: Add ½ tsp red pepper flakes and a splash of hot sauce to the classic butter. A gentle heat that builds beautifully with the rich chicken.
🍋 Lemon Herb & Chive: Double the lemon zest, add fresh chives and a little fresh dill. Bright, fresh, and slightly Scandinavian in character.
🧀 Parmesan Herb: Mix 2 tbsp finely grated Parmesan into the butter with garlic and parsley. Adds a nutty, umami depth to the filling.
🫙 Dairy-Free Option: Use a good quality vegan butter (Miyoko’s works best). Same herbs and garlic. The result is surprisingly close to the original.
Ingredients You’ll Need
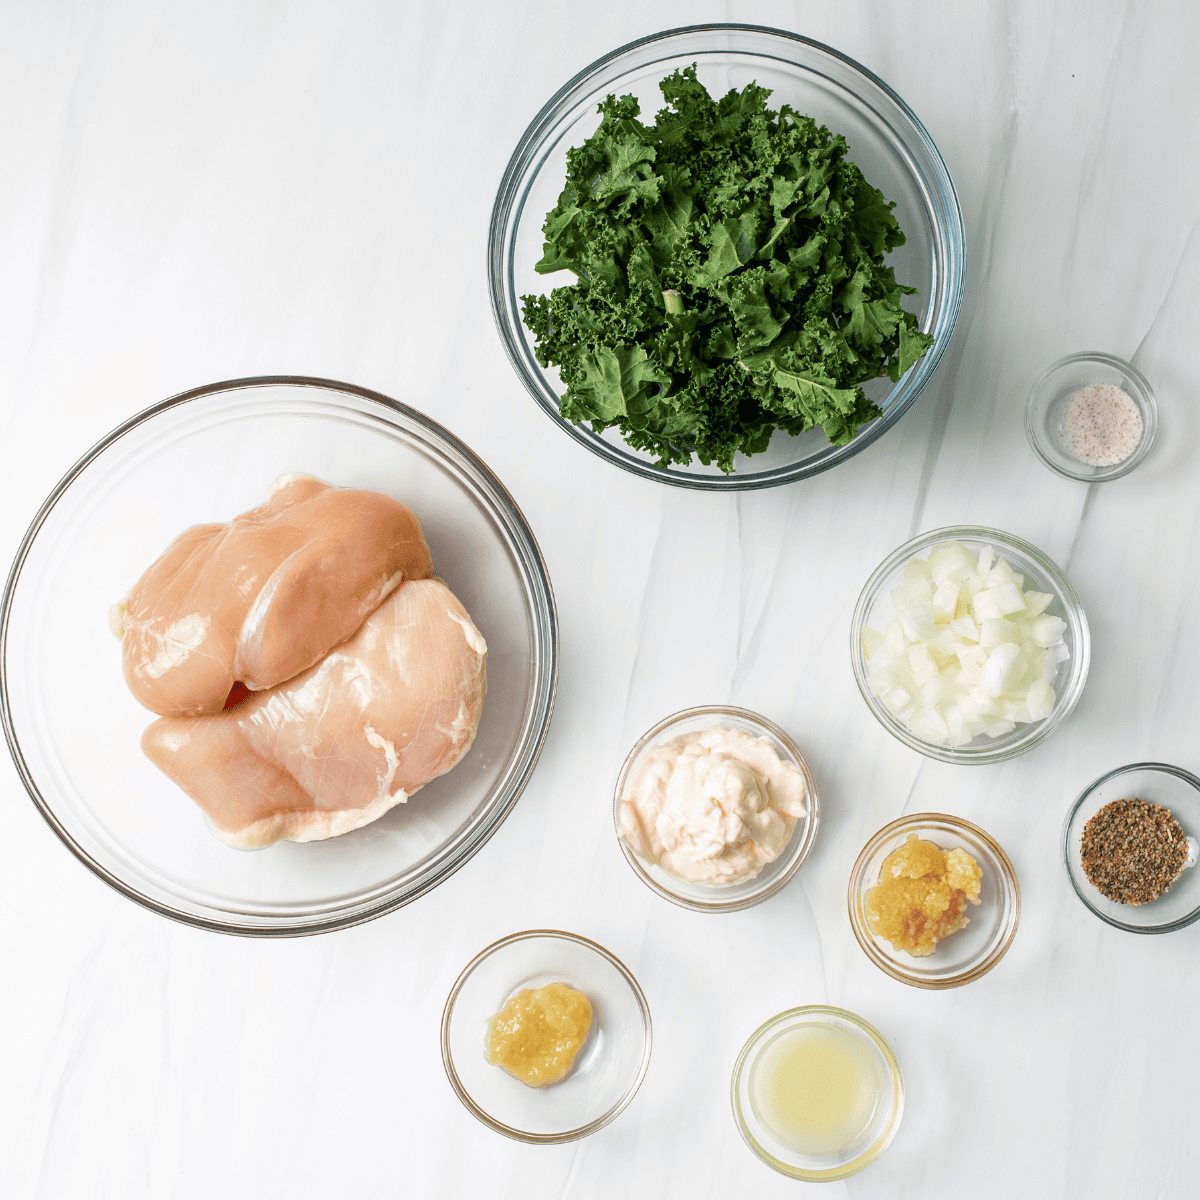
- Butter: Softened unsalted butter creates rich creamy filling base
- Garlic: Minced garlic adds bold savory flavor throughout butter
- Parsley: Fresh parsley brings bright herb flavor and color
- Lemon zest: Adds fresh citrus brightness without overpowering sour taste
- Salt: Enhances overall flavor and balances herb butter mixture
- Black pepper: Adds mild heat and subtle earthy spice
- Chicken breasts: Boneless skinless chicken breasts provide juicy tender filling
- Flour: All-purpose flour creates first coating for breading adhesion
- Eggs: Beaten eggs act as binding layer for coating
- Panko breadcrumbs: Panko creates extra crispy golden crunchy outer crust
- Garlic powder: Adds savory garlic flavor to breadcrumb coating
- Paprika: Provides color and mild smoky flavor to crust
- Onion powder: Adds subtle sweetness and savory depth to breading
- Salt: Seasons chicken and enhances overall flavor profile
- Black pepper: Adds light heat and balances seasoning blend
- Cooking spray: Helps achieve golden crispy air fryer finish
- Toothpicks: Secures chicken closed to keep butter inside during cooking
🍞 Panko vs Regular Breadcrumbs: Panko breadcrumbs are coarser and drier, meaning they create more surface texture and a dramatically crunchier crust. Italian breadcrumbs will work in a pinch — reduce the added salt and seasonings since they’re already seasoned — but panko is the clear winner here.
How to Make Air Fryer Chicken Kiev — Step by Step
Step 1: Mix the softened butter, garlic, parsley, lemon zest, salt, and pepper until fully combined. Spoon onto a piece of plastic wrap, shape into a rough log about 1 inch in diameter, and roll tight. Refrigerate for at least 30 minutes — or overnight. The butter must be cold and firm before you stuff the chicken.
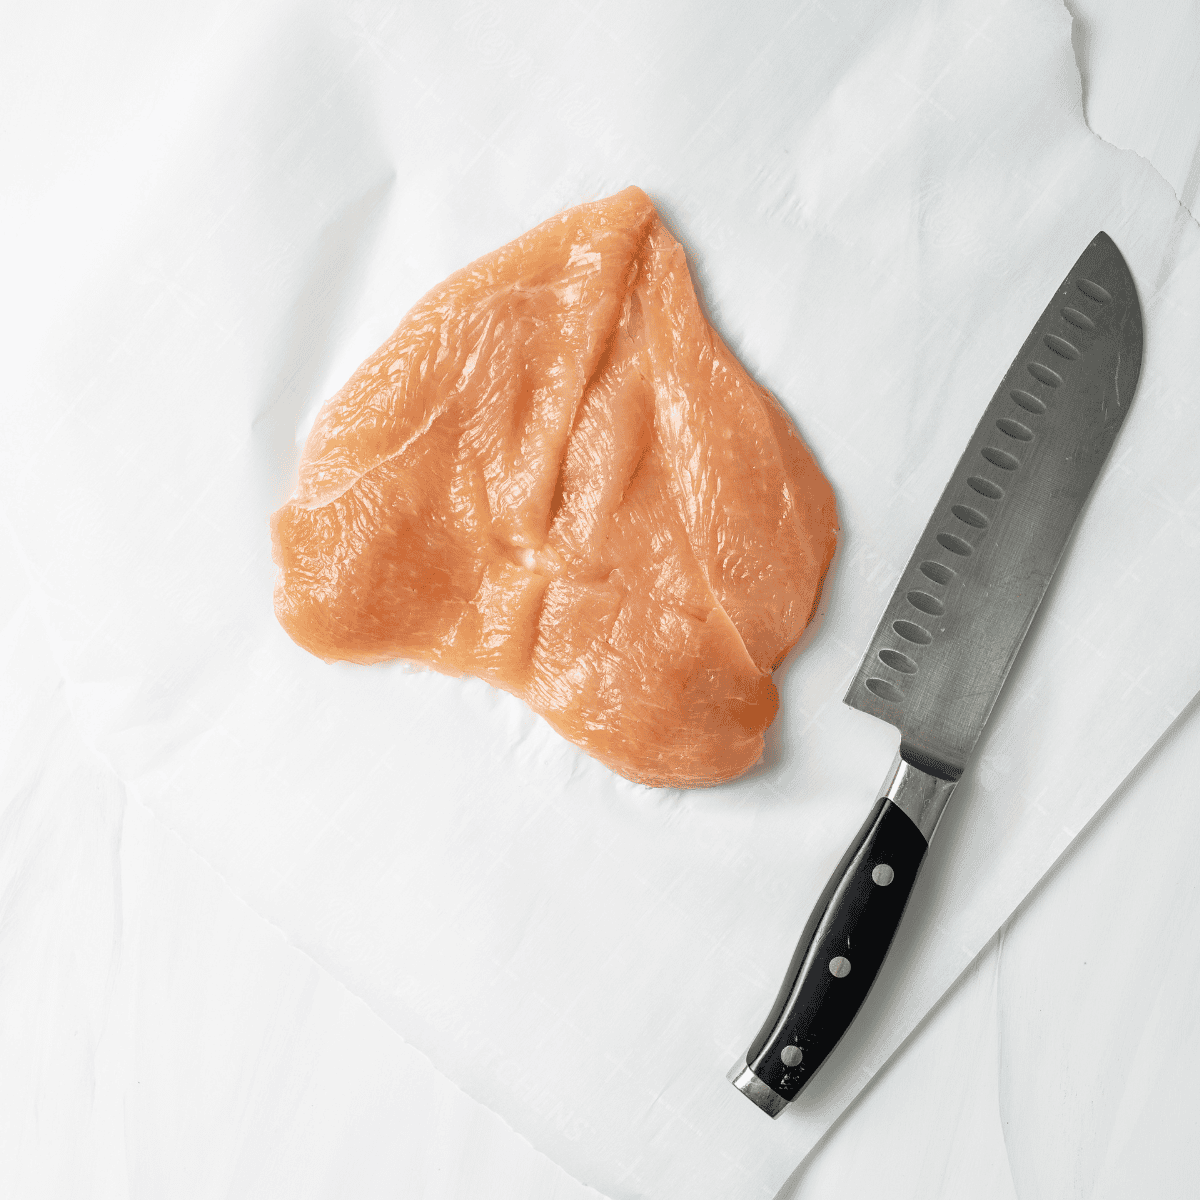
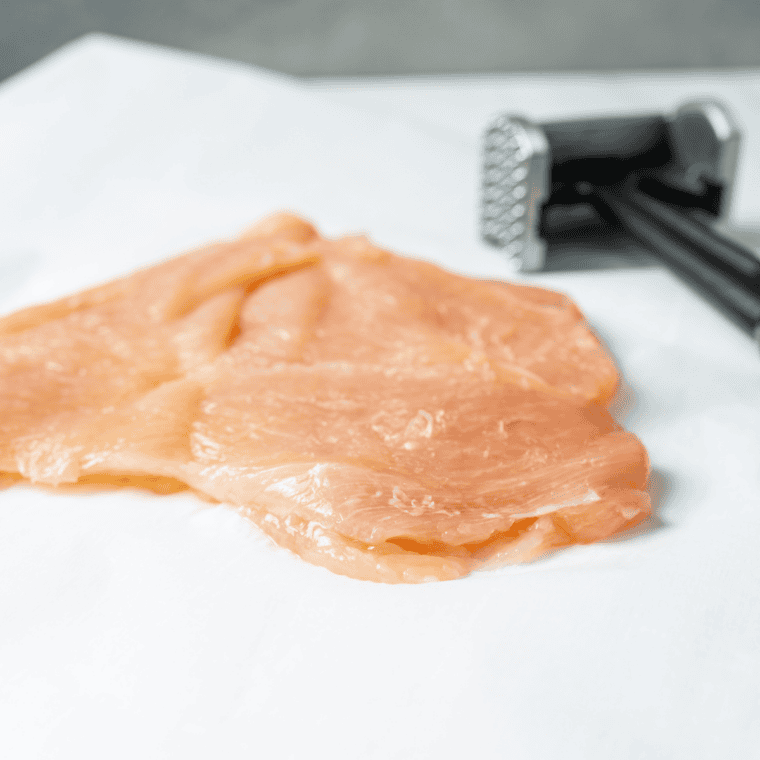
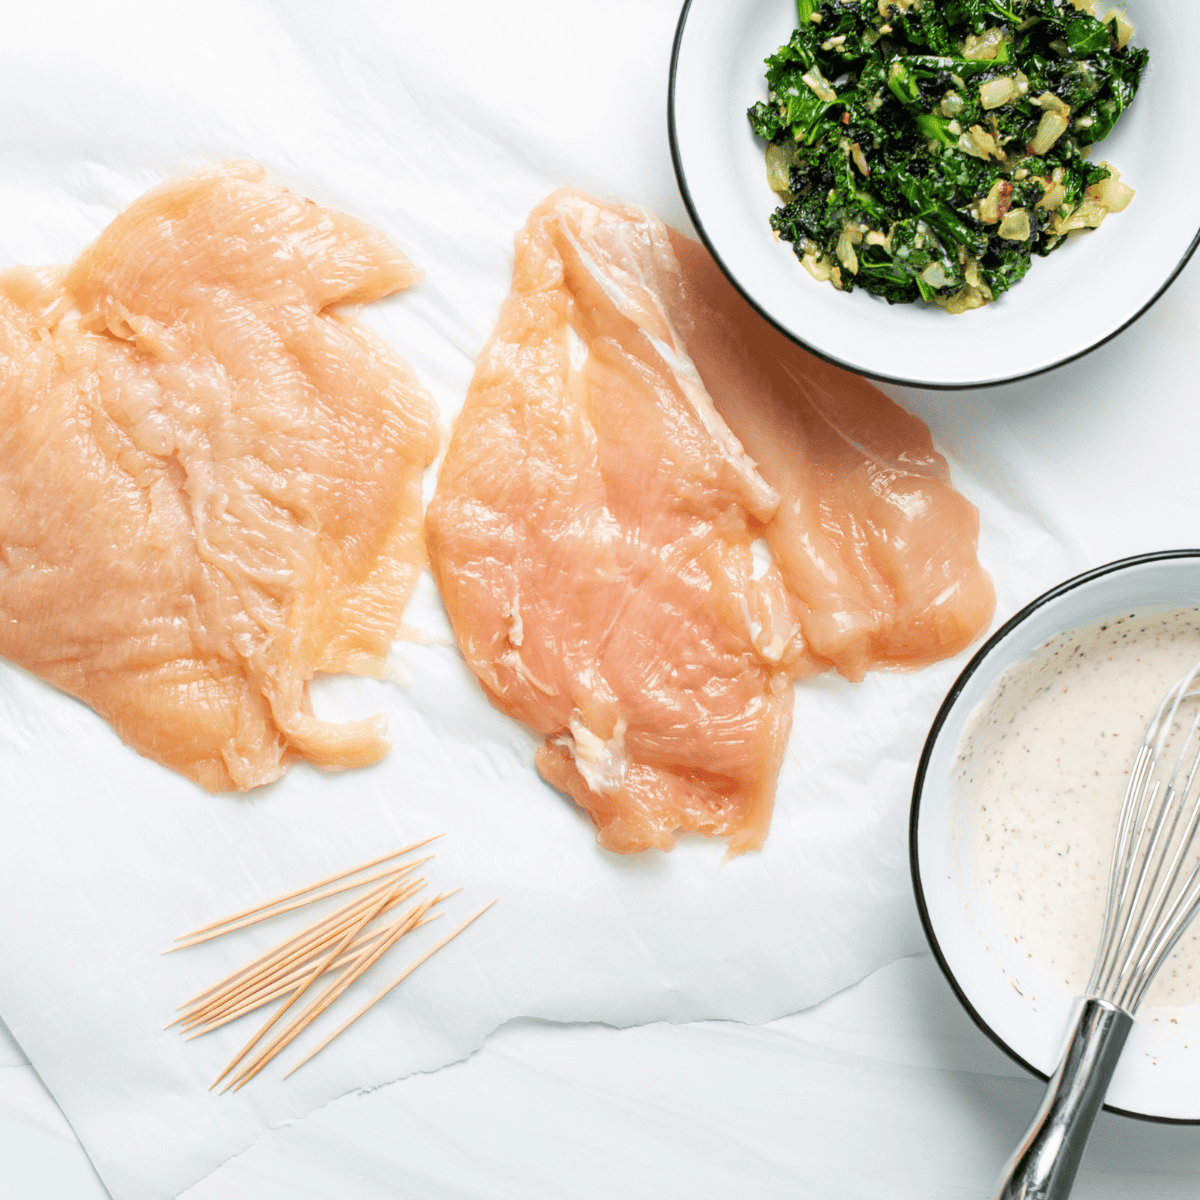
Step 2: Place each chicken breast between two sheets of plastic wrap or in a zip-lock bag. Use a meat mallet or rolling pin to pound to an even thickness of about ½ inch — this ensures even cooking and makes the breast easier to roll. Season both sides lightly with salt and pepper.
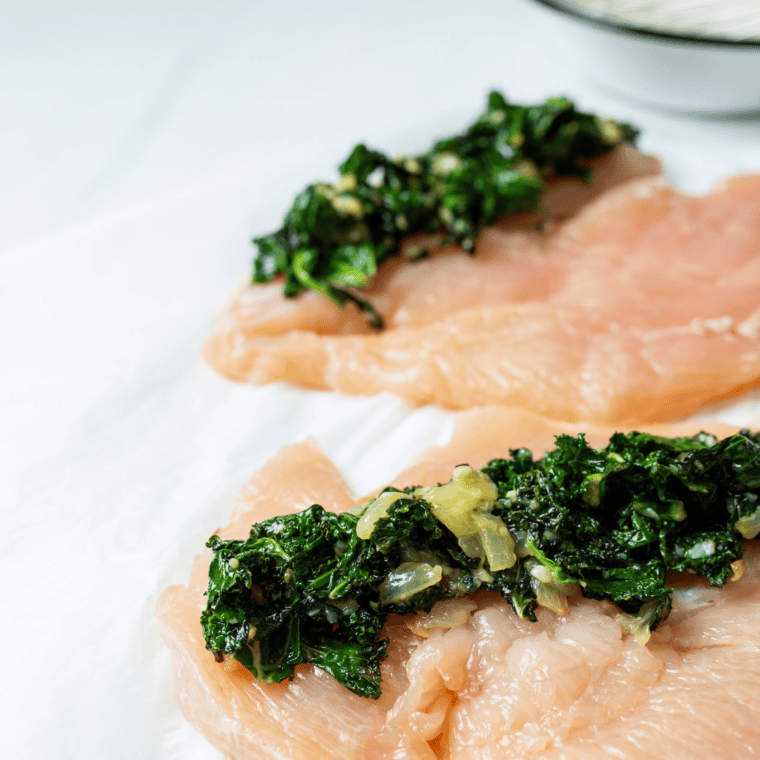
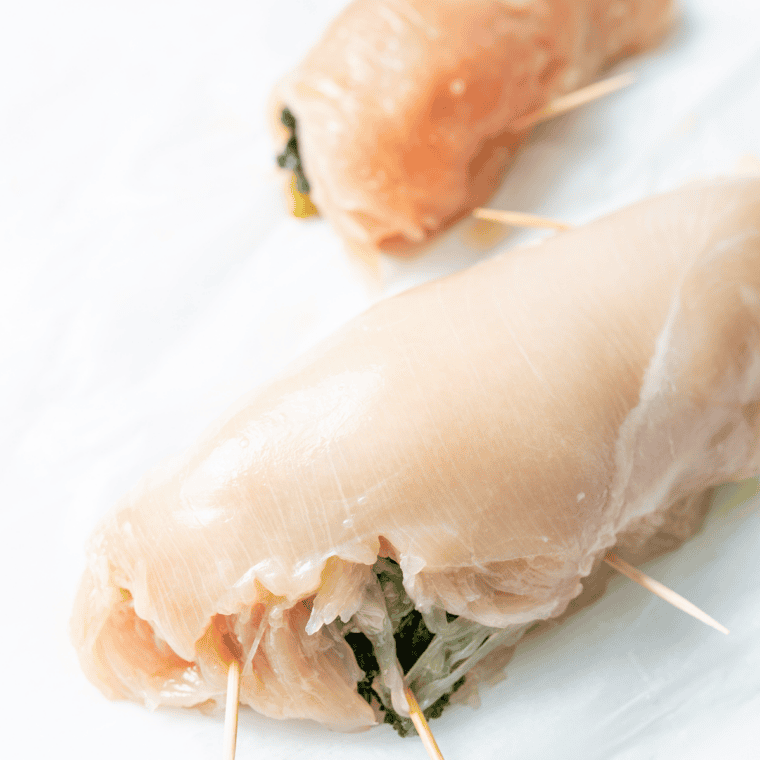
Step 3: Slice the chilled butter log into 4 equal portions. Place one portion in the center of each pounded chicken breast. Fold the sides of the chicken in first, then roll from the bottom up — like a burrito — to completely enclose the butter. Secure with 2–3 toothpicks to hold the seam closed. Place the rolled chicken in the freezer for 15 minutes to firm up — this is the single most important step to prevent leaking.
Step 4: Arrange three shallow dishes in a row: Dish 1: Flour; Dish 2: beaten eggs; Dish 3: Panko mixed with garlic powder, paprika, onion powder, salt, and pepper. Stir the panko seasoning well so it’s evenly distributed.
Step 5: Remove chicken rolls from the freezer. Working one at a time: coat thoroughly in flour (shake off any excess), dip fully in beaten egg (let excess drip off), then press firmly into the seasoned panko coating all sides. For extra crunch and a more secure coating, you can double-bread: dip back into the egg and panko a second time. Place breaded rolls on a plate.
Step 6: Remove chicken rolls from the freezer. Working one at a time: coat thoroughly in flour (shake off any excess), dip fully in beaten egg (let excess drip off), then press firmly into the seasoned panko coating all sides. For extra crunch and a more secure coating, you can double-bread: dip back into the egg and panko a second time. Place breaded rolls on a plate.
Step 7: Preheat your air fryer to 375°F (190°C) for 5 minutes. Spray the basket generously with cooking spray. A hot, greased basket means the breading begins crisping the moment the chicken touches it — this is key to getting that audible crunch.
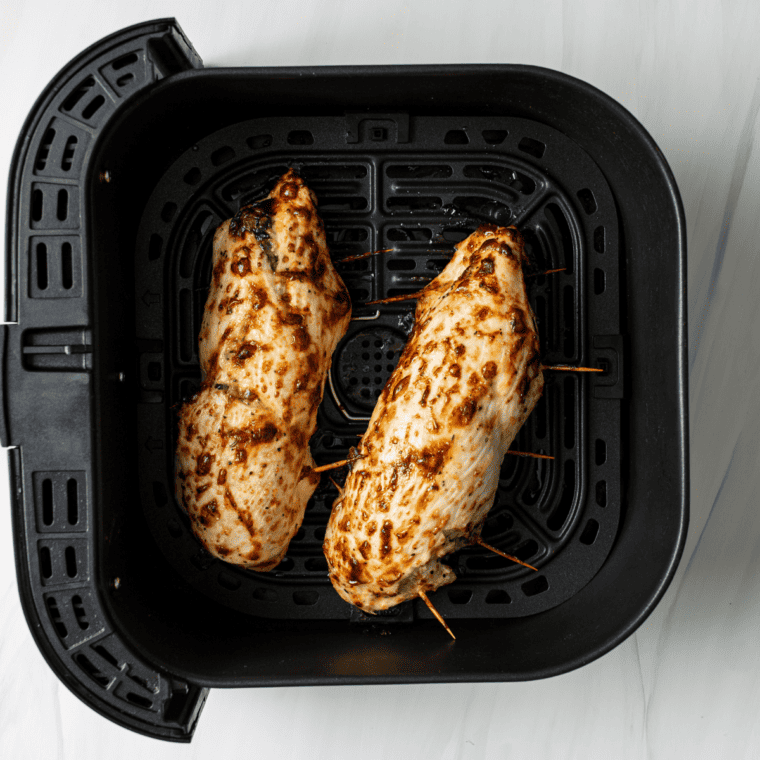
Step 8: Place the breaded chicken rolls seam-side down in the air fryer basket. Don’t overcrowd — leave space around each one. Spray the tops generously with cooking spray. Air fry at 375°F for 10 minutes. Open, spray tops again, and cook for another 10–15 minutes until the crust is deep golden and the internal temperature reads 165°F (74°C).
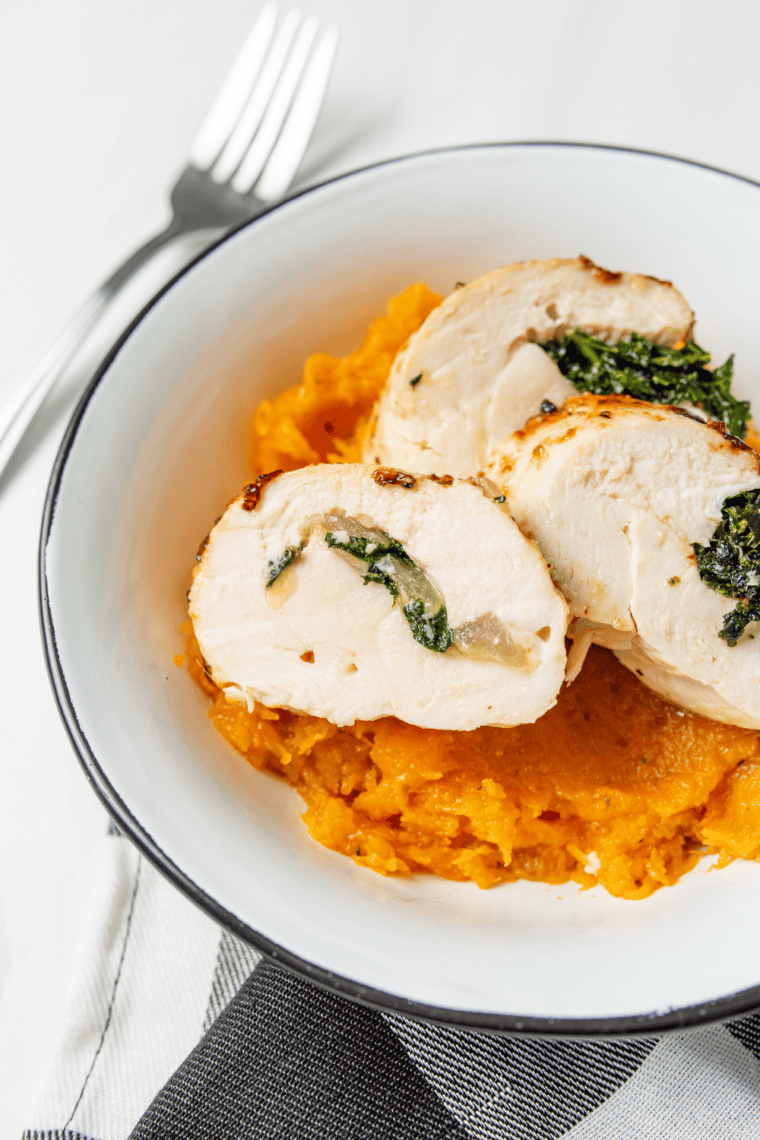
Step 9: Remove the toothpicks! Let the chicken kiev rest for 5 minutes before cutting. This is important — the resting time allows the internal butter to settle slightly so it doesn’t all pour out the moment you slice in. Serve on a warmed plate over mashed potatoes or rice so the butter acts as a sauce.
Cook Time Guide — Fresh, Chilled & Frozen
Air fryer cook times vary based on what type of Chicken Kiev you’re starting with. This is the most complete guide you’ll find:
| Type | Temp | Time | Notes |
|---|---|---|---|
| Homemade (fresh) ★ Best | 375°F | 20–25 min | Seam-side down. Check temp at 20 min. |
| Store-bought chilled | 375°F | 15–20 min | Already shaped. Flip halfway. |
| Frozen (pre-cooked) | 380°F | 12–15 min | No thawing needed. Flip halfway. |
| Frozen (raw) | 375°F | 25–30 min | Thaw overnight for best results or add 10 min cook time. |
| Reheating leftovers | 350°F | 8–10 min | From fridge. No need to flip. |
⚠️ Always use a meat thermometer. Air fryer models vary significantly in power and airflow. The only reliable way to know your Chicken Kiev is fully cooked is to check the internal temperature in the thickest part of the chicken — it must reach 165°F (74°C). Don’t rely on color or timing alone.
Pro Tips — Including How to Stop the Butter Leaking
Butter leaking out is the #1 complaint with homemade Chicken Kiev. Here’s exactly how to prevent it, plus every other tip for perfect results:
- Chill the butter before stuffing. Room-temperature butter will melt and leak before the chicken crust has time to set. Always stuff with cold, firm butter.
- Freeze the rolled chicken for 15 minutes before breading. This firms everything up so the roll holds its shape during the breading process and doesn’t unravel in the air fryer.
- Use toothpicks to seal the seam. Don’t rely on the breading alone to hold the chicken shut. Insert 2–3 toothpicks through the seam. Remember to count them and remove them all before serving.
- Cook seam-side down. Starting seam-side down in the air fryer helps the heat seal the opening first, before the butter has a chance to melt out.
- Don’t pound the chicken too thin. If the chicken breast is pounded too thin (less than ¼ inch), it’s more likely to tear and let butter escape. Aim for ½ inch — thick enough to hold the filling, thin enough to roll easily.
- Press the panko on firmly. When coating with breadcrumbs, use your palms to press them into the chicken. Loose crumbs fall off and don’t form a seal. Pressed crumbs adhere and create a proper crust.
- Double-bread for insurance. For extra protection, run the chicken through egg and panko twice. A thicker crust = better butter containment.
- Don’t skip the resting time. After cooking, 5 minutes of resting lets the internal temperature equalize and the butter thicken slightly. Cut immediately and you’ll lose all the butter in seconds.
Variations & Substitutions
- 🌾 Gluten-Free: Use a 1:1 gluten-free flour blend and certified GF panko breadcrumbs. The result is just as crispy — no compromise needed.
- 🧀 Chicken Cordon Bleu Style: Add a slice of ham and a slice of Swiss or Gruyère cheese to the center alongside the herb butter for a crossover classic.
- 🌶️ Spicy Kiev: Add cayenne and hot sauce to the butter filling. Use smoked paprika in the breading. A bold, heat-forward version.
- 🍗 Chicken Thigh Version: Use boneless skinless thighs instead of breasts. Pound flat, stuff, and roll. Thighs are more forgiving with heat and stay juicier.
- 🌿 Spinach & Herb Butter: Wilt and finely chop fresh spinach, then mix into the butter with garlic. A more substantial, vegetable-forward filling.
- 🧄 Parmesan Panko Crust: Replace ¼ cup of the panko with finely grated Parmesan. The cheese browns deeply and adds a nutty, salty crust layer.
How to Cook Frozen Chicken Kiev in the Air Fryer
Frozen Chicken Kiev — Complete Guide
Frozen chicken kievs (store-bought) are one of the best things you can cook in an air fryer. The result is consistently better than the oven — crispier crust, juicier center, and much faster. Here’s everything you need to know:
- No thawing needed for pre-cooked frozen kievs. Cook straight from frozen.
- Preheat air fryer to 380°F (193°C) for 5 minutes.
- Place frozen kievs in a single layer — don’t stack or overlap.
- Cook for 15–20 minutes for pre-cooked frozen kievs, flipping halfway.
- For raw frozen kievs: cook at 375°F for 25–30 minutes, flipping once at the halfway point.
- Always verify internal temperature reaches 165°F (74°C).
- Some butter leaking is normal with store-bought kievs — that’s fine, just keep an eye on it.
- No extra oil spray needed — store-bought kievs already contain oil in the breading.
What to Serve with Air Fryer Chicken Kiev
Chicken Kiev is rich and buttery, so the best sides are either creamy (to complement) or fresh and acidic (to cut through the richness). The melted herb butter that pools on the plate acts as a natural sauce — choose sides that can soak it up.
🥔 Starchy Sides
- Garlic mashed potatoes — the classic pairing; the butter sauce soaks right in
- Buttered egg noodles
- Steamed white or jasmine rice
- Air fryer roasted potatoes
- Crusty bread — to mop up every last drop of butter
🥦 Vegetable Sides
- Steamed green beans or broccolini
- Roasted asparagus with lemon
- Creamed spinach — luxurious and complementary
- Simple green salad with lemon vinaigrette
- Honey-glazed carrots
Storage & Reheating
🧊 Storing Leftovers
- Cool completely before storing
- Wrap each individually in foil or plastic wrap
- Fridge: up to 3 days in an airtight container
- Freezer: up to 2 months — freeze on a tray first, then bag
- Don’t store hot — steam will soften the crust
🔥 Reheating (Stay Crispy!)
- Air fryer (best): 350°F for 8–10 min — restores the crunch
- Oven: 350°F on a rack for 12–15 min
- From frozen: 375°F for 18–22 min, flip halfway
- Microwave: last resort only — the crust will go soft
💡 Make-Ahead Option: You can fully assemble and bread the Chicken Kievs up to 24 hours ahead. Place them on a lined tray, cover loosely with plastic wrap, and refrigerate. When ready to cook, let them sit at room temperature for 10 minutes, then air fry as directed. This actually helps the crust adhere better.
Frequently Asked Questions
Why does the butter leak out of my Chicken Kiev? The most common cause is using butter that’s too warm. The butter must be cold and firm before you stuff the chicken — ideally chilled for at least 30 minutes. Additionally, freeze the stuffed, rolled chicken for 15 minutes before breading, and always use toothpicks to secure the seam. Cook seam-side down so the heat seals the opening first.
Do I have to pound the chicken breasts? Yes — pounding is important for two reasons. First, it creates an even thickness so the chicken cooks uniformly. Second, it makes the breast pliable enough to roll around the butter filling without tearing.
Can I make Chicken Kiev without toothpicks? You can try, but toothpicks significantly reduce the risk of the roll unraveling. If you don’t have toothpicks, use short lengths of uncooked spaghetti — they work the same way. Place the chicken seam-side down in the air fryer as an additional precaution.
Can I use dried parsley instead of fresh? Technically yes, but the flavor difference is significant. Fresh parsley is bright and aromatic. If you only have dried, use 1 teaspoon in place of 3 tablespoons fresh.
Can I make Chicken Kiev gluten-free? Absolutely. Replace the all-purpose flour with a 1:1 gluten-free flour blend and use certified gluten-free panko breadcrumbs. The technique and cook time stay exactly the same.
How do I know when Chicken Kiev is fully cooked? Use an instant-read meat thermometer inserted into the thickest part of the chicken, avoiding the butter center. It must read 165°F (74°C). Don’t rely on color alone — the crust can look golden before the interior is fully cooked.
Can I make Chicken Kiev ahead of time? Yes — this is one of the best make-ahead dinners you can have. Assemble and bread the kievs up to 24 hours in advance, cover, and refrigerate. The crust actually adheres better after chilling. You can also freeze fully assembled raw kievs for up to a month.
Can I use chicken thighs instead of chicken breasts? Yes, and they are actually more forgiving. Boneless skinless chicken thighs stay juicier during cooking. Pound them flat, stuff, roll, and bread the same way. Check for 165°F internal temperature starting at 18 minutes.
What can I use instead of panko? Regular Italian breadcrumbs work but give a less crunchy result. Crushed cornflakes, crushed Ritz crackers, or crushed pork rinds (for a low-carb option) all create great crusts. If using pre-seasoned alternatives, reduce the added salt and seasonings accordingly.
More Air Fryer Chicken Recipes You’ll Love
Air Fryer Pickle Brined Chicken Tenders
Air Fryer Buttermilk Chicken Tenders
Doritos Air Fryer Chicken Tenders
Air Fryer Easy Chicken Tenders For Kids
Copycat Chick-Fil-A Chicken Nuggets
Share Your Creations! Are you active on Facebook? Join our Air Fryer Recipes Group, where hundreds of thousands of Air Fryer enthusiasts gather and share your photos! I’m always thrilled to see what you’ve made. For those on Instagram, don’t forget to tag me @forktospoon – I can’t wait to admire your culinary adventures!

Air Fryer Chicken Kiev (Homemade)
Description
Ingredients
Herb Butter
- 4 tbsp unsalted butter, softened
- 3 cloves garlic, finely minced
- 3 tbsp fresh flat-leaf parsley, finely chopped
- ½ tsp lemon zest
- ¼ tsp salt
- ¼ tsp black pepper
Chicken
- 4 boneless, skinless chicken breasts, (6–7 oz each)
- Salt and pepper, for seasoning
Breading
- ¾ cup all-purpose flour
- 2 large eggs, beaten
- 1½ cups panko breadcrumbs
- 1 tsp garlic powder
- 1 tsp paprika
- ½ tsp onion powder
- 1 tsp salt
- ½ tsp black pepper
Instructions
- Make herb butter: Mix softened butter with garlic, parsley, lemon zest, salt, and pepper. Shape into a log on plastic wrap, roll tight, and refrigerate for at least 30 minutes until firm.
- Pound chicken: Place each breast between plastic wrap and pound to ½-inch even thickness. Season lightly with salt and pepper.
- Stuff and roll: Slice the butter log into 4 portions. Place one in the center of each breast. Fold in the sides, then roll up tightly from the bottom like a burrito. Secure the seam with 2–3 toothpicks. Freeze rolled chicken for 15 minutes.
- Set up breading: Place flour, beaten eggs, and seasoned panko in three separate shallow dishes.
- Bread: Coat each roll in flour (shake off excess), dip in egg, press firmly into panko on all sides. For extra crunch, repeat egg and panko dip.
- Preheat air fryer to 375°F (190°C) for 5 minutes. Spray basket with cooking spray.
- Air fry: Place kievs seam-side down. Spray tops generously. Cook at 375°F for 10 minutes, spray again, then cook 10–15 more minutes until golden and internal temp reads 165°F (74°C).
- Rest: Remove toothpicks. Rest for 5 minutes before serving. Serve over mashed potatoes so the herb butter acts as a sauce.
Equipment
- Cooking Spray
- Parchment Paper, optional
Notes
Nutrition
Share this recipe
We can’t wait to see what you’ve made! Mention @forktospoon or tag #forktospoon!


Kenny
Tried this tonight. Very good flavor but would not crisp up. breading was also very very light to non existent. I believe the 4 tablespoons of butter was too much. I will try this again but will reduce the butter by 1/2 and possibly use an egg wash to provide for the ritz breading rather than the water.