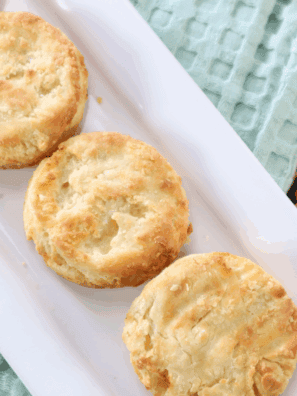
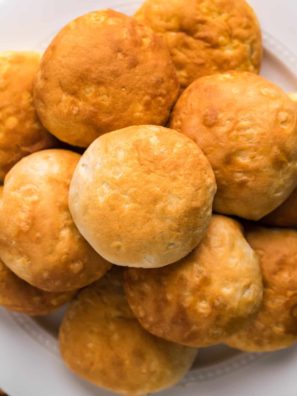
Tall, flaky, golden-edged buttermilk biscuits made entirely in the air fryer — no oven needed. I’ve tested this recipe dozens of times across basket and oven-style air fryers, and cracked every variable that matters: butter temperature, folding technique, cutting method, and the exact temp that gives you a crispy outside without a raw center. This is the only recipe you’ll ever need.
Why air fryer buttermilk biscuits are better than oven biscuits
This isn’t just a gimmick. The air fryer genuinely makes a better biscuit in two specific ways.
- First, speed. Your oven takes 15 minutes to preheat, then another 12–15 minutes to bake. The air fryer needs zero preheat time and cooks biscuits in 10–13 minutes from cold. You’re eating 20+ minutes faster.
- Second, texture. The circulating hot air in an air fryer crisps all four sides of each biscuit simultaneously — something an oven can’t do without a convection setting. You get that bakery-style golden edge all the way around, not just on top.
- The one catch: the air fryer runs hotter and faster than an oven, so the recipe and technique need to be dialed in. Follow this exactly and you’ll get biscuits that are tall, layered, and golden every single time.

What makes a buttermilk biscuit flaky
Before you touch a bowl, understand these three rules. Every flaky biscuit recipe lives or dies by them.
- 1. Your butter must be ice cold. Warm butter blends into the flour and creates a cakey, dense biscuit. Cold butter stays in small, distinct pieces. When those pieces hit the hot air fryer, they create steam — and that steam is what produces the flaky layers. If your kitchen is warm, freeze your butter for 20 minutes before starting.
- 2. Do not overwork the dough. Overmixing develops gluten, which makes biscuits tough and chewy instead of tender. Mix until the dough just comes together — it should look shaggy and slightly rough, not smooth and elastic. That’s correct.
- 3. Never twist your biscuit cutter. This is the most common mistake. Twisting seals the edges of the dough shut, which prevents the biscuit from rising. Press straight down and pull straight up, every time. If you don’t have a round cutter, a sharp knife cutting squares works perfectly and wastes zero dough.
Ingredients Needed
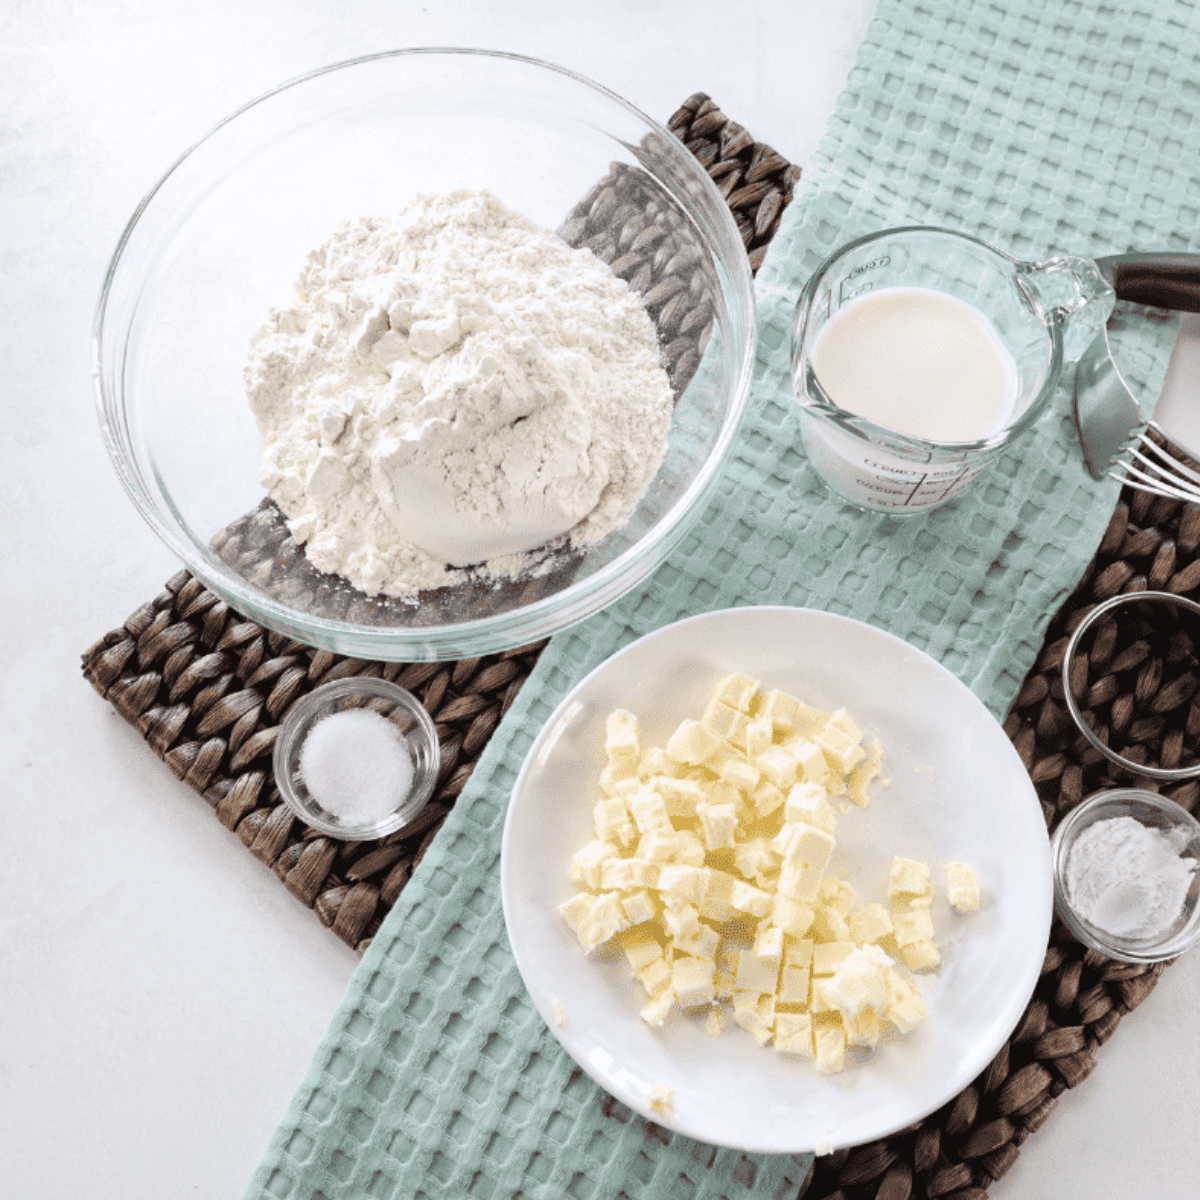
- All-purpose flour: Forms structure and base for fluffy biscuits
- Baking powder: Helps biscuits rise tall and light texture
- Baking soda: Reacts with buttermilk for extra lift and tenderness
- Kosher salt: Enhances flavor and balances sweetness in dough
- Sugar: Adds slight sweetness and encourages golden browning
- Unsalted butter: Creates flaky layers when kept very cold
- Buttermilk: Adds tangy flavor and tender soft biscuit crumb
- Melted butter: Brushed on top for rich buttery finish
Ingredient notes
- Butter: Unsalted gives you control over seasoning. If you only have salted butter, reduce the kosher salt to ½ teaspoon. The butter must be cold, not just cool, but genuinely cold. Straight from the back of the fridge, or briefly frozen.
- Buttermilk: Full-fat buttermilk is noticeably better than low-fat. The extra fat makes the crumb more tender and the flavor richer. If you don’t have buttermilk, see the substitution in the FAQ below, but real buttermilk is worth buying for this recipe.
- Flour: All-purpose works perfectly. Some southern biscuit recipes use White Lily or another soft wheat flour for a more tender crumb, but all-purpose gives excellent results here.
How to make Air Fryer Buttermilk Biscuits (Step by Step Instructions)
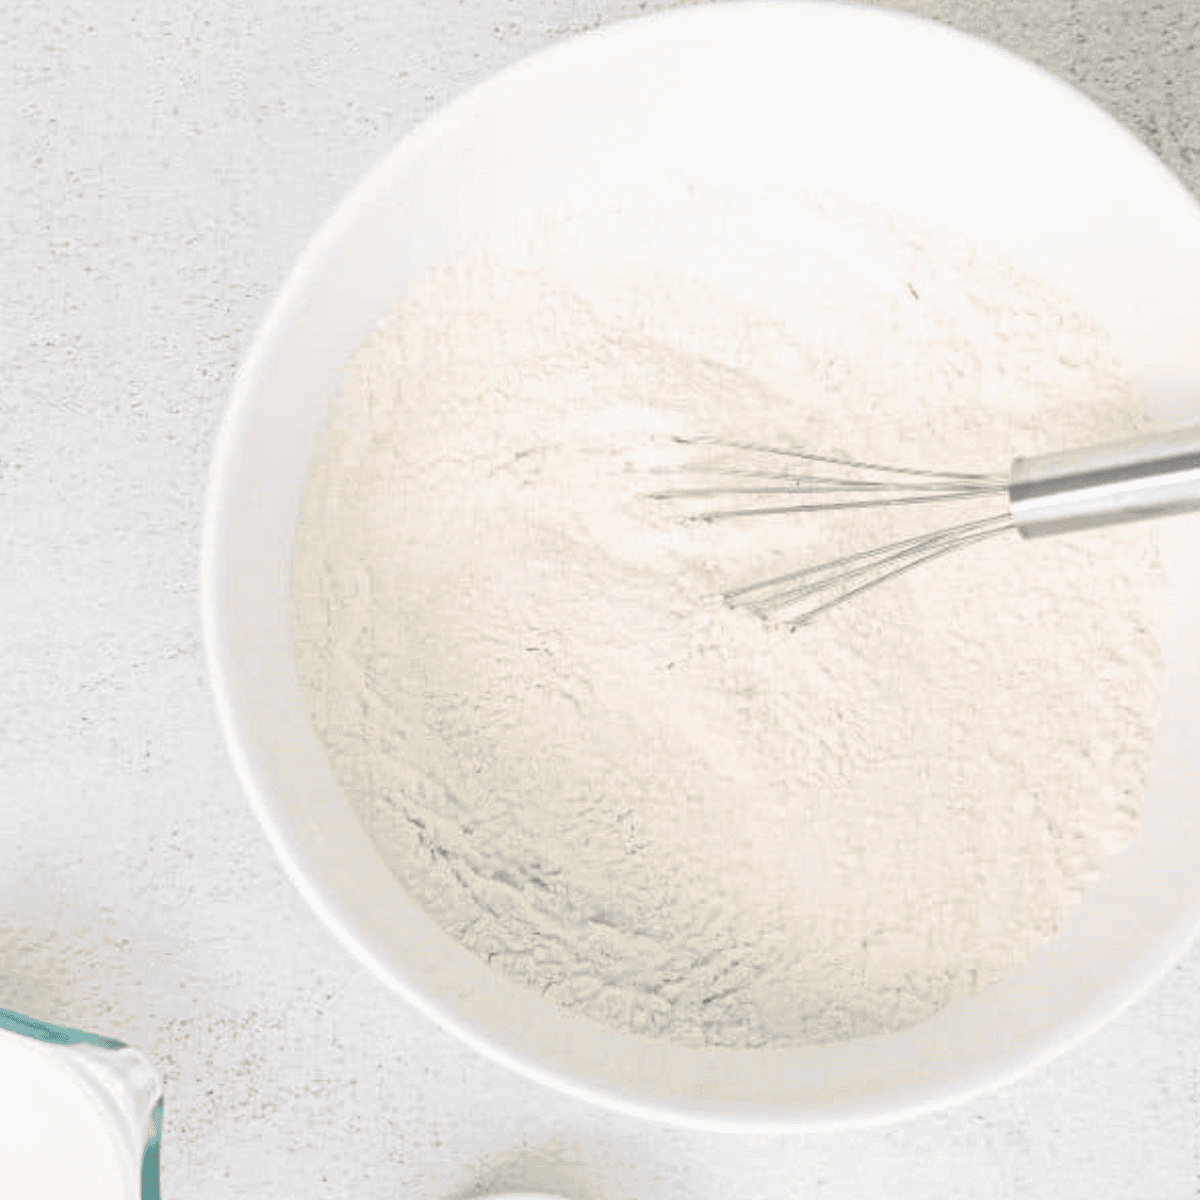
Step 1 — Mix the dry ingredients
In a large bowl, whisk together the flour, baking powder, baking soda, salt, and sugar. Whisk until fully combined. This also aerates the flour, which helps the rise.
Step 2 — Cut in the cold butter
Add the cold butter cubes to the flour mixture. Using a pastry cutter, two forks, or your fingertips, break the butter into the flour until the mixture looks like coarse crumbs with some pea-sized butter pieces still visible. Work quickly — the goal is to keep the butter cold. If the butter starts to feel soft or greasy, put the bowl in the freezer for 5 minutes before continuing.
Tip: The fastest method is a box grater. Freeze the butter for 20 minutes, then grate it directly into the flour on the large holes of the grater. Toss gently to coat each piece in flour. No pastry cutter needed.
Step 3 — Add the buttermilk
Pour the cold buttermilk over the flour-butter mixture. Use a rubber spatula or wooden spoon to fold — not stir — until the dough just comes together. It will look shaggy and rough. That is correct. If there are dry spots at the bottom of the bowl, add buttermilk one tablespoon at a time. Do not add more than needed.

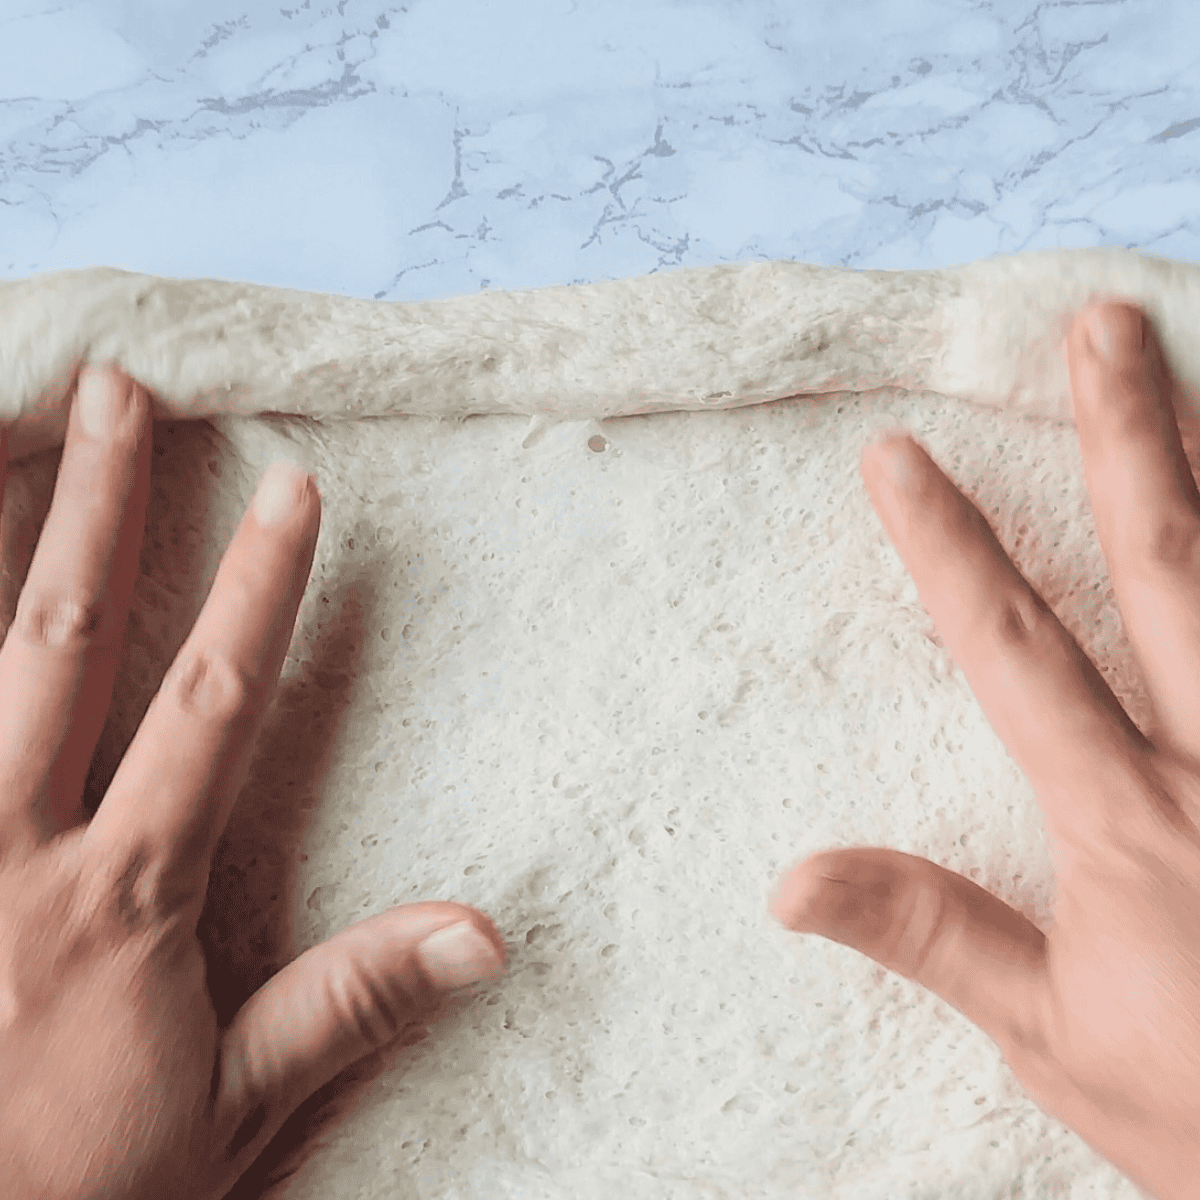
Step 4 — Turn out and fold (the lamination method)
Turn the shaggy dough onto a lightly floured surface. Gently press it into a rough rectangle about ¾ inch thick. Do not knead.
Now fold: cut the rectangle into 4 pieces and stack them on top of each other. Gently press the stack down into another ¾-inch thick rectangle. This folding creates distinct layers in the finished biscuit — it’s the same principle as laminated pastry, just done quickly. Do this fold one more time for extra layers.
Step 5 — Cut the biscuits
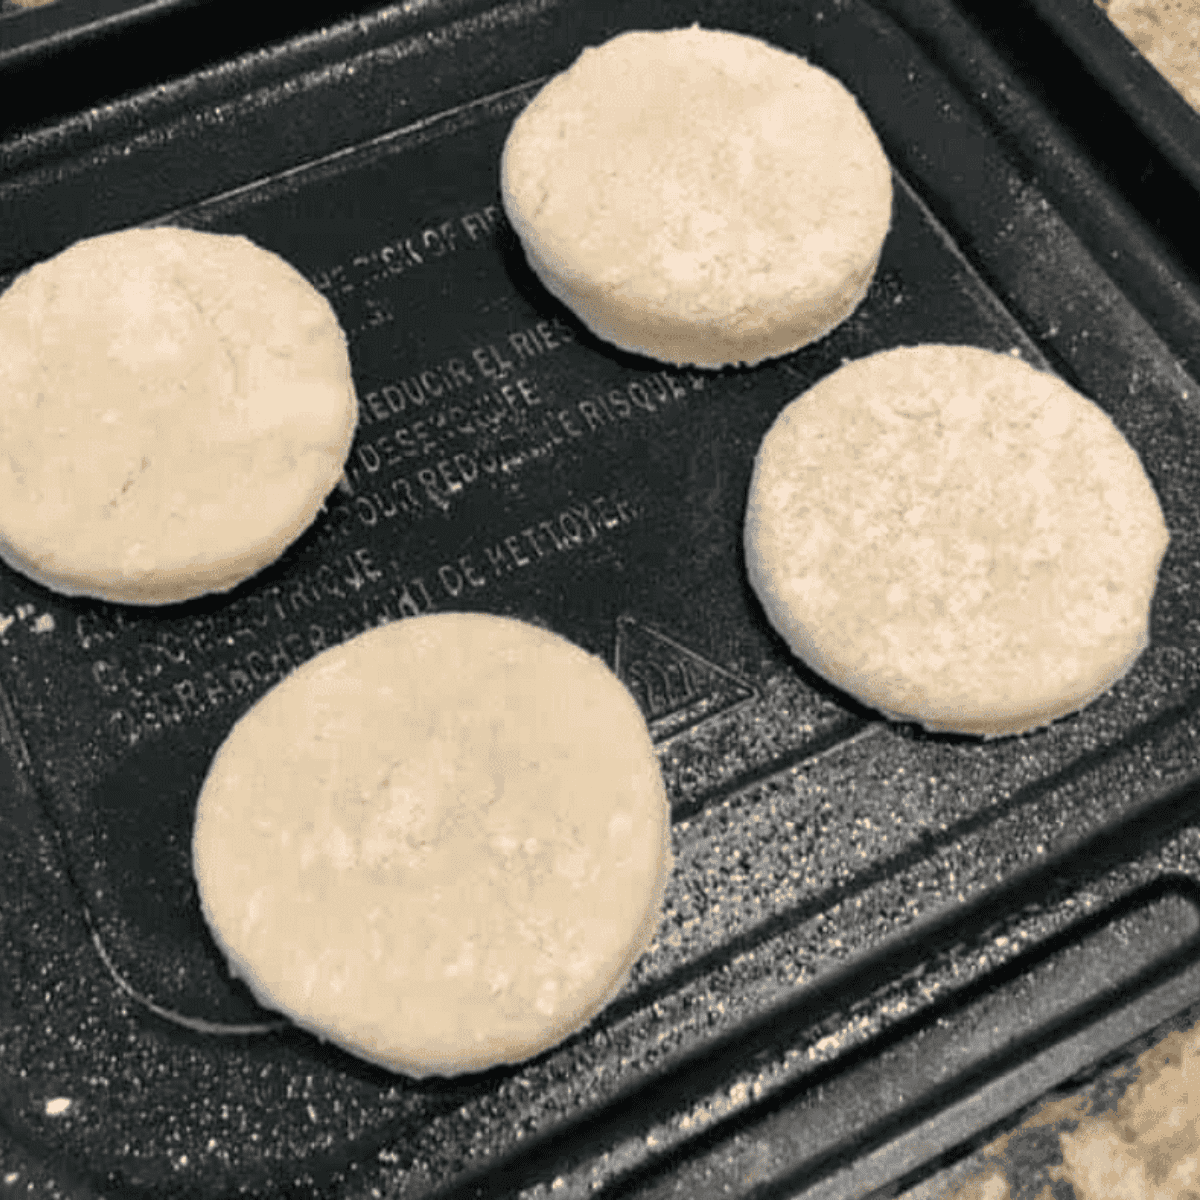
Press the dough to a final thickness of ¾ inch. Using a sharp 2–2.5 inch round biscuit cutter (or a sharp knife), cut straight down without twisting. Press the scraps together gently and cut any remaining biscuits — these will be slightly less perfect but still delicious.
Step 6 — Chill for 10 minutes
Place the cut biscuits on a plate and refrigerate for 10 minutes. This re-solidifies the butter and dramatically improves the rise. Don’t skip this — it takes 10 minutes and makes a real, visible difference.
Step 7 — Air fry
Place the chilled biscuits in the air fryer basket in a single layer, leaving about ½ inch of space between them. Slightly close together is fine — it encourages them to rise upward rather than spread sideways.
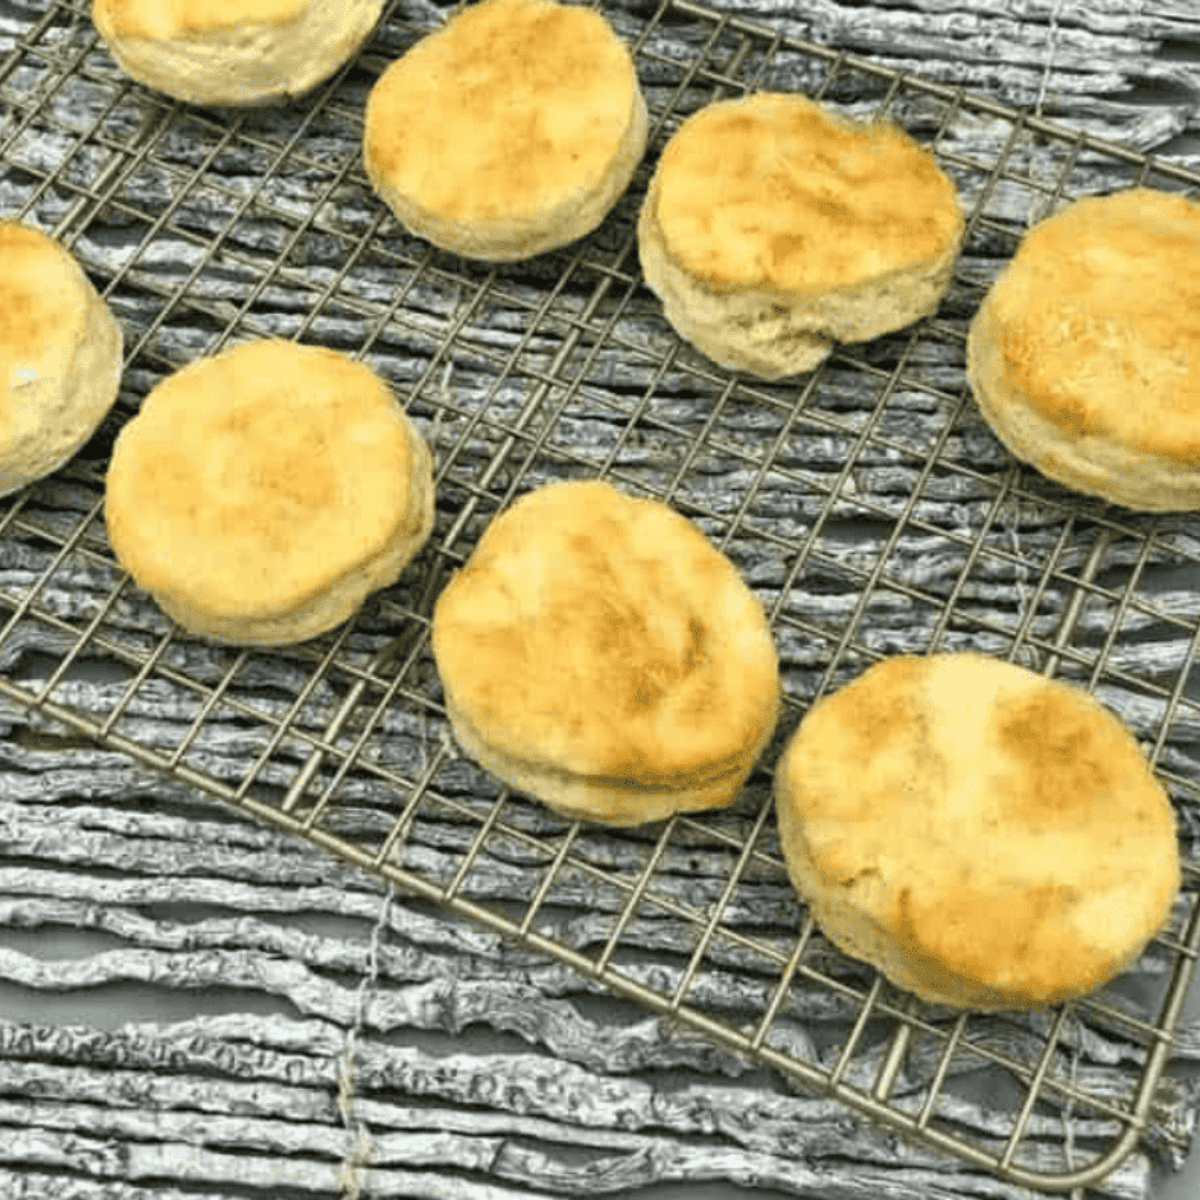
Air fry at 325°F (165°C) for 13–15 minutes until the tops are golden brown and the sides look dry and set. Unlike canned biscuits, homemade buttermilk biscuits do not need to be flipped — the folded layers rise upward and the hot circulating air browns all sides evenly.
Check at 12 minutes. Every air fryer runs slightly differently.
Step 8 — Brush with butter and serve immediately
The moment they come out of the air fryer, brush generously with the melted butter. Serve warm. Biscuits are at their peak for the first 20 minutes after cooking.
Temperature and timing guide
| Air fryer type | Temp | Time | Flip? |
|---|---|---|---|
| Basket air fryer | 325°F | 13–15 min | No |
| Oven-style air fryer (middle rack) | 325°F | 12–14 min | No |
| Dual-zone air fryer | 325°F | 13–15 min | No |
Oven-style air fryers: Always use the middle rack. Top rack burns the outside before the inside cooks. Bottom rack undercooks because heat doesn’t reach down effectively.
Already hot air fryer: If cooking a second batch in a hot air fryer, reduce time by 1–2 minutes.
The grated butter trick (game changer)
The single biggest upgrade you can make to this recipe: grate frozen butter directly into the flour.
Take your butter, wrap it and freeze for 20 minutes, then grate it on the large holes of a box grater straight into the flour bowl. Toss quickly to coat each strand in flour. This gives you perfectly even, tiny butter pieces dispersed throughout the dough — more evenly than any pastry cutter can achieve — and keeps everything colder longer.
The result is significantly more flaky layers and a more consistent crumb throughout the biscuit. Once you try it, you’ll never go back to cutting in butter.
Serving ideas
- Classic: Split and serve with softened butter and honey, or your favorite jam.
- Southern style: Top with Air Fryer Sausage Gravy — rich, peppery, and ready in 15 minutes.
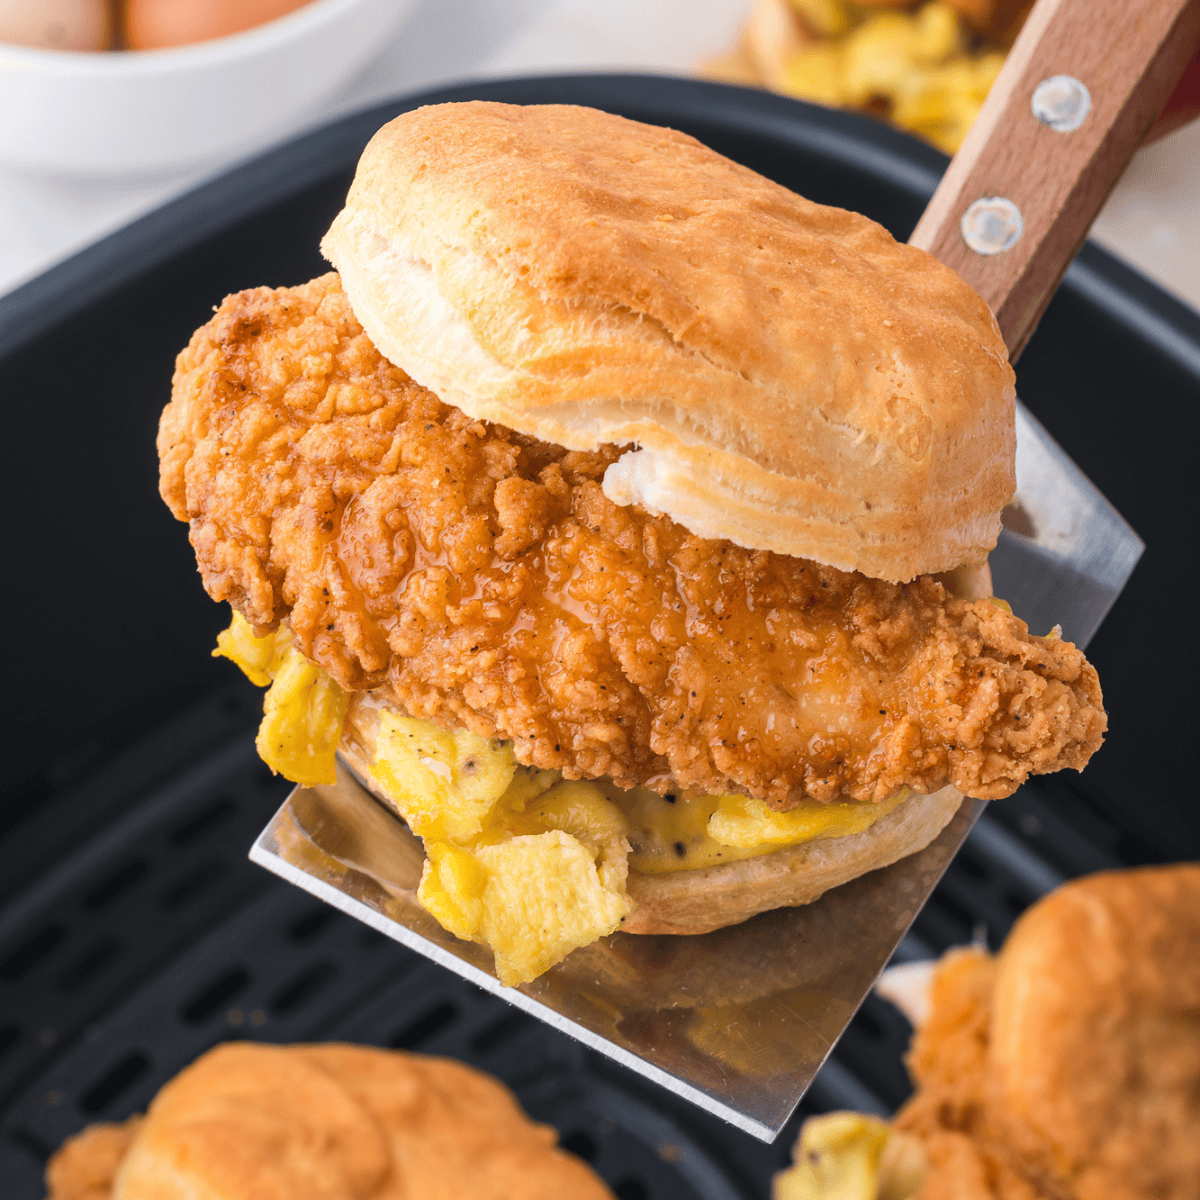
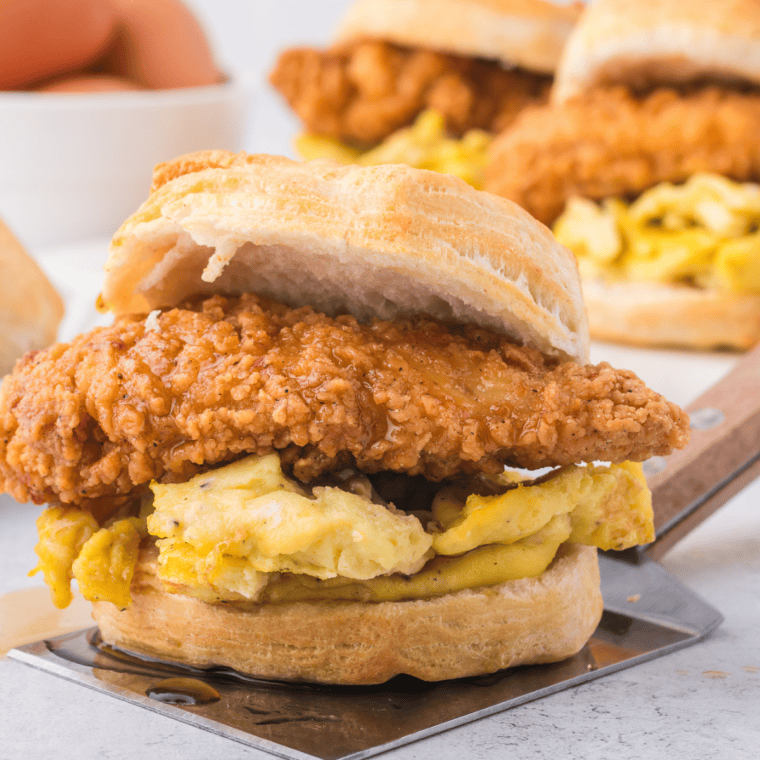
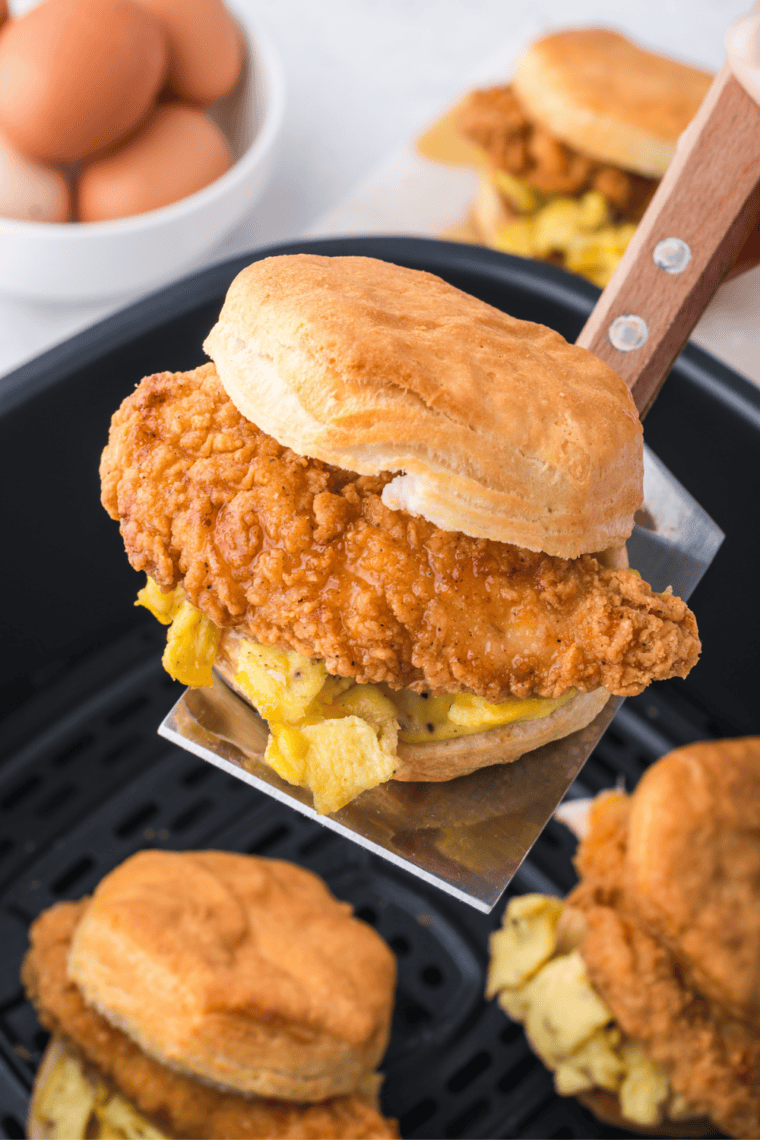
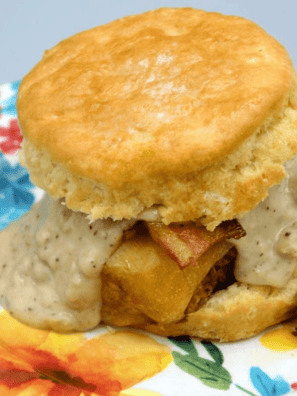
- Breakfast sandwich: Split the biscuit and fill with a fried egg, sharp cheddar, and crispy bacon.
- Garlic herb: Mix 1 tablespoon of softened butter with ½ teaspoon garlic powder and 1 teaspoon chopped fresh chives. Spread on the warm biscuit immediately after cooking.
- Strawberry shortcake: Split the biscuit, layer with macerated strawberries and fresh whipped cream. The slight tang of the buttermilk biscuit works beautifully against the sweetness.
- Honey butter: Mix 2 tablespoons softened butter with 1 tablespoon honey and a pinch of flaky salt. Spread generously on a warm biscuit.
How to Store and Reheating
- Room temperature: Store in an airtight container or zip-top bag for up to 2 days. Biscuits are always best the day they’re made.
- Refrigerator: Store for up to 5 days in an airtight container.
- Reheating: Air fry at 300°F for 2–3 minutes. This revives the crispy exterior without drying out the interior. Do not microwave — they go rubbery and dense.
- Freezing baked biscuits: Wrap individually in foil, place in a freezer-safe bag, and freeze for up to 2 months. Reheat from frozen at 300°F for 6–8 minutes.
- Freezing unbaked biscuits: Cut the biscuits, place them on a baking sheet, and freeze until solid (about 1 hour). Transfer to a freezer bag. Cook from frozen at 325°F for 16–18 minutes — no thawing required. This is the best method if you want fresh biscuits any morning with zero prep.

Troubleshooting
- My biscuits didn’t rise. Almost always caused by one of three things: baking powder that’s past its prime (test it by adding a teaspoon to hot water — it should bubble vigorously), warm butter that blended into the dough instead of staying in pieces, or overworked dough that developed too much gluten. Check your baking powder date, keep everything cold, and fold gently.
- My biscuits are raw in the center. The air fryer temperature is too high, or the biscuits are too thick. Lower to 325°F and ensure your dough is patted to exactly ¾ inch thick — no thicker. Also check that biscuits are not touching each other, which can trap steam and slow cooking.
- My biscuits are brown on the outside but raw inside. Too high a temperature. 325°F is the correct setting for homemade buttermilk biscuits. Higher temps (375°F+) brown the outside too fast. If yours are already browning too fast, tent them loosely with a small piece of foil.
- My biscuits spread flat instead of rising. The butter got warm. Make sure you’re working quickly, chilling the cut biscuits before cooking, and starting with genuinely cold buttermilk and butter.
- My biscuits are tough. Overmixed dough. The moment the dough comes together, stop mixing. Tough, dense biscuits come from developed gluten, which happens when you overwork the dough.
Frequently asked questions
What temperature do you cook buttermilk biscuits in the air fryer? 325°F (165°C) is the ideal temperature for homemade buttermilk biscuits from scratch. This is lower than what some recipes suggest, but it allows the inside to cook fully and rise properly before the outside browns. Canned biscuits use a slightly different temperature (330°F) because the formulation is different.
Do you flip homemade biscuits in the air fryer? No — unlike canned biscuits, homemade buttermilk biscuits do not need to be flipped. The folded layers rise upward, and the circulating hot air browns the sides and bottom evenly without flipping. Flipping risks deflating the biscuit before it sets.
Do I need to preheat the air fryer for biscuits? No preheating required. Place chilled biscuits directly into a cold air fryer basket. Starting cold gives the biscuits a few extra seconds before the heat hits, which helps them rise taller before the crust sets.
Can I make buttermilk biscuits without buttermilk? Yes. Add 1 tablespoon of white vinegar or fresh lemon juice to ¾ cup of whole milk. Stir briefly and let sit for 5 minutes — it will curdle slightly. This is a reliable buttermilk substitute. The biscuits will be very slightly less tangy but still excellent. Low-fat milk works in a pinch but full-fat gives a better result.
Can I use salted butter? Yes. Reduce the kosher salt in the recipe from 1 teaspoon to ½ teaspoon to avoid over-salting.
Why do you fold the dough instead of rolling it? The folding technique (also called laminating) stacks distinct layers of dough and butter. When those layers hit the hot air fryer, each one puffs separately, creating the tall, flaky, pull-apart texture that makes a great biscuit. Simply rolling the dough produces a denser crumb with no visible layers.
Can you use self-rising flour? Yes. Replace the all-purpose flour with self-rising flour and omit the baking powder, baking soda, and salt from the recipe. The results are nearly identical.
How do I know when biscuits are done? The tops should be golden brown and the sides should look dry and set — not pale or shiny. If you’re unsure, insert a toothpick into the center: it should come out clean with no wet dough on it.
More biscuit recipes on Fork to Spoon
Love these from-scratch biscuits? Here’s the rest of our biscuit collection:
- Air Fryer Canned Biscuits — the fastest biscuit method using a can of Pillsbury, Aldi, or Trader Joe’s biscuits
- Air Fryer Frozen Biscuits — cooking Pillsbury frozen biscuits straight from the freezer
- Air Fryer Bisquick Biscuits — semi-homemade with Bisquick mix, ready in 15 minutes
- Air Fryer Breakfast Biscuit Sandwiches — egg, cheese, and bacon on a biscuit, fully air fryer made
Share Your Creations! Are you active on Facebook? Join our Air Fryer Recipes Group, where hundreds of thousands of Air Fryer enthusiasts gather and share your photos! I’m always thrilled to see what you’ve made. For those on Instagram, don’t forget to tag me @forktospoon – I can’t wait to admire your culinary adventures!

Air Fryer Buttermilk Biscuits (From Scratch)
Description
Ingredients
- 2 cups all-purpose flour
- 1 tablespoon baking powder
- ½ teaspoon baking soda
- 1 teaspoon kosher salt
- 1 teaspoon sugar, optional
- 6 tablespoons unsalted butter, very cold, cut into ½-inch cubes
- ¾ cup buttermilk, very cold
- 2 tablespoons butter, melted, for brushing
Instructions
- Whisk together flour, baking powder, baking soda, salt, and sugar in a large bowl.
- Add cold butter cubes. Work into the flour using a pastry cutter or fingertips until pea-sized pieces form. (Or grate frozen butter directly into flour.)
- Pour in cold buttermilk. Fold until the dough just comes together — it should look shaggy, not smooth.
- Turn onto a lightly floured surface. Press into a ¾-inch rectangle. Cut into 4 pieces and stack. Press down and repeat the fold once more.
- Press to a final ¾-inch thickness. Cut with a 2–2.5 inch round cutter, pressing straight down without twisting.
- Place biscuits on a plate and refrigerate for 10 minutes.
- Arrange chilled biscuits in a single layer in the air fryer basket, leaving ½ inch of space between each.
- Air fry at 325°F (165°C) for 13–15 minutes until golden brown on top and set on the sides. Do not flip.
- Brush immediately with melted butter. Serve warm.
Equipment
- Parchment Paper, optional
- Cooking Spray
Notes
- Oven-style air fryer: use the middle rack only
- Second batch in a hot air fryer: reduce time by 1–2 minutes
- Freeze unbaked cut biscuits for up to 2 months; cook from frozen at 325°F for 16–18 minutes
- Reheat baked biscuits at 300°F for 2–3 minutes
Nutrition
Share this recipe
We can’t wait to see what you’ve made! Mention @forktospoon or tag #forktospoon!


Lea
Very good recipe – in my 6 qt air fryer I had to make biscuits in batches. I also cut the recipe in half for just two of us. For half recipe I made 6 good size biscuits. Four in the first batch and two in the second. I did find I had to flip the biscuits at the air fryer prompting. Otherwise the bottom was too pale and unbaked.