Instant Pot Red Velvet Cake — Everyone loves red velvet cake, but it is typically time-consuming and requires you to be in the kitchen for hours.
However, you can make this delicious red velvet cake with an Instant Pot in just minutes. It will taste like you spent all day baking!

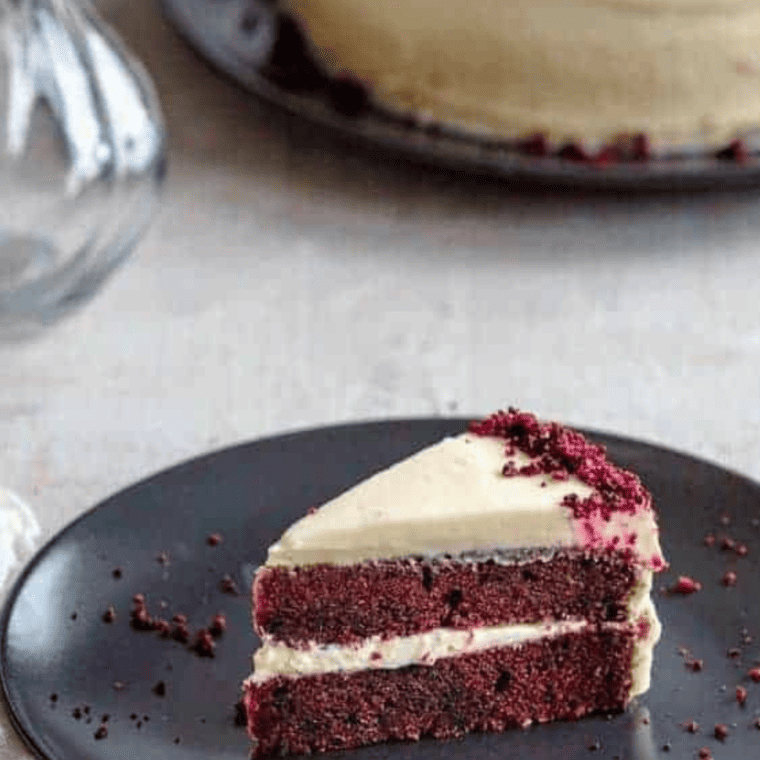
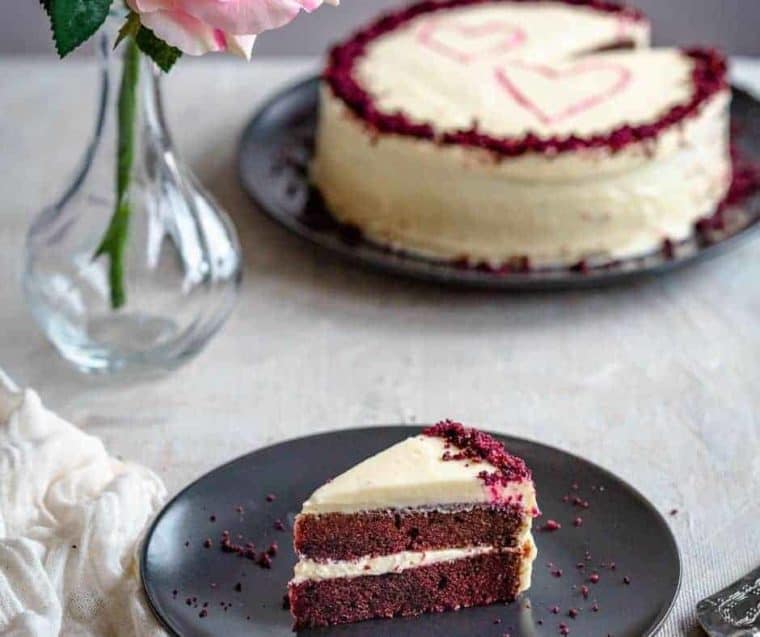
There is nothing better for dessert than a homemade cake. Today I made a special treat for my family, used my Instant Pot, and prepared an Instant Pot Red Velvet Cake, with Cream Cheese Frosting and all. It was fabulous.
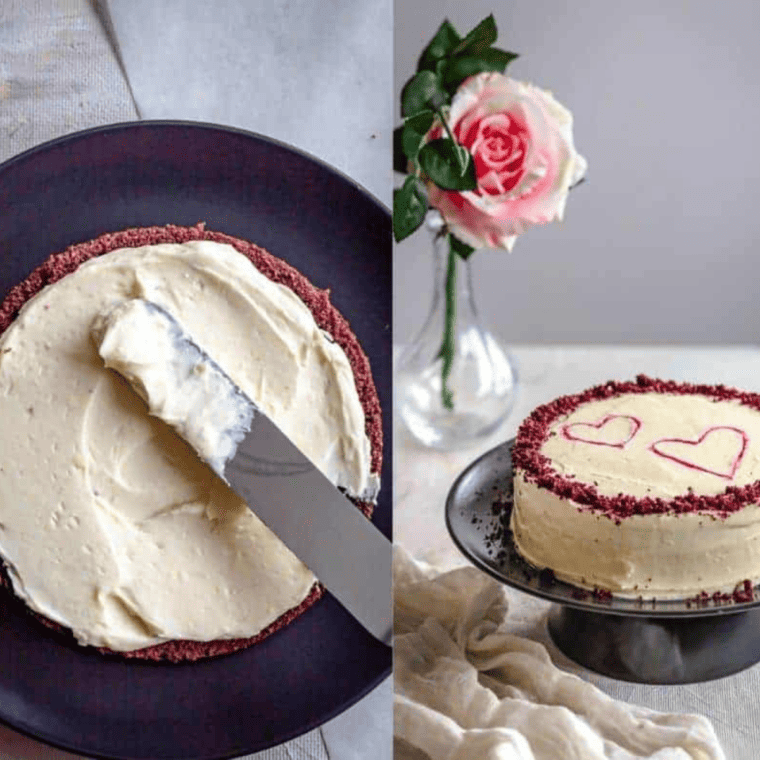
If you have never prepared an Instant Pot Cake, they are delicious and straightforward, and you end up with a lovely, moist, rich, and tasty cake. Today, because Valentine’s Day is coming up, I made a red velvet cake smeared with cream cheese frosting.
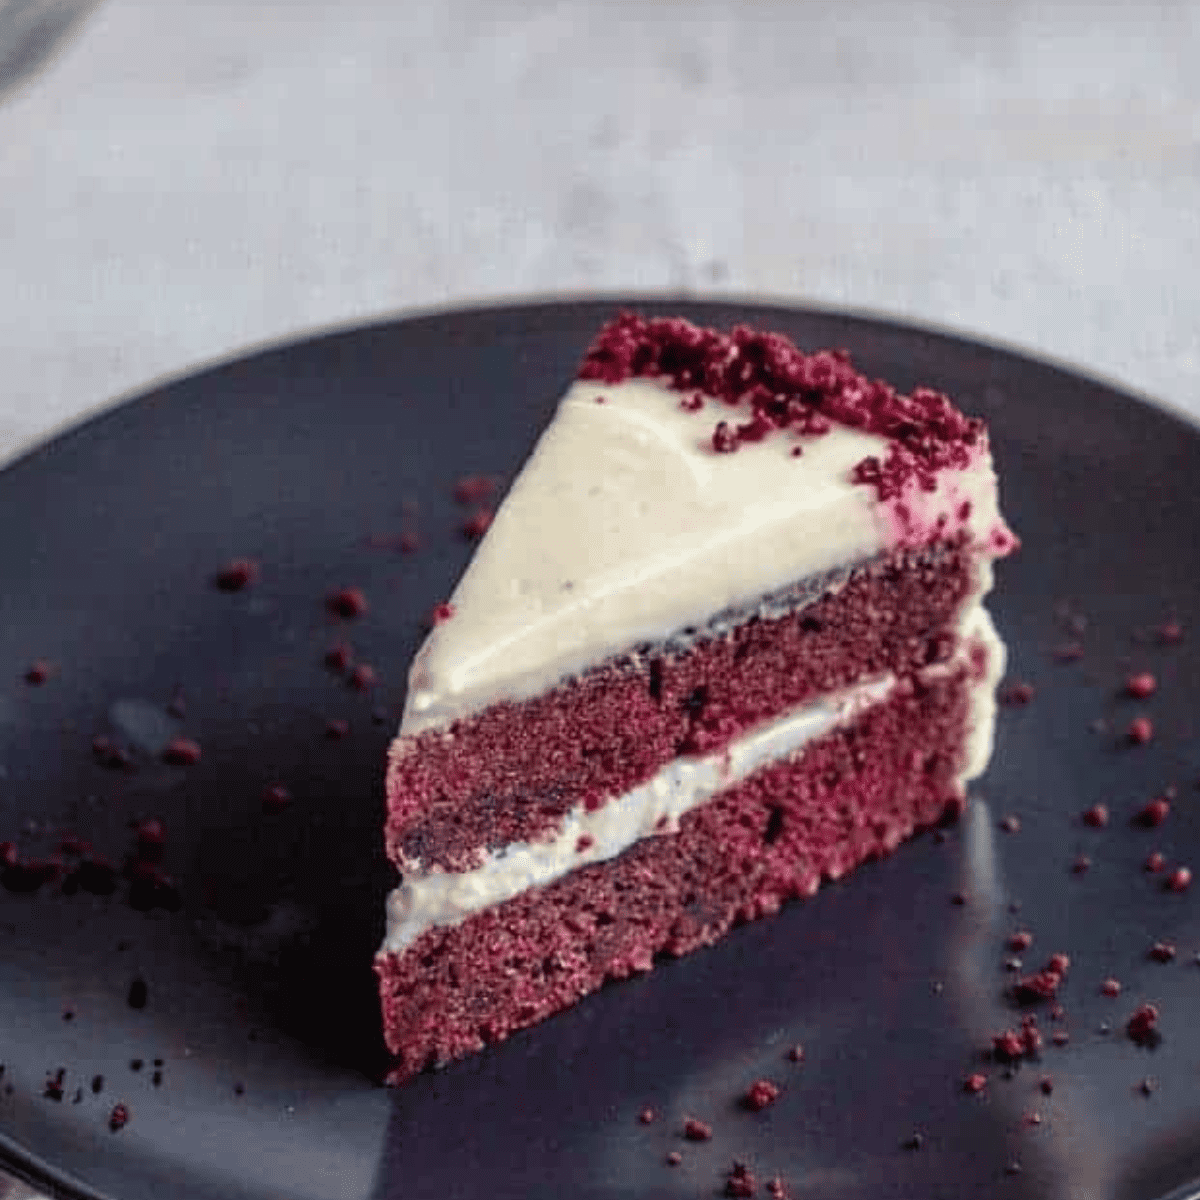
If you are looking for a rich, deep piece of cake with buttery, vanilla, and cocoa powder, this is a perfect dessert anytime, whether Valentine’s Day or just a regular day. However, I promised to make this for my oldest son again for his birthday!
What Is Red Velvet Cake?
Red velvet cake is a popular dessert that has existed since the 1920s. It gets its name from the red coloring, often achieved by adding beets to the batter.
The frosting on this cake is typically cream cheese or buttercream, and it can either be covered in chocolate or left as-is for a lighter option. Red velvet cake was invented in rural Virginia and became famous after being featured at New York City’s Waldorf Astoria Hotel’s restaurant, The Towers.

Why You Will Love Making A Red Velvet Cake In The Instant Pot
Making a Red Velvet Cake in the Instant Pot offers a delightful twist on traditional baking methods, with several compelling benefits that might make you fall in love with the process. Here’s why:
- Moisture-Rich Cake: The Instant Pot uses steam to cook, which means your Red Velvet Cake will turn out exceptionally moist. This method reduces the risk of overbaking or drying out, ensuring a tender, delicious texture every time.
- Flavor Enhancement: Cooking under pressure can intensify flavors, making your Red Velvet Cake’s chocolatey, slightly tangy taste even more pronounced and satisfying.
- Time Efficiency: An Instant Pot can often bake a cake more quickly than a conventional oven, saving you time. Plus, there’s no need to preheat, which further reduces the overall preparation and cooking duration.
- Convenience and Ease: Baking a cake in an Instant Pot is straightforward and can be less intimidating for those new to baking or who prefer not to deal with the nuances of oven baking. The process is almost foolproof, with less monitoring required.
- Energy Efficiency: Using an Instant Pot can be more energy-efficient than heating a traditional oven, especially for smaller kitchens or during warmer months when you want to avoid heating your entire living space.
- Versatility: After mastering a Red Velvet Cake, you’ll find that the Instant Pot is capable of handling a wide variety of desserts, expanding your baking repertoire without the need for multiple appliances.
- Perfect for Any Occasion: Whether it’s a special celebration, a family dinner, or a desire for a delicious dessert, a Red Velvet Cake made in the Instant Pot is sure to impress. Its classic flavor and the unique benefits of pressure cooking make it a hit for any occasion.
In summary, making a Red Velvet Cake in an Instant Pot yields a scrumptious, moist dessert and offers convenience, efficiency, and a fun new way to bake, which is why you’ll love adding this method to your baking arsenal.
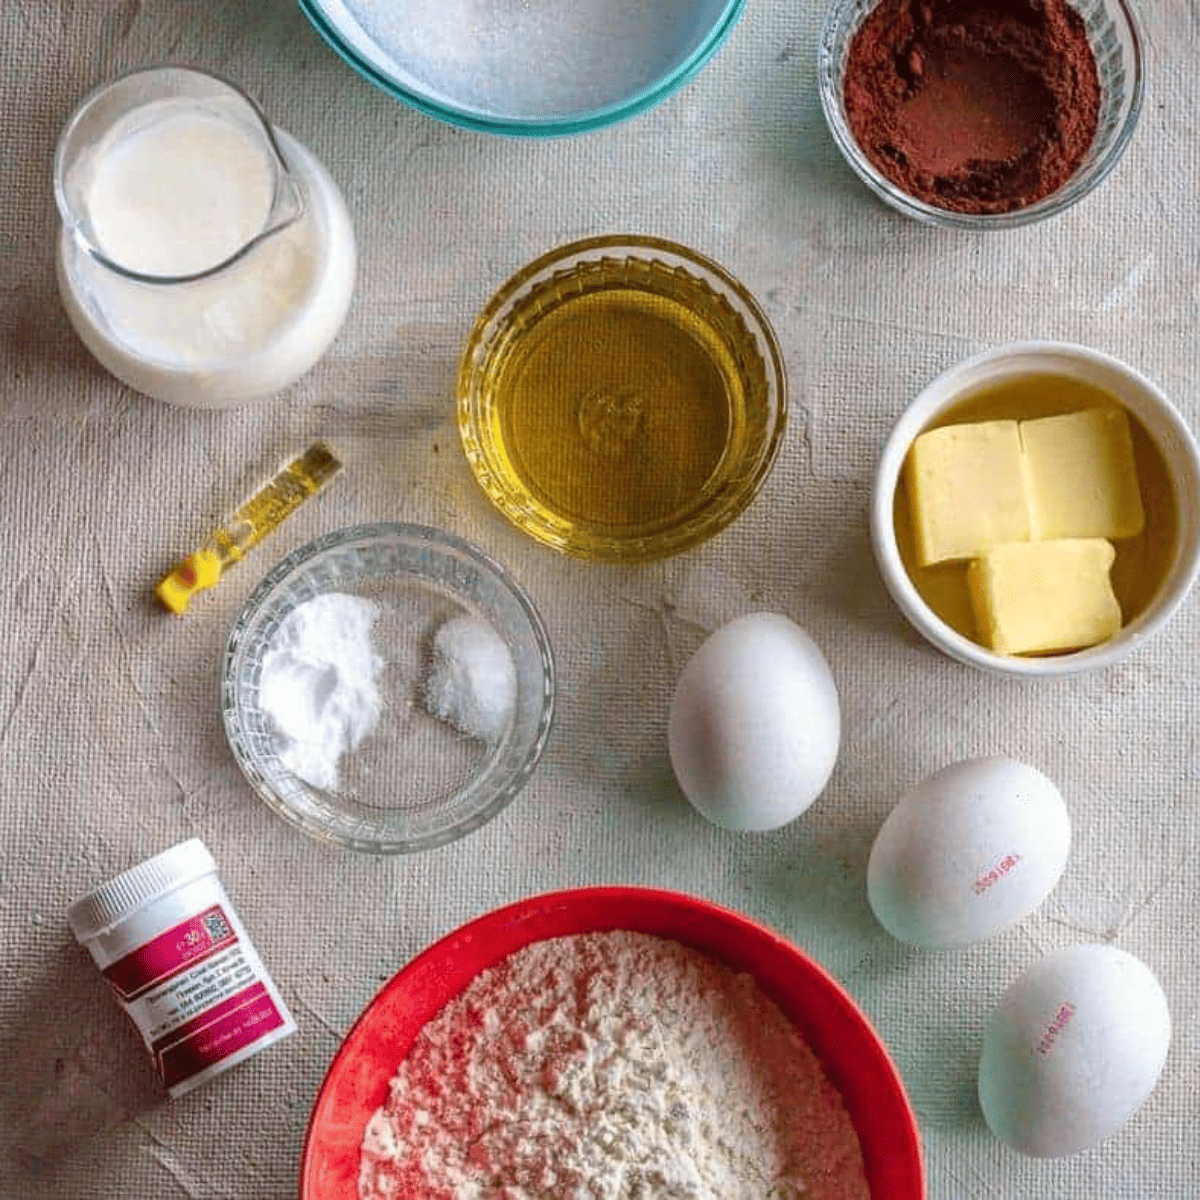
Ingredients Needed For Instant Pot Red Velvet Cake
Creating a Red Velvet Cake in your Instant Pot simplifies the baking process and ensures a moist, delectable dessert every time. Here’s a breakdown of the ingredients you’ll need, each contributing unique qualities to make this cake a standout treat.
Remember the step-by-step directions and detailed ingredient list are below, in the printable recipe card at the bottom of the post, as well as the nutritional information.
- All-purpose flour: The backbone of your cake, providing structure and softness, ensuring a tender crumb in every slice.
- Eggs: Eggs bind the ingredients together, add moisture, and help the cake rise.
- Vegetable oil: Keeps the cake incredibly moist, making each bite melt in your mouth.
- Unsweetened cocoa powder: Adds a subtle chocolate flavor, complementing the cake’s unique taste and contributing to its classic reddish hue.
- Vanilla extract: A splash of vanilla enhances the complex flavors of the cocoa and buttermilk.
- Baking soda and white vinegar: This duo reacts to create bubbles, giving the cake a light and airy texture. The vinegar also enhances the cake’s signature tang.
- Salt: A pinch of salt balances the sweetness and intensifies the flavors of the other ingredients.
- Granulated sugar: Provides sweetness and moisture, contributing to the cake’s tender texture.
- Buttermilk: Adds acidity to the batter, tenderizing the gluten for a softer texture and contributing to the cake’s slight tanginess.
- Red food coloring: Gives the cake its iconic vibrant red color, making it visually striking and festive.
- Cream cheese for frosting: The creamy, tangy flavor of cream cheese frosting pairs perfectly with the sweet and slightly chocolatey cake, creating a classic flavor combination.
- Powdered sugar for frosting: Sweetens the frosting to the perfect level and contributes to its smooth, spreadable consistency.
- Butter for frosting: Adds richness to the frosting, making it luxuriously smooth and enhancing the overall flavor.
- Vanilla extract for frosting: Infuses the frosting with a warm, aromatic flavor that complements both the tanginess of the cream cheese and the sweetness of the cake.
- With these ingredients, your Instant Pot Red Velvet Cake will come together beautifully, offering a moist, flavorful, and visually stunning dessert that’s sure to impress.
How To Make Instant Pot Red Velvet Cake
Making a Red Velvet Cake in your Instant Pot is a surprisingly simple process that yields deliciously moist and visually stunning results. Here’s a step-by-step guide to creating this classic cake with a modern twist:
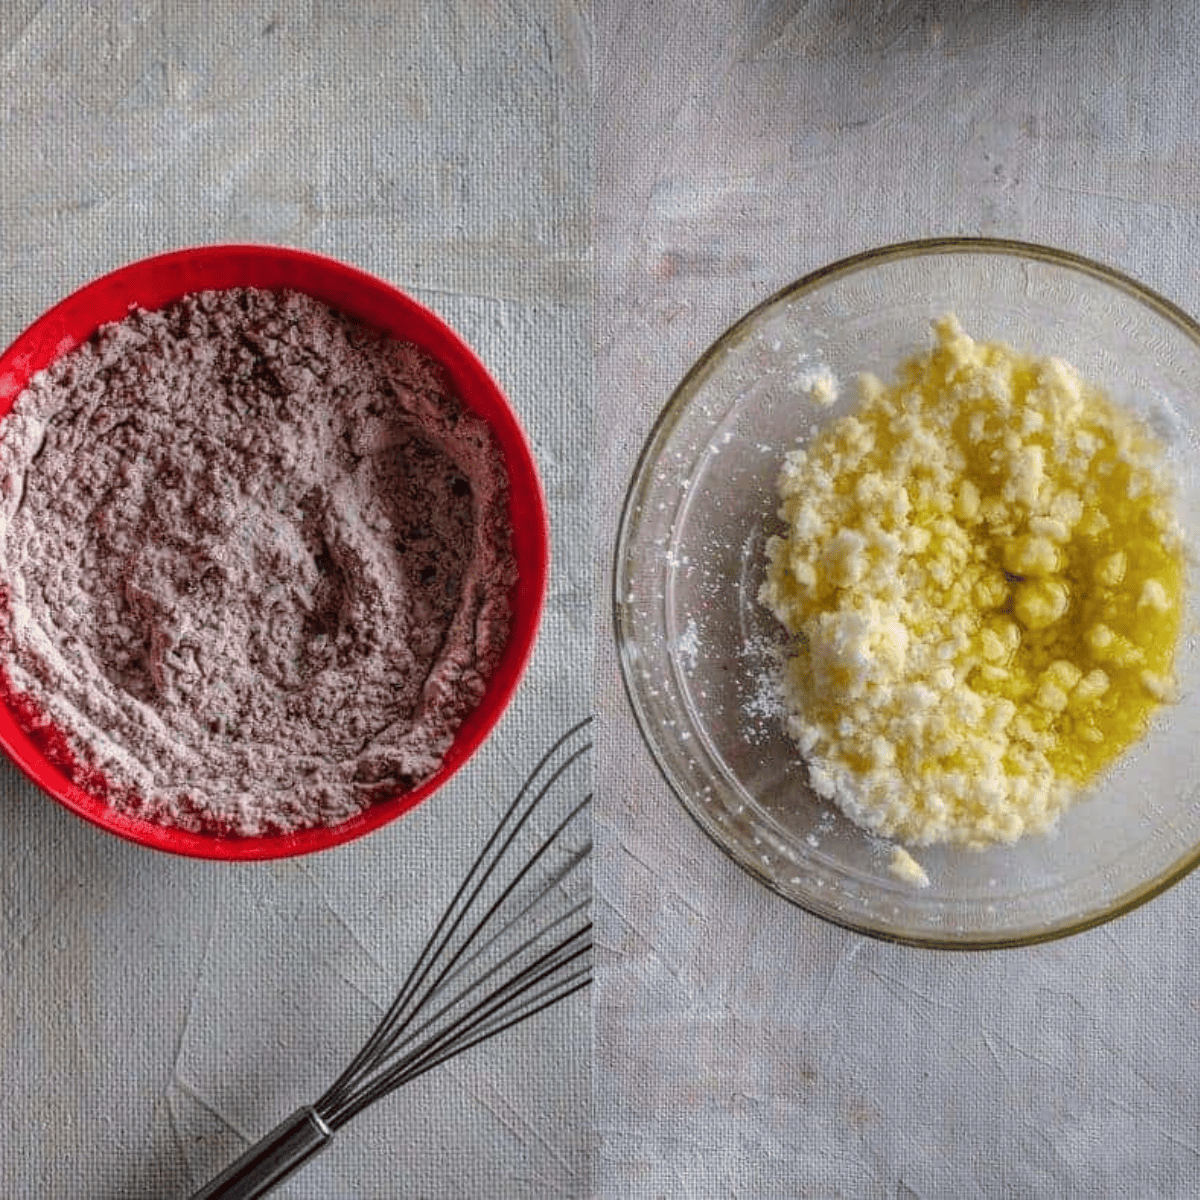
Step One: Prepare Red Velvet Cake Batter
- Whisk together the flour, cocoa powder, baking soda, and salt in a large bowl. In another bowl, beat the sugar and eggs until light and fluffy. Gradually mix in the vegetable oil, buttermilk, vanilla extract, red food coloring, and vinegar until well combined.
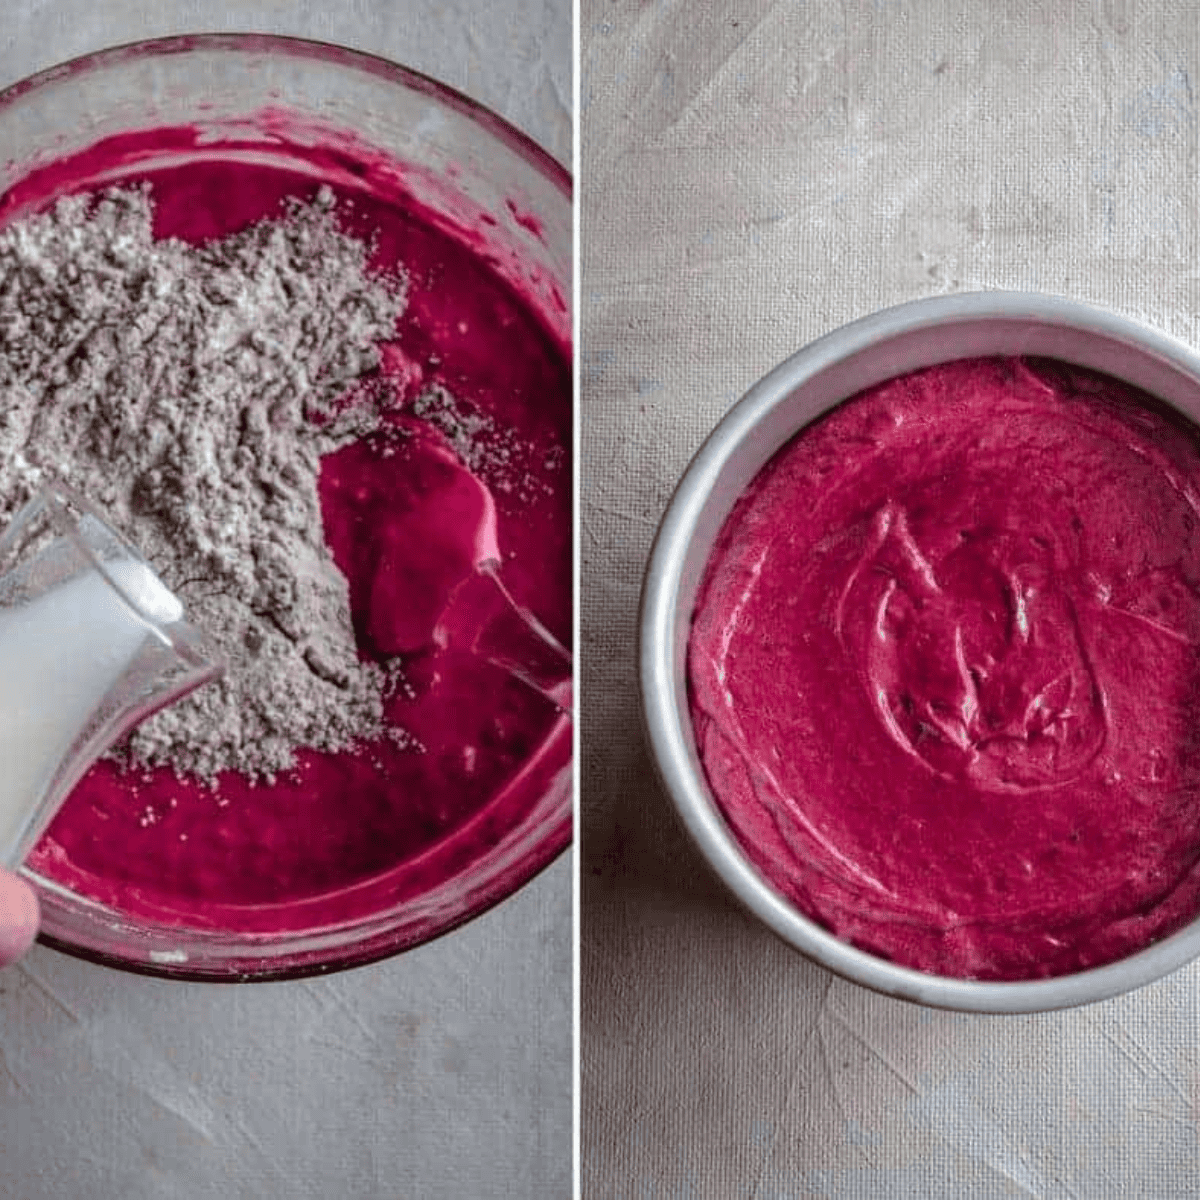
- Slowly incorporate the dry ingredients into the wet ingredients, mixing until combined without overmixing.
Step Two: Prepare the Pan
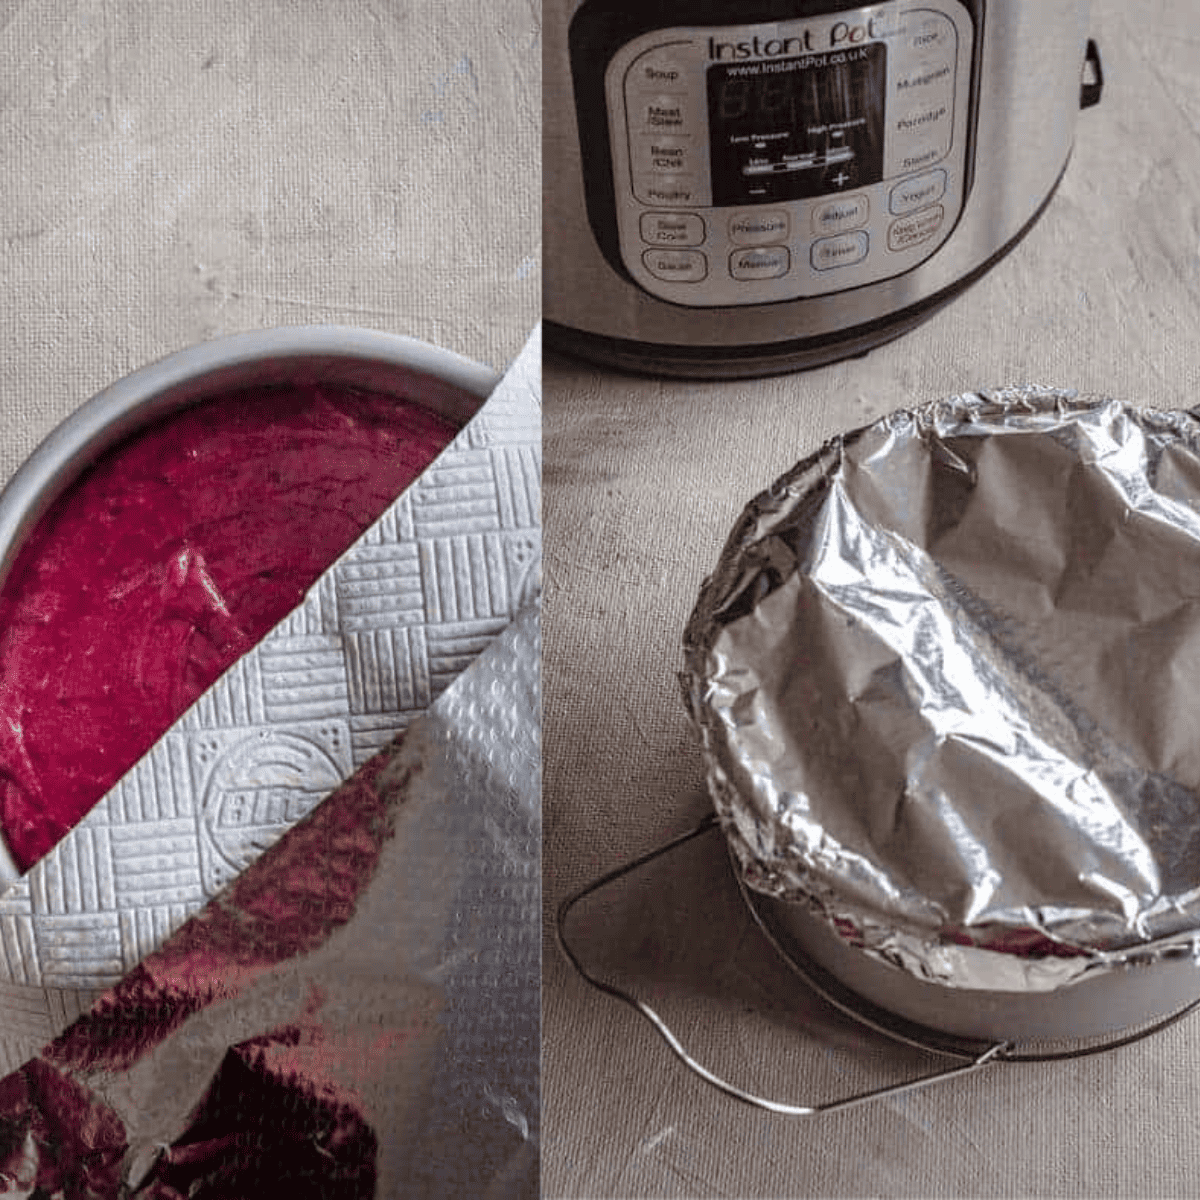
- Grease a 7-inch round cake pan that fits inside your Instant Pot. Pour the batter into the pan, smoothing the top with a spatula.
Step Three: Pressure Cook the Cake
- Pour 1 cup of water into the bottom of your Instant Pot and place the trivet inside. Carefully lower the cake pan onto the trivet.
- Secure the lid, ensuring the valve is set to “Sealing.” Cook on high pressure for 35-40 minutes. Once done, allow the pressure to release naturally for 10 minutes, then quickly release any remaining pressure.
Step Four: Cool and Frost
- Carefully remove the cake from the Instant Pot and let it cool completely on a wire rack. Once cooled, remove the cake from the pan.
- To make the frosting, beat the cream cheese and butter until smooth. Gradually add the powdered sugar and vanilla extract, continuing to beat until creamy and spreadable.
- Frost the cooled cake with the cream cheese frosting, spreading evenly over the top and sides.
Step Five: Serving
- Once frosted, slice the cake and serve. The cake can be refrigerated for up to 5 days, making it a great make-ahead dessert for any occasion.
Recipe Variations Instant Pot Red Velvet Cake
Experimenting with classic Instant Pot Red Velvet Cake variations can add an exciting twist to this beloved dessert. Here are some creative ideas to customize your cake, catering to different tastes and occasions:
- Chocolate Chip Red Velvet Cake: Stir 1 cup of mini chocolate chips into the batter before pouring it into the pan. The chocolate chips will add a delightful texture and enhance the cake’s chocolate flavor.
- Red Velvet Oreo Cake: Crush 1 cup of cookies and fold them into the batter. You can add a layer of crushed Oreos to the frosting for extra crunch.
- Red Velvet Cheesecake Cake: Prepare a simple cheesecake batter, pour half of the red velvet cake batter into the pan, add the cheesecake layer, and then top with the remaining cake batter.
- Gluten-Free Red Velvet Cake: Substitute the all-purpose flour with your favorite gluten-free flour blend (ensure it’s 1:1 baking flour for best results).
- Vegan Red Velvet Cake: Use plant-based milk mixed with a teaspoon of vinegar in place of buttermilk, swap eggs for flax eggs (1 tablespoon ground flaxseed mixed with 3 tablespoons water per egg), and use vegan cream cheese and butter for the frosting.
- Red Velvet Cupcakes: Instead of using a cake pan, divide the batter among silicone cupcake liners that fit in your Instant Pot. Adjust the cooking time accordingly, usually reducing it by 5-10 minutes.
- Mocha Red Velvet Cake: Add 1-2 tablespoons of instant espresso powder to the cake batter to infuse it with a rich coffee flavor.
These Instant Pot Red Velvet Cake variations offer something for everyone, whether you’re looking to satisfy dietary restrictions, add new flavors, or shake up the presentation. Each twist on the classic recipe promises a delicious and memorable dessert experience.

Pro Tips For Making A Red Velvet Cake In Instant Pot
Creating the perfect Red Velvet Cake in an Instant Pot involves nuances that differ from traditional oven baking. Here are some pro tips to help you achieve the best results, ensuring your cake is as delicious as it is beautiful:
- Ensure Ingredients Are at Room Temperature: Ingredients like eggs, buttermilk, and cream cheese blend more smoothly at room temperature, leading to a batter with a uniform texture. This helps avoid lumps and ensures the cake rises evenly.
- Don’t Overmix the Batter: Overmixing the batter can develop too much gluten, leading to a dense and chewy cake. Mix until the dry ingredients are incorporated into the wet ingredients to keep the cake light and fluffy.
- Use High-Quality Cocoa Powder: The cocoa powder not only contributes to the flavor but also affects the color of the cake. High-quality cocoa powder will give a richer taste and a more appealing color.
- Be Precise with Food Coloring: The amount of red food coloring can greatly influence the final appearance of your cake. Start with a small amount and adjust until you reach your desired shade of red. Liquid gel food coloring provides intense color without adding too much liquid to the batter.
- Natural Pressure Release (NPR) is Key: Allowing the Instant Pot to release pressure naturally helps prevent the cake from collapsing. A sudden change in pressure can cause the delicate structure of the cake to fall, resulting in a denser texture.
- Check for Doneness: Even though cooking times are generally reliable, variations in Instant Pot models and ingredient temperatures can affect doneness. Use a toothpick or a cake tester to check; it should come out clean or with a few moist crumbs attached.
- Cool Completely Before Frosting: Frosting the cake while it’s still warm can cause the frosting to melt and slide off. Cooling the cake ensures that the frosting stays put and spreads evenly.
- Use a Hand Mixer for the Frosting: A hand mixer will give you smoother, fluffier cream cheese frosting by efficiently combining the butter, cream cheese, and powdered sugar and incorporating air into the mixture.
- Water in the Pot: Ensure there’s enough water in the Instant Pot before starting. The steam generated from the water is crucial for cooking the cake evenly and keeping it moist.
- Grease and Flour the Pan: Even though you use a non-stick pan, greasing and lightly flouring (or using cocoa powder) helps prevent the cake from sticking. This makes removing the cake from the pan easier without damaging it.
By following these pro tips, you’ll enhance your chances of baking a Red Velvet Cake in your Instant Pot that’s visually stunning, deliciously moist, and perfectly textured.
Faq’s
Can I use a regular cake mix for this Instant Pot recipe? You can use a regular boxed cake mix for an Instant Pot Red Velvet Cake. Follow the mix instructions for preparing the batter, then proceed with the Instant Pot baking instructions as described. Keep in mind that the cooking time might need slight adjustments based on the consistency of the mix.
How do I prevent the cake from becoming too moist or soggy? To prevent a soggy cake, don’t add too much water to the pot (1 cup is usually sufficient), and cover the cake pan with aluminum foil to protect it from the condensation inside the lid. Additionally, perform a natural pressure release to avoid sudden temperature changes affecting the cake’s texture.
Can I make this cake without food coloring? Absolutely! The food coloring doesn’t affect the flavor, so omitting it won’t change the taste of your cake. Without food coloring, the cake will have a light cocoa color rather than the traditional red.
How do I store leftovers? Leftover Red Velvet Cake should be stored in the refrigerator due to the cream cheese frosting. Cover it with plastic wrap or store it in an airtight container to keep it moist. It will last for up to 5 days.
Can I freeze Red Velvet Cake made in an Instant Pot? Yes, you can freeze the cake either frosted or unfrosted. Wrap it tightly in plastic wrap and aluminum foil to prevent freezer burn. When ready to eat, thaw it overnight in the refrigerator before serving. It can be frozen for up to 3 months.
Why did my cake come out dense or undercooked? If your cake is dense or undercooked, it might be due to overmixing the batter, which can develop the gluten and make the cake heavy. Another reason could be incorrect cooking time or pressure settings; ensure you use the “Manual” or “Pressure Cook” setting on High. Also, altitude can affect cooking times, requiring adjustments if you live at a high elevation.
Can I double the recipe in the Instant Pot? Doubling the recipe requires a larger cake pan that still fits in your Instant Pot. You can double the recipe if you have a larger pot and a suitable pan. Just keep in mind that the cooking time may need to be adjusted. However, making two separate batches is often safer to ensure even cooking.
Can I make this cake in any size Instant Pot? This recipe is generally suitable for 6-quart and larger Instant Pots. If you have a smaller model, you may need to adjust the size of your cake pan or the amount of batter to ensure it fits and cooks properly.
Is it necessary to use a trivet in the Instant Pot for baking a cake? A trivet is necessary to elevate the cake pan above the water. This prevents the cake from becoming too moist and promotes even cooking by allowing steam to circulate the pan.
How do I ensure the frosting is smooth and without lumps? To ensure smooth frosting, ensure the cream cheese and butter are at room temperature before mixing. Beat them together until light and fluffy before gradually adding the powdered sugar. Running the mixture through a fine-mesh sieve if lumps persist can help smooth it out.

Equipment Used
More Easy Instant Pot Recipes
- INSTANT POT MONKEY BREAD
- INSTANT POT DINNER ROLLS
- EASY INSTANT POT APPLE CRISP
- INSTANT POT STRAWBERRY CHEESECAKE
- INSTANT POT PECAN CHEESECAKE
Don’t Forget To Pin!

Instant Pot Red Velvet Cake
Description
Ingredients
- 2 cups all-purpose flour
- 1 cup caster sugar
- 1/3 cup butter, room temperature
- 3 large eggs
- 1/3 cup vegetable oil
- 1 1/2 tablespoons cocoa powder
- 2 teaspoons vanilla extract
- 1 teaspoon baking soda
- 1/3 teaspoon salt
- 2/3 cup buttermilk
- 1 tablespoons white vinegar
- 1 tablespoon red food coloring: liquid or gel
Instructions
- Combine buttermilk and vinegar and stir. Set aside.
- In a bowl, combine all-purpose flour, cocoa powder, baking soda, and salt. Stir very well to blend.
- In a large mixing bowl, beat together with an electric mixer butter and sugar for 2-3 minutes, until creamy.
- Add oil and beat again to combine.
- Add the eggs one by one, beating after each addition until combined.
- Scrape well the sides of the bowl.
- Add some food coloring and mix gently with a rubber spatula. The batter should have an intensive red or magenta color.
- Gradually add the dry ingredients, alternating with the buttermilk, mixed with vinegar.
- Mix gently with the rubber spatula until both are absorbed, and the batter is uniform.
- Pour the batter into the prepared pan.
- Cover the top of the pan with a piece of paper towel and wrap it tightly with aluminum foil. Make sure there is room for the cake to rise, so keep the foil and the paper loose.
- Pour 3/4 cup water into the Instant Pot. Use the trivet with the handles up to place the cake pan into the Pot.
- Close the lid and make sure the valve is in the Seal position. Select the “Manual” setting and dial 40 minutes on high pressure.
- When the program is over, let the pressure release naturally for 15 minutes. Release any remaining pressure manually and open the lid. Remove the pan from the Instant Pot, holding the trivet handles with kitchen mittens. Test the cake for doneness by inserting a toothpick in the middle: if it comes out clean, the cake is made. If it comes out with some dough, wrap the pan again with a paper towel and aluminum foil and cook for another 10 minutes. Let the pressure release naturally for 10 minutes.
- Remove the cake from the pan and let it cool until room temperature before assembling it.
Equipment
- Instant Pot, or Ninja Foodi
- Cooking Spray
Nutrition
Share this recipe
We can’t wait to see what you’ve made! Mention @forktospoon or tag #forktospoon!

Laurie
jUST SAY WOW.
Laura Marin
Is so good to bake it I want to make more people try to they say wow