Stuffed peppers used to be an all-afternoon situation at my house. Preheat the oven, par-boil the peppers, bake for 45 minutes, wait for the cheese to finally brown. By the time dinner hit the table, everyone had already snacked their way out of hunger.
Then I started making them in the Ninja Crispi — and now they’re a weeknight meal.

If you’re not familiar with it, the Crispi Pro (model AS101CY, the Cyberspace colorway) is Ninja’s 1800-watt countertop glass air fryer. It comes with a 6-quart and a 2.5-quart CleanCrisp glass container, and the modular base swaps between 2.5-qt, 4-qt, and 6-qt glassware. Six functions — Max Crisp, Air Fry, Bake/Proof, Roast, Recrisp, and Dehydrate — plus real temperature control up to 450°F, which matters a lot here. Stuffed peppers want steady, moderate heat, not a preset that guesses for you.
The other reason it’s perfect for this recipe: the glass. You can watch the cheese go from melted to blistered and pull it at exactly the right second. And when there are leftovers, the lid snaps right onto the same container you cooked in.
Why the Crispi Beats the Oven for Stuffed Peppers
- No preheat. You’re cooking two minutes after you plug it in.
- Better cheese. Circulating air browns the top instead of just melting it into a puddle.
- Peppers keep their bite. They soften without collapsing into mush, which is the classic oven-baked stuffed pepper failure.
- One dish, start to finish. Cook in the glass, serve from the glass, store in the glass, re-crisp in the glass tomorrow.
Ingredients Needed
Makes 6 servings (12 pepper halves). Full measurements are in the printable recipe card below — here’s what each ingredient is doing and why it matters.
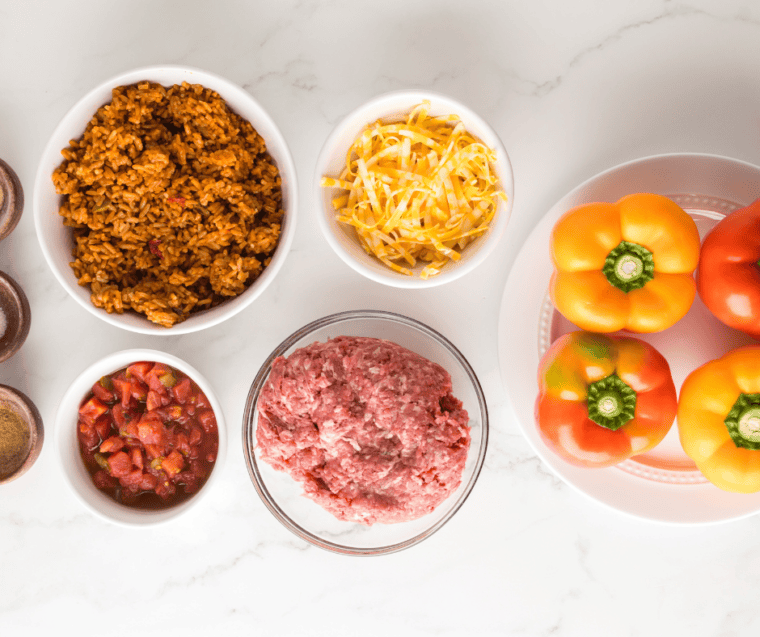
- Bell peppers: The edible bowl and the backbone of the dish. Look for peppers that sit flat and feel heavy for their size, with thick walls that won’t collapse under a heavy filling. Red, orange, and yellow are riper and noticeably sweeter, which plays beautifully against the cumin; green peppers are sharper and more vegetal.
- Ground beef: The savory base. An 85/15 blend gives you enough fat to keep the filling moist through the air frying, but you’ll want to drain it well — excess grease pools in the bottom of the pepper and keeps the cheese from browning.
- Ground cumin: The single spice that makes this taste like stuffed peppers instead of meatloaf in a vegetable. Cumin is earthy and warm, and stirring it into the hot beef rather than the cold mix blooms the oils and doubles the flavor payoff.
- Salt: Not optional and not just for seasoning — salt draws moisture out of the beef so it browns instead of steams, and it wakes up the tomatoes and cheese. Add it while the beef is cooking, not after.
- Garlic powder: Powder over fresh here on purpose. It distributes evenly through the filling and won’t scorch under the Crispi’s circulating heat the way minced fresh garlic can.
- Diced tomatoes with green chilis: This is the moisture and the mild heat in one can. Drain it well — the flavor stays behind, and the liquid that would otherwise turn your rice soggy goes down the sink.
- Spanish rice: The filler that stretches a pound of beef into six servings and soaks up the drippings. Cold, day-old rice works best because it’s already dried out slightly and won’t turn gluey. Homemade is worth it if you have time — try this Instant Pot Spanish Rice, or take the shortcut with Instant Pot Goya Yellow Rice.
- Colby Jack cheese: Doing double duty. A half cup goes into the filling as a binder so nothing tumbles out on the first forkful, and the rest goes on top, where the Crispi’s circulating air browns it into blistered, golden spots. Colby Jack melts smoothly and stays mild — it won’t fight the cumin.
How to Make ninja crispi stuffed peppers
Step 1: Slice each pepper in half lengthwise, straight through the stem. Pull out the seeds and white ribs. Halving them (instead of standing them upright) is the key move for the Crispi — the halves sit low and flat, the hot air reaches the filling directly, and you can fit far more in a batch.
Step 2: Stovetop is fastest: cook the ground beef in a skillet over medium-high heat, breaking it up as it goes, about 6–8 minutes until no pink remains. Drain the fat. Want to skip the skillet? You can brown it right in the 2.5-qt glass container. Set the Crispi to Air Fry at 375°F for 12 minutes, adding the beef in a loose layer and stirring every 4 minutes to break up the clumps. Drain before mixing.
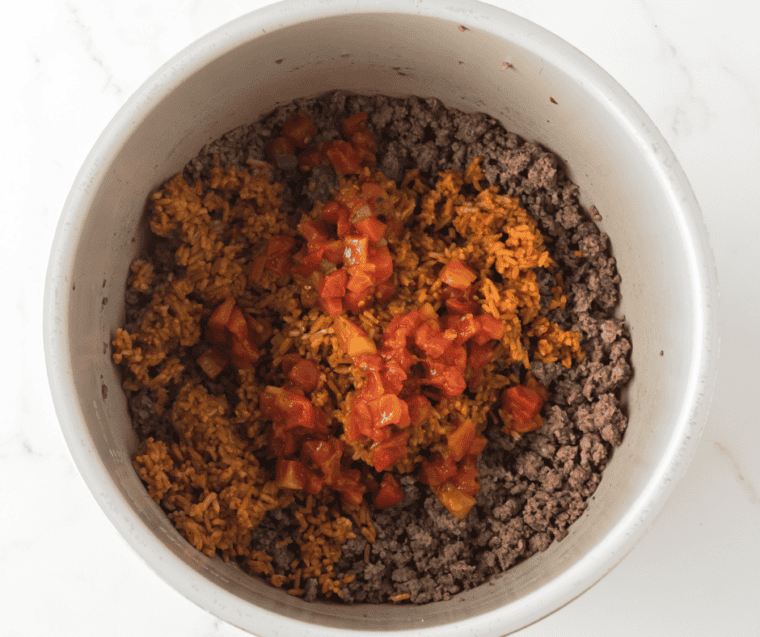
Step 3: Stir the cumin, salt, and garlic powder into the hot beef so the spices bloom. Add the drained diced tomatoes with green chilis, then fold in the cooked Spanish rice and ½ cup of the Colby Jack. The cheese in the filling is what keeps everything bound together instead of tumbling out on the first forkful.
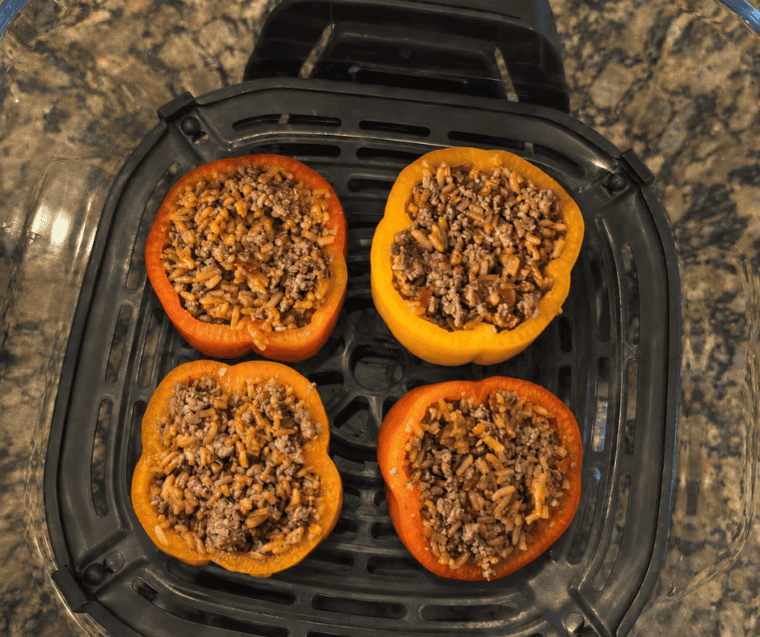
Step 4: Arrange as many pepper halves as fit in a single layer in the 6-qt container, cut side up. Set to Air Fry at 375°F for 5 minutes. This gives them a head start so they’re tender by the time the filling is hot — no par-boiling required.
Step 5: Pack the filling into each half, mounding it slightly. Return to the Crispi and Air Fry at 375°F for 10 minutes.
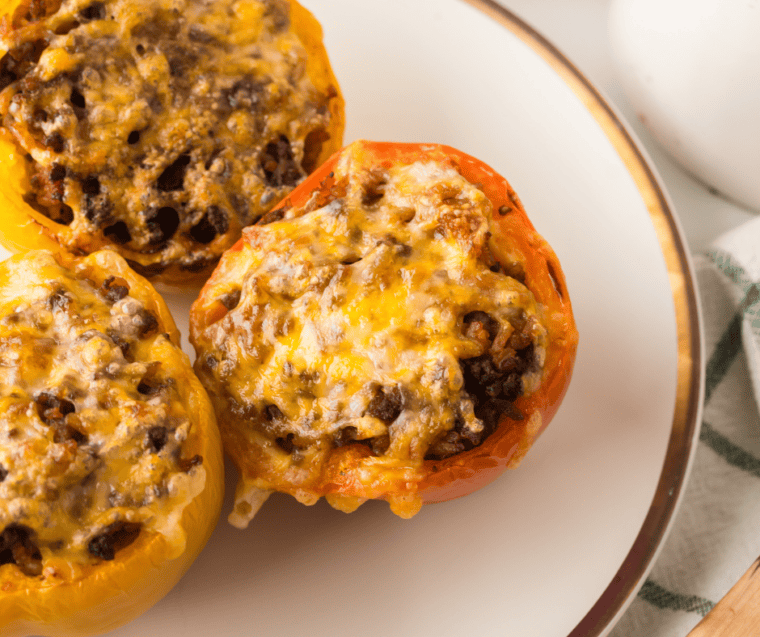
Step 6: Top each pepper with the remaining Colby Jack and cook 3 more minutes at 375°F, watching through the glass until it’s bubbling with a few golden-brown spots. Pull them the moment they look right to you. Let them rest 5 minutes before serving — the filling is molten straight out of the machine.
Substitutions and Variations
- Swap the meat. Ground turkey or ground chicken both work; add a tablespoon of olive oil since lean poultry doesn’t render much fat. Ground Italian sausage brings its own seasoning and a lot more richness. For a vegetarian version, use two cups of black beans or a plant-based crumble.
- Swap the rice. Cooked white or brown rice, cilantro-lime rice, quinoa, or cauliflower rice all slot in. If you’re using plain rice instead of Spanish rice, bump the cumin to 1½ teaspoons and add a tablespoon of tomato paste so the filling doesn’t taste flat.
- Swap the cheese. Sharp cheddar for more bite, pepper Jack for heat, Monterey Jack for a milder melt, or queso quesadilla for the smoothest pull. Shredding your own melts better than pre-shredded, which is coated in anti-caking starch.
- Swap the seasoning. Three and a half tablespoons of taco seasoning can replace the cumin, salt, and garlic powder entirely. A batch of homemade copycat McCormick taco seasoning takes five minutes, skips the fillers, and lets you control the salt.
- Swap the tomatoes. No diced tomatoes with green chilis on hand? Use ½ cup of chunky salsa (drained), or plain diced tomatoes plus a tablespoon of canned diced green chilis.
- Turn up the heat. Add ½ teaspoon of chili powder or a pinch of cayenne to the beef, stir in diced jalapeño, or reach for the hot version of the canned tomatoes.
- Stretch the filling. A cup of black beans, frozen corn, or sautéed onion bulks it up and easily feeds two more people without another pound of beef.
- Make it a taco night. The same filling works as a base for air fryer taco meat or ground beef taco bowls — make a double batch and use half for each.
Batching in the 6-Quart
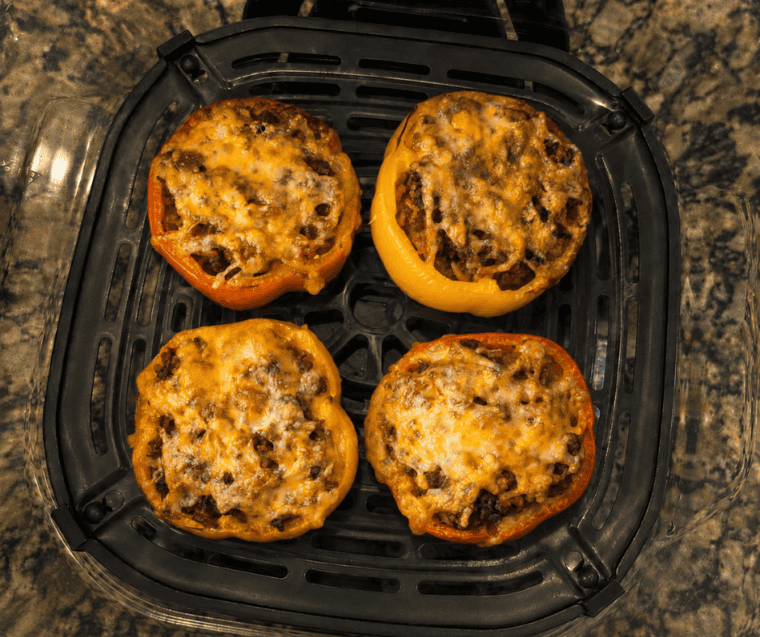
Twelve pepper halves won’t all fit at once, and crowding them is the fastest way to steam instead of crisp. Expect two batches of about six halves each in the 6-qt container. Batch one stays perfectly warm under a snap-lock lid while batch two cooks, or you can hit it with 3 minutes on Recrisp right before serving.
Cooking for two? Use the 2.5-qt container for four halves and freeze the rest of the filling.
Tips That Actually Matter
- Drain the tomatoes well. Extra liquid is the enemy of a crisp top. Press them against a strainer with a spoon.
- Use day-old rice if you have it. Cold, slightly dried-out Spanish rice absorbs the beef drippings instead of turning gluey.
- Don’t skip the 5-minute pre-crisp. It’s the difference between tender peppers and squeaky, half-raw ones.
- Shred your own cheese if you’re feeling ambitious. Pre-shredded Colby Jack is coated in anti-caking starch that keeps it from melting quite as smoothly.
- Level up: a spoonful of sour cream, sliced green onion, and a few pickled jalapeños on top turn this into something worth photographing.
Leftovers and Reheating
This is where the Crispi earns its keep. Snap a lid on the glass container and refrigerate for up to 4 days. To reheat, take the lid off, set the base back on, and run Recrisp for 4–5 minutes. The cheese re-browns and the pepper doesn’t go soggy the way it would in the microwave.
The filling also freezes well on its own for up to 3 months — stuff fresh peppers whenever the craving hits.

FAQ
Can I use ground turkey or chicken instead? Absolutely. Add a tablespoon of olive oil when browning, since leaner meat doesn’t render much fat, and consider bumping the salt slightly.
Do I need to cook the rice first? Yes. There isn’t enough moisture or time in this method to cook raw rice through. Boxed Spanish rice, a pouch of the microwave kind, or leftover takeout rice all work.
What if I only have the 2.5-qt container? Cook in three or four smaller batches, or halve the recipe. The 2.5-qt actually runs a little hotter and browns the cheese beautifully.
Can I make these on the original Ninja Crispi? Yes — the original uses preset ranges instead of exact temperatures, so use the Air Fry setting and check a couple of minutes early. The 4-qt container fits about four halves at a time.
Are they spicy? Mild. The green chilis in the tomatoes add flavor more than heat. For real spice, swap in a hotter salsa or add ½ teaspoon of chili powder to the beef.
The Bottom Line
Six peppers, a pound of beef, and about 30 minutes of actual work. The Crispi Pro turns a Sunday-dinner project into a Tuesday-night reality, and the fact that dinner, storage, and tomorrow’s lunch all happen in the same piece of glass means the sink stays nearly empty.
If you’ve been on the fence about the Ninja Crispi Pro, this is the recipe that sells it.

Ninja Crispi Stuffed Peppers
Description
Ingredients
For the peppers
- 6 bell peppers, halved lengthwise, seeds and ribs removed
For the filling
- 1 pound ground beef, 85/15
- 1 teaspoon ground cumin
- 1 teaspoon salt
- 1 teaspoon garlic powder
- ½ cup diced tomatoes with green chilis, well drained
- 2 cups cooked Spanish rice
- 1½ cups shredded Colby Jack cheese, divided
Instructions
- Prep the peppers. Slice each bell pepper in half lengthwise, straight through the stem. Remove the seeds and white ribs.
- Brown the beef. Cook the ground beef in a skillet over medium-high heat for 6 to 8 minutes, breaking it up as it cooks, until no pink remains. Drain the fat. (Skillet-free option: air fry the beef in the 2.5-qt glass container at 375°F for 12 minutes, stirring every 4 minutes. Drain.)
- Season and mix. Stir the cumin, salt, and garlic powder into the hot beef. Add the drained diced tomatoes with green chilis, then fold in the cooked Spanish rice and ½ cup of the Colby Jack cheese.
- Pre-crisp the peppers. Arrange the pepper halves cut side up in a single layer in the 6-qt container. Air fry at 375°F for 5 minutes.
- Stuff and cook. Pack the filling into each pepper half, mounding slightly. Air fry at 375°F for 10 minutes.
- Add the cheese. Top with the remaining 1 cup of Colby Jack and air fry at 375°F for 3 more minutes, until the cheese is bubbling with golden-brown spots.
- Rest and serve. Let the peppers rest 5 minutes before serving — the filling is molten straight out of the machine.
Equipment
- Ninja Crispi Pro Glass Air Fryer (or original Ninja Crispi)
- 6-qt CleanCrisp glass container with crisper plate
- 2.5-qt CleanCrisp glass container (optional, for browning beef)
- Skillet (optional, for browning beef)
- Fine mesh strainer
- Cutting board and sharp knife
- Mixing Bowl
Notes
- Batching: About 6 pepper halves fit in the 6-qt container at a time, so plan on two batches. Hold batch one under a snap-lock lid and hit it with 3 minutes on Recrisp before serving.
- Drain everything well. Excess liquid from the beef or tomatoes keeps the cheese from browning.
- Day-old rice works best — it absorbs the beef drippings instead of turning gluey.
- Original Ninja Crispi: use the Air Fry setting and check a couple of minutes early, since it uses preset temperature ranges rather than exact temps. About 4 halves fit in the 4-qt container.
- Storage: Snap a lid on the glass container and refrigerate up to 4 days. Reheat on Recrisp for 4 to 5 minutes. Filling alone freezes up to 3 months.
Nutrition
Share this recipe
We can’t wait to see what you’ve made! Mention @forktospoon or tag #forktospoon!