Make creamy, rich Chocolate Peanut Butter Ice Cream in your Ninja Creami! Easy recipe with simple ingredients for a smooth, indulgent homemade treat.

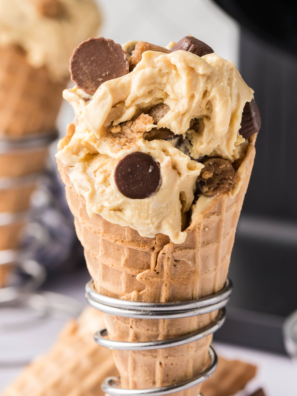
If you’re obsessed with your Ninja Creami (like I am), this Chocolate Peanut Butter Ice Cream is about to become your new go-to. It’s rich, creamy, ridiculously easy, and tastes like a frozen Reese’s cup — but better because you made it.
This Easy Ninja Creami Chocolate Peanut Butter Ice Cream hits that perfect balance between chocolatey indulgence and salty peanut butter goodness. No weird ingredients, no fancy tricks, just your Ninja Creami doing what it does best.

🍦 Why You’ll Love This Recipe!
- Quick to prep: Mix it up in minutes — the freezer does the rest.
- Simple ingredients: Pantry staples like milk, cocoa, and peanut butter.
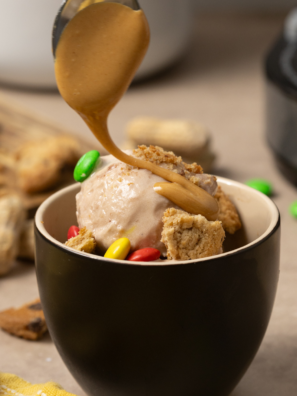
- Customizable: Go classic, or swirl in chocolate chips, peanut butter cups, or even a drizzle of caramel.
- Creamy texture: The Ninja Creami gives you that professional ice cream shop feel without the price tag.
🥣 Ingredients You’ll Need

- Whole milk: Makes the base rich, smooth, and creamy.
- Unsweetened cocoa powder: Adds deep chocolate flavor without extra sweetness.
- Granulated sugar: Sweetens and balances the peanut butter and cocoa.
- Creamy peanut butter: Gives that classic nutty, salty richness.
- Vanilla extract: Enhances flavor and adds a warm, sweet aroma.
- Salt: Brings out the chocolate and peanut butter flavors.
- Optional mix-ins: Add crunch and extra flavor with candy pieces.
How To Make Easy Ninja Creami Chocolate Peanut Butter Ice Cream

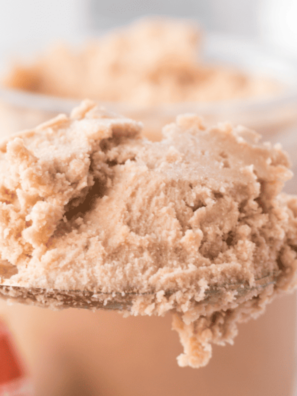
Step 1: In a blender or mixing bowl, whisk together milk, cocoa powder, sugar, peanut butter, vanilla, and salt until smooth. Make sure everything’s fully dissolved — no cocoa clumps allowed.

Step 2: Pour the mixture into your Ninja Creami pint container. Pop the lid on and freeze it on a flat surface for at least 24 hours. (Yes, 24 — don’t rush it, or your Creami will give you a milkshake instead of ice cream.)

Step 3: Once fully frozen, remove from the freezer and let it sit for about 5–10 minutes. Then, place it into your Ninja Creami machine and run the Ice Cream function.
Step 4: If it’s a little crumbly, add 1–2 tablespoons of milk and hit Re-spin. This brings it right to that perfect creamy consistency.
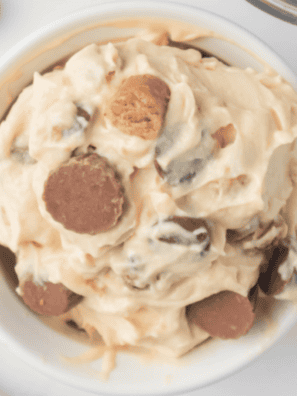
Step 5: If you want extra texture, make a small well in the middle and add your mix-ins. Run the Mix-in cycle and let the Creami do its magic.

Easy Ninja Creami Chocolate Peanut Butter Ice Cream Recipe Tips
- Use creamy peanut butter for a smooth texture; avoid natural or chunky types.
- Freeze the mixture for at least 24 hours to ensure scoopable, thick ice cream.
- Blend ingredients thoroughly to remove cocoa lumps and fully incorporate peanut butter.
- Re-spin if crumbly: add 1–2 tablespoons of milk and run the Re-spin function for silky creaminess.
- Add mix-ins last during the Mix-in cycle to avoid interfering with smooth spinning.
- Serve fresh for best texture; store leftovers in the pint and re-spin before serving again.
Storing Instructions
Store leftover ice cream in the Ninja Creami pint with the lid tightly sealed. Keep it in the freezer for up to 1 week, and before serving again, let it sit for 5–10 minutes and run the Re-spin function to restore its creamy texture.

Easy Ninja Creami Chocolate Peanut Butter Ice Cream Recipe Faqs
Can I make this dairy-free? Yes! Substitute almond, oat, or coconut milk and use a dairy-free peanut butter and cocoa to keep it creamy.
Why is my ice cream crumbly after spinning? This usually happens if it wasn’t fully frozen or the mixture needs a little moisture. Add 1–2 tablespoons of milk and run the Re-spin function.
Can I add mix-ins before freezing? It’s best to add chocolate chips, peanut butter cups, or candy during the Mix-in cycle. Adding them beforehand can interfere with smooth spinning.
How long can I store leftovers? Keep leftovers in the Ninja Creami pint with the lid sealed for up to 1 week. Re-spin before serving to restore creaminess.
Can I make this ahead of time for a party? Absolutely! Freeze the base at least 24 hours in advance, then spin and add mix-ins just before serving for fresh, creamy ice cream.
Recommended Equipment
- Ninja Creami Ice Cream Machine
- Ninja Creami Pint Containers
- Mixing Bowls That You Will Love, also known as the prettiest mixing bowls, I have ever seen!
Don’t Forget To Follow Us Along on Social Media; Instagram, Facebook, and TikTok, and Join Our Facebook Page and group for all your Air Fryer Recipes and Tips!

Easy Ninja Creami Chocolate Peanut Butter Ice Cream
Description
Ingredients
- 1 cup whole milk, or 2% if you prefer lighter
- 2 tablespoons unsweetened cocoa powder
- ¼ cup granulated sugar
- 2 tablespoons creamy peanut butter
- ½ teaspoon vanilla extract
- Pinch of salt
- Optional mix-ins: mini peanut butter cups, chocolate chips, or crushed Reese’s Pieces
Instructions
- In a blender or mixing bowl, whisk together milk, cocoa powder, sugar, peanut butter, vanilla, and salt until smooth. Make sure there are no cocoa lumps.
- Pour the mixture into your Ninja Creami pint container, seal with the lid, and freeze on a flat surface for at least 24 hours.
- Remove the pint from the freezer and let it sit 5–10 minutes. Place in the Ninja Creami and run the Ice Cream function.
- If the ice cream is crumbly, add 1–2 tablespoons of milk and run the Re-spin function to achieve a creamy texture.
- Make a small well in the center and add any desired mix-ins. Run the Mix-in cycle to incorporate them evenly.
- Scoop immediately for best texture. Leftovers can be stored in the pint and re-spun before serving again.
Equipment
- Ninja Creami Ice Cream Machine
- Ninja Creami Pint Container
- Ninja Creami Pint Container Lid
Nutrition
Share this recipe
We can’t wait to see what you’ve made! Mention @forktospoon or tag #forktospoon!