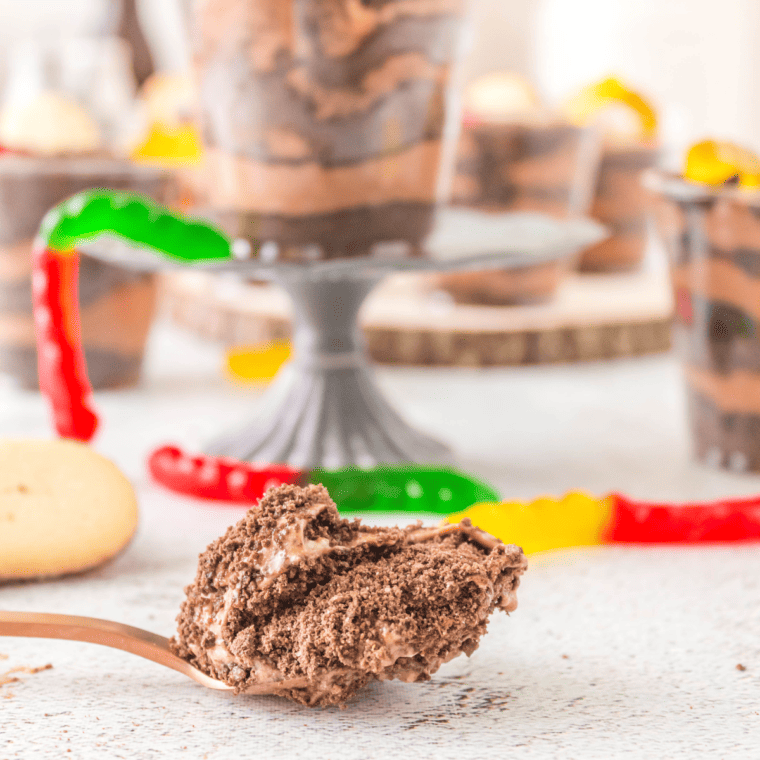
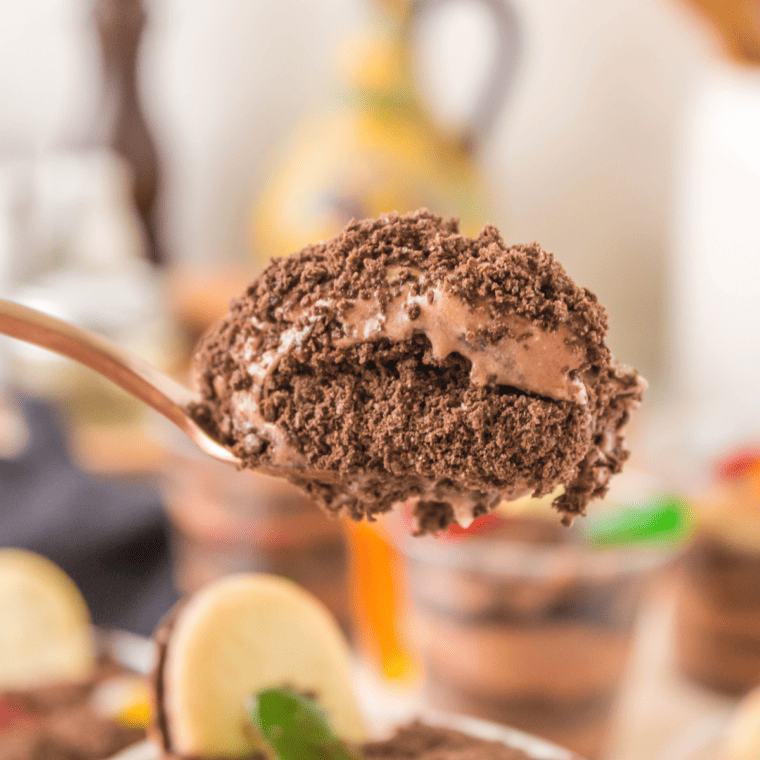
Today, we’re diving into a fun, whimsical, and delicious treat – Dirt Cups!! These aren’t your ordinary desserts; they’re a playful mix of creamy, chocolatey goodness that will transport you straight back to your childhood. 🎈

Imagine layers of smooth, rich chocolate pudding interspersed with crumbly, sweet “dirt” from crushed cookies. Each cup is topped off with playful gummy worms, making it a treat for the taste buds and a feast for the eyes! 🐛🍪
Perfect for parties, family gatherings, or just a special treat for the kids (and the kids in all of us), Dirt Cups are as fun to make as they eat. Plus, they’re incredibly easy to whip up with minimal ingredients and no baking required! 🎉
Stay tuned as we share the simple steps to creating these delightful Dirt Cups, guaranteed to bring smiles and giggles to your table. Get your spoons ready – it’s time to dig into some delicious “dirt”! 😄
What Are Dirt Pudding Cups?
Dirt Pudding Cups, playfully known as “Dirt Cups,” are a fun and whimsical dessert that’s particularly beloved by children but enjoyed by people of all ages. Here’s what makes them a unique and delightful treat:
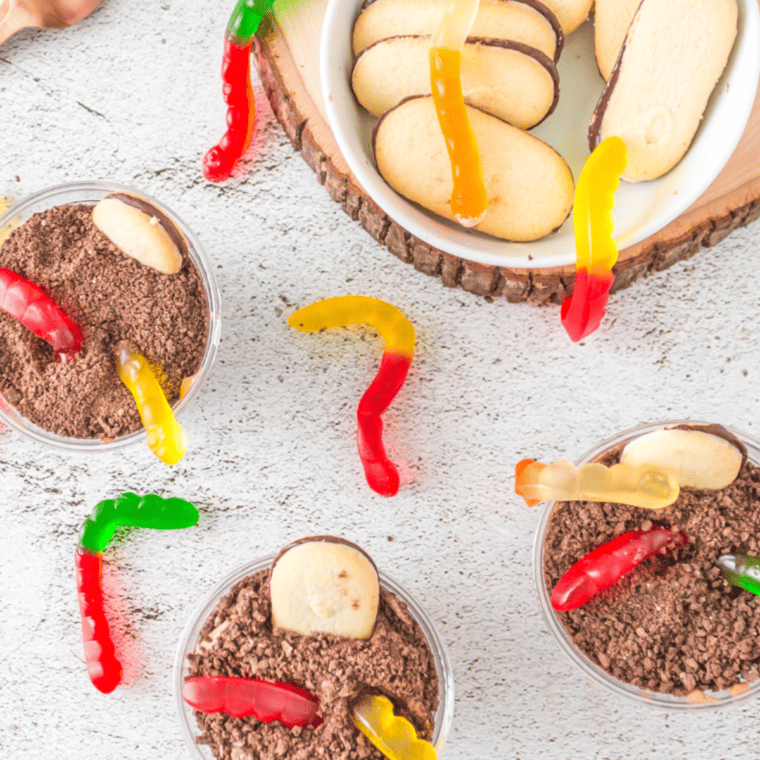
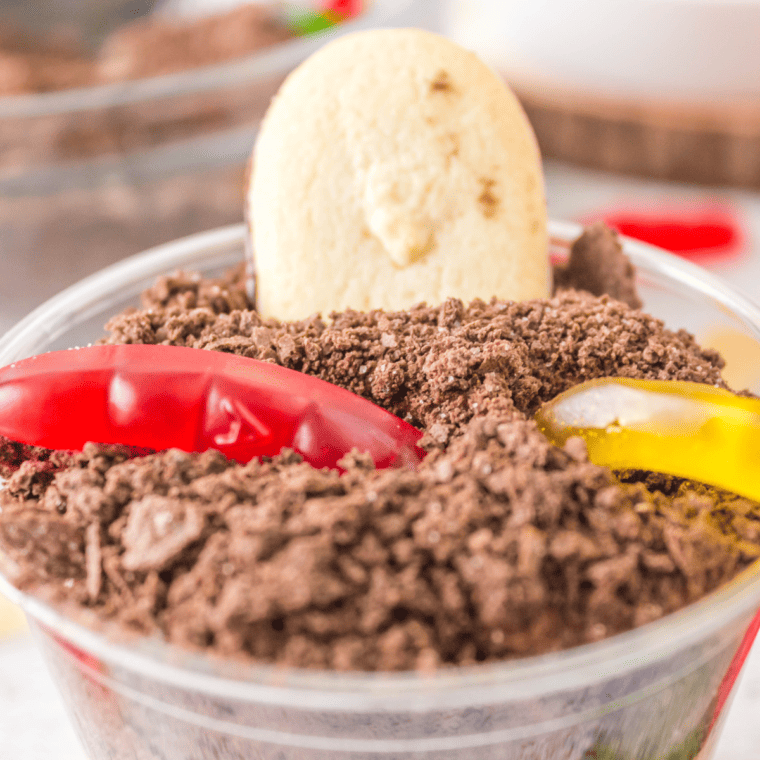
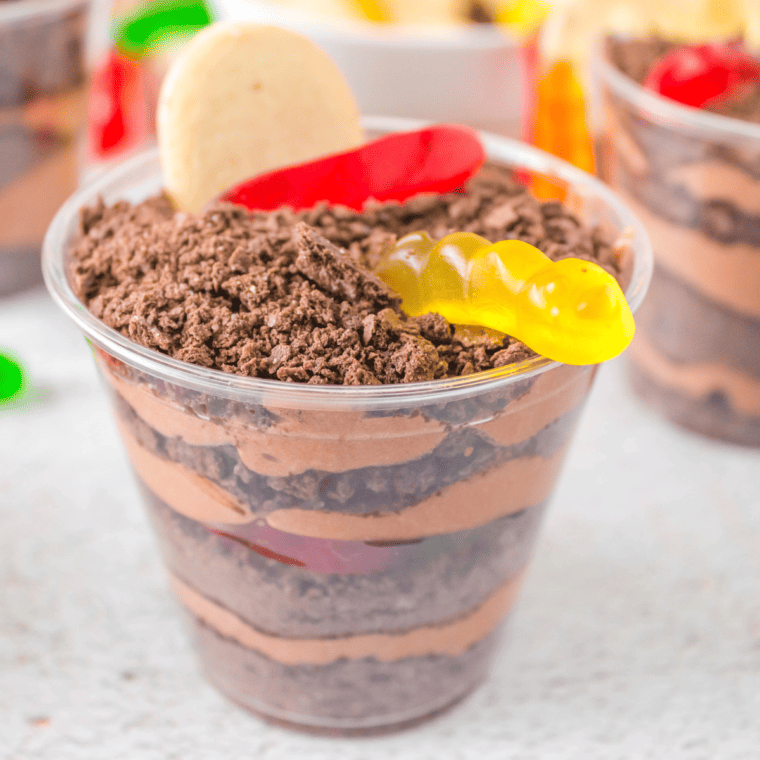
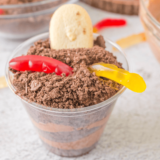
- Visual Appeal: They are designed to mimic a small pot of dirt but are completely edible and delicious. The “dirt” is typically made from crumbled chocolate cookies.
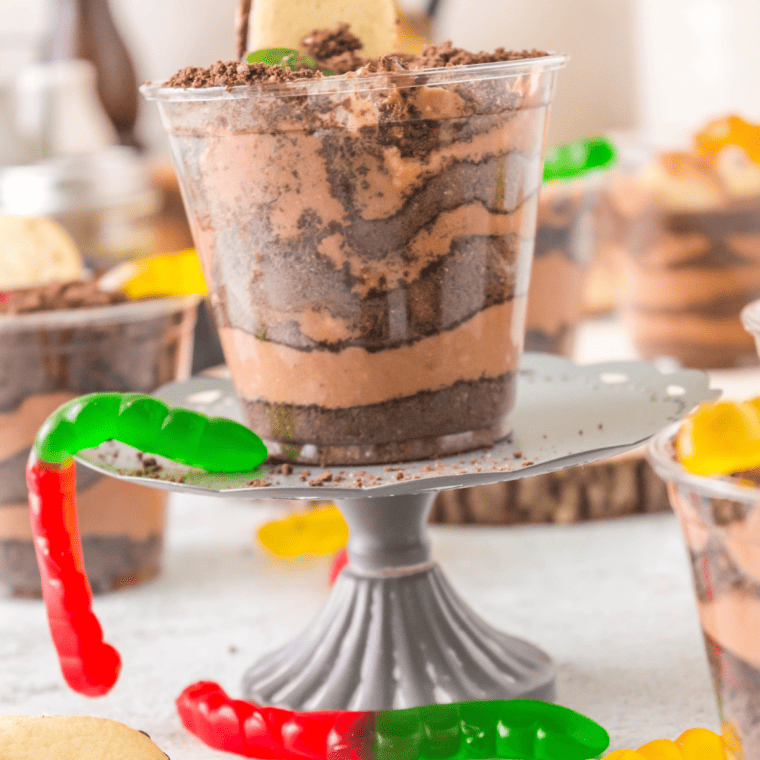
- Composition: The base layer usually consists of chocolate pudding, then topped with crumbled cookies to resemble soil.
- Gummy Worms: To enhance their playful appearance, Dirt Cups are often garnished with gummy worms. The worms are partially buried in the cookie crumbles, adding to the illusion of real earth and worms.
- No-Bake Dessert: One of the appealing aspects of Dirt Cups is their simplicity and the fact that no baking is required. They’re made using ready-made ingredients that are assembled.
- Versatility: While chocolate pudding and chocolate sandwich cookies are standard, the recipe can be varied. Some versions use vanilla or another flavored pudding, and additional layers like whipped cream can be added.
- Occasions: Dirt Cups are especially popular at children’s parties, for Halloween themes, or as a creative dessert for garden-themed events. They’re also a hit as a casual treat or a fun project for kids in the kitchen.
- Ease of Preparation: They are extremely easy to prepare, making them a great option for involving children in the kitchen or for quick preparation for a party.
- Serving Style: Typically served in individual cups or small bowls, Dirt Pudding Cups are a treat to both the eyes and the palate, offering a blend of creamy and crunchy textures.
In summary, Dirt Pudding Cups are more than just a dessert; they’re an experience – playful, delicious, and sure to bring a smile to anyone’s face.

Why You Will Love Making Dirt Cups
You’re going to love making Dirt Cups for several delightful reasons:
- Fun and Playful: The whimsical nature of Dirt Cups, with layers of “dirt” and “worms,” makes the preparation process enjoyable, especially if you involve kids. It’s a fantastic way to add fun to your cooking routine.
- Simple and Easy: Dirt Cups are incredibly easy to make, with minimal baking and ingredients. They’re almost foolproof, making them perfect for beginner cooks or when you want a quick and hassle-free dessert.
- Versatile and Customizable: You can easily adapt this recipe to suit different tastes. Whether you want to use different types of cookies, add layers of whipped cream, or experiment with various pudding flavors, there’s plenty of room for creativity.
- A Hit with Kids: Kids adore Dirt Cups. The combination of creamy pudding, crunchy cookies, and gummy worms is a surefire winner among the younger crowd.
- Perfect for Parties and Gatherings: Their unique presentation makes Dirt Cups a hit at parties, especially themed ones like Halloween or garden parties. They’re also great as a conversation starter at potlucks.
- Convenient Portion Control: Serving in individual cups makes portion control easy and ensures everyone gets their fair share of this delightful dessert.
- No Special Equipment Needed: Unlike many desserts, you don’t need any special kitchen gadgets to make Dirt Cups. Just a few simple kitchen tools, and you’re good to go.
- Engaging Activity: Making Dirt Cups can be fun for a kids’ party or a bonding session in the kitchen. It’s a sweet way to interest children in cooking and food preparation.
- Deliciously Satisfying: Beyond their playful look, Dirt Cups are genuinely delicious. The combination of smooth pudding and crunchy cookies is a classic treat satisfying for any sweet tooth.
- Great for All Seasons: Dirt Cups aren’t just for summer or Halloween; they can be a delightful treat anytime. Their ease of preparation makes them a go-to dessert, regardless of season.
In essence, making Dirt Cups is not only about creating a tasty dessert but also about enjoying the process, unleashing creativity, and indulging in a bit of whimsy and fun in the kitchen.
Ingredients Needed
- Chocolate Pudding: Forms the base of your Dirt Cups, offering a rich, creamy texture and a deep chocolate flavor that’s universally loved.
- Oreo Cookies (or similar chocolate sandwich cookies): These are crushed to resemble ‘dirt,’ providing a delightful crunchy contrast to the smooth pudding.
- Gummy Worms: Adding an element of fun and surprise, these gummy treats enhance the playful ‘dirt’ theme and add a chewy texture and a sweet taste.
- Whipped Cream (optional): A dollop on top can add a light and airy texture, making your Dirt Cups even more indulgent.
- Chocolate Sprinkles (optional): For an extra touch of chocolate and a bit more ‘dirt’ effect, chocolate sprinkles can be a great addition.
- Plastic Cups or Small Bowls: While not an edible ingredient, these serve as the perfect container for your Dirt Cups, allowing the layers to be beautifully displayed.
Each of these ingredients contributes to the fun and tastiness of Dirt Cups, creating a classic dessert that’s sure to bring smiles and a bit of whimsy to any table.
How to Make Oreo Dirt Cups
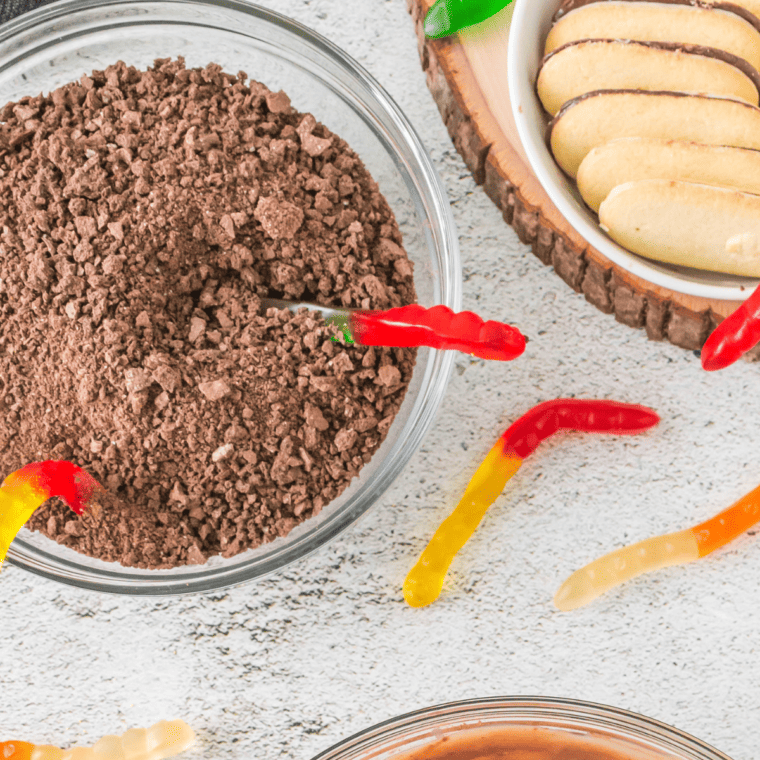
Crush the cookies in a food processor to create Oreo crumbs. If you don’t have a food processor, put the cookies in a Ziploc bag. Take all the air out and close the bag. Roll a rolling pin to crush them to fine crumbs. Set aside.
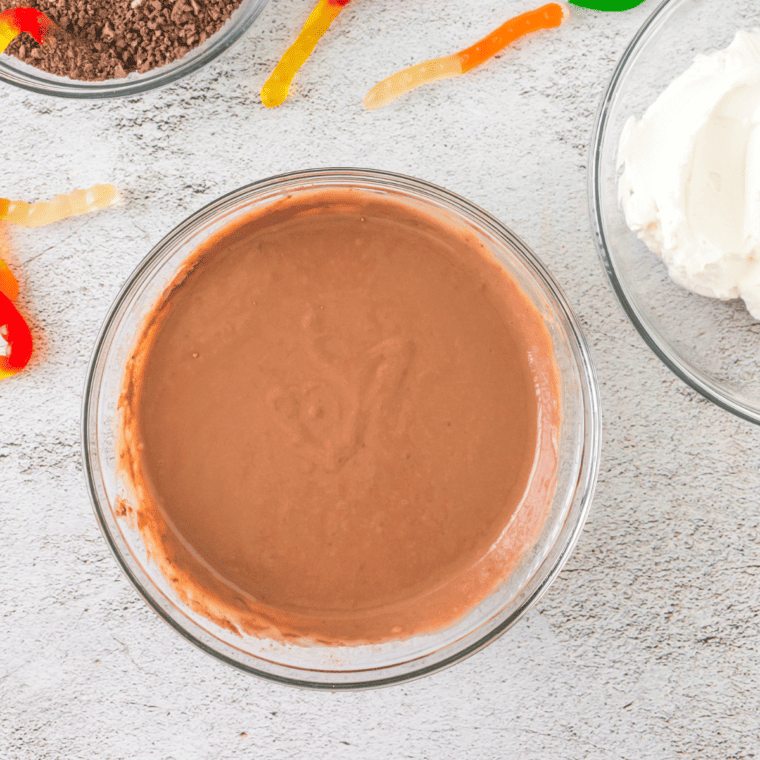
Pudding Mix: To create the chocolate pudding layer, Combine the instant pudding mix, cocoa powder, and milk in a large mixing bowl. Whisk until all ingredients are combined.
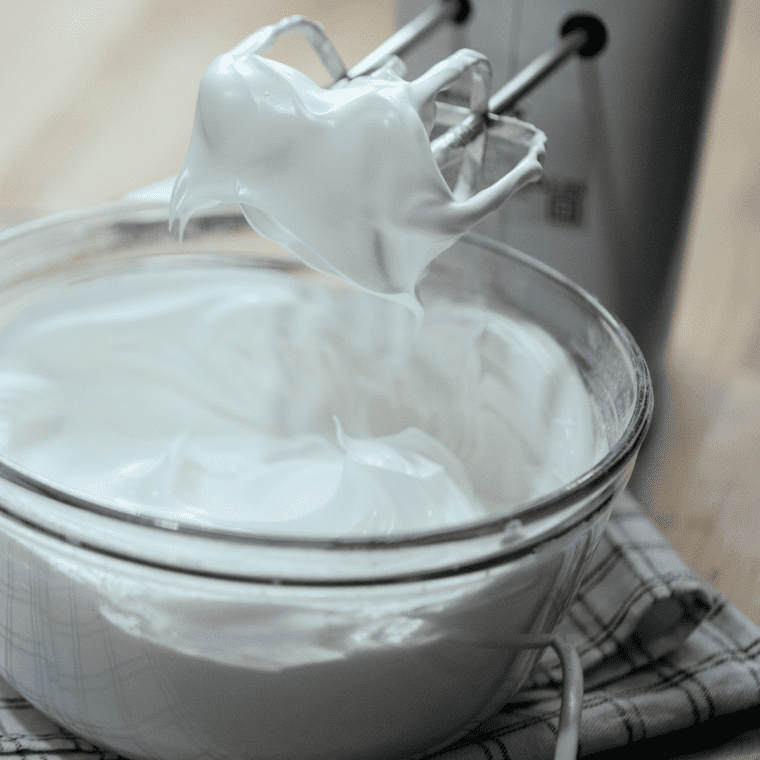
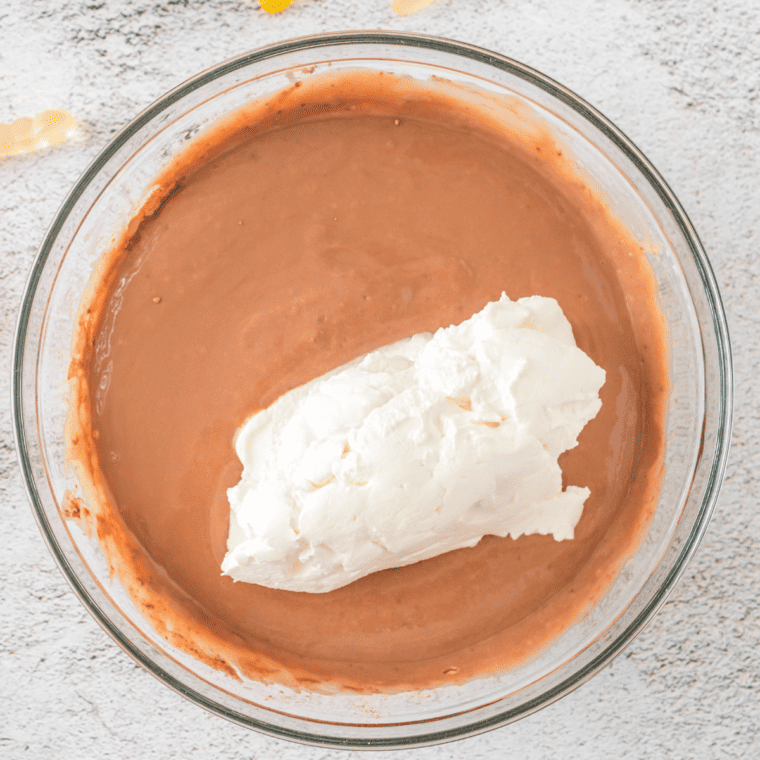
Whipped Cream (if homemade): With a hand mixer, whip the cream to a soft peak in a large bowl. Add the powdered sugar and vanilla extract and whip until the desired consistency is reached, stiff peak. Fold the whipped topping into the pudding mixture. Gently mix until well combined. If you want, you could also use cool whip in place of the cream here.
Assemble: Layer 2 tablespoons of crushed graham crackers in the 9 oz clear plastic cups. Gently add in 2 tablespoons of chocolate pudding. Repeat until the cup is full. Finish by sprinkling graham crackers on top to create the dirt.
Decoration: Cut the cookie in half (in this case, the Milano cookies) and stick the cut side down into the pudding. Place the gummy worm as desired. Keep refrigerated until ready to serve!
Recipe Variations
Dirt Cups are incredibly versatile and easy dessert, allowing for numerous creative variations. Here are some ideas to customize and add a twist to the classic Dirt Cup recipe:
- Mint Chocolate Dirt Cups: Use mint-flavored chocolate cookies for the “dirt” and add a layer of mint chocolate chip ice cream for a refreshing twist.
- Peanut Butter Dirt Cups: Mix a layer of smooth or crunchy peanut butter with the pudding. You can also use peanut butter-flavored cookies for the dirt layer.
- Coffee-Infused Dirt Cups: Add a teaspoon of instant coffee or espresso powder to the pudding mix for a subtle coffee flavor.
- Strawberry Dirt Cups: Layer sliced strawberries between the pudding and cookie layers for a fruity addition.
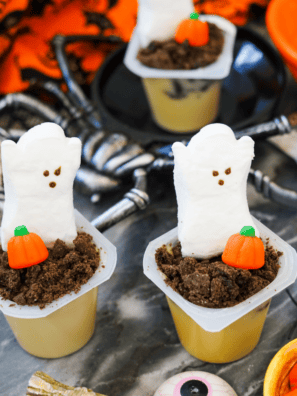
- Halloween-themed Dirt Cups: Use gummy spiders, candy eyeballs, or skeleton candy to decorate them for a Halloween treat.
- Vegan Dirt Cups: Use a dairy-free pudding mix, plant-based milk, vegan cookies, and whipped cream to create a vegan-friendly version.
- Banana Dirt Cups: Add banana slices between layers for a banana-chocolate combination.
- Cheesecake Dirt Cups: Incorporate a layer of no-bake cheesecake filling (cream cheese, sugar, and lemon juice) beneath the cookie crumbs.
- S’mores Dirt Cups: Include a layer of marshmallow fluff and use graham crackers instead of chocolate cookies. You can even lightly torch the top for a toasted marshmallow effect.
- Coconut Dirt Cups: Mix shredded coconut with the cookie crumbs and use coconut cream in the pudding for a tropical twist.
- Red Velvet Dirt Cups: Use red velvet cake crumbs instead of cookies for the dirt and cream cheese frosting mixed with the pudding for a red velvet cake-inspired version.
- Oreo Cheesecake Dirt Cups: Combine crushed Oreos with a layer of no-bake Oreo cheesecake filling for a double Oreo delight.
These variations add a unique flavor and texture to the classic Dirt Cup, making this fun dessert even more exciting and delicious. Feel free to experiment and combine different elements to create your own signature Dirt Cup!
Dirt Cup Recipe Tips
Creating the perfect Dirt Cups is an enjoyable experience, and a few pro tips can make your dessert even more delightful. Here are some expert suggestions for making outstanding Dirt Cups:
- Fun with Kids: Involve children in the assembly process. It’s a fun activity and a great way to get them interested in cooking.
- Consistency of Pudding: Ensure the pudding reaches the right consistency before layering. If it’s too runny, it won’t hold the layers well; if it’s too thick, it won’t blend nicely with the other components.
- Crumb Size Matters: When crushing your cookies, aim for a mix of sizes. Some finer crumbs have a realistic dirt appearance, while larger pieces create a satisfying crunch.
- Layering Technique: To create a neat appearance, layer the pudding using a piping bag or a zip-top bag with a corner snipped off. This method helps prevent the sides of the cups from getting messy.
- Chill Before Serving: Refrigerate the Dirt Cups for at least an hour before serving. This helps the layers to set and the flavors to meld together.
- Freshness of Ingredients: Use fresh ingredients, especially dairy products like milk and whipped cream, to ensure the best taste and texture.
- Decoration Timing: If using gummy worms or other candy decorations, add them just before serving to prevent them from getting soggy.
- Customize Your “Dirt”: Experiment with different types of cookies for the dirt layer. Chocolate sandwich cookies are classic, but chocolate chip cookies, brownies, or even cake crumbs can be great alternatives.
- Serving Size: Consider the size of your serving cups. Smaller cups are great for parties and kid-sized servings, while larger ones can be used when you need more than individual portions.
- Dietary Adaptations: For dietary restrictions, look for gluten-free cookies, dairy-free pudding, and plant-based whipped cream to make suitable adjustments.
- Creative Add-ins: Don’t shy away from adding layers of fruits like strawberries or bananas for a fresh twist or even a layer of nuts for added texture.
- Themed Decorations: Tailor your decorations to suit the occasion – from creepy crawlers for Halloween to colorful sprinkles for birthday parties.
How to Store Dirt Cups
Storing your Dirt Cups properly ensures they stay fresh and delicious. Here are some tips to keep your treats at their best:
- Refrigeration: Store your Dirt Cups in the refrigerator, covered with plastic wrap or in airtight containers. They’ll stay fresh for up to 3 days. Remember, the longer they sit, the softer the cookie crumbs will become – but they’ll still be yummy!
- Leftovers: If you have leftover Dirt Cups (though we doubt you will! 😉), keep them refrigerated in an airtight container. Give them a quick stir before serving to redistribute any moisture that may have settled.
- Freezing: Want to save some for later? You can freeze Dirt Cups! Place them in freezer-safe containers and they’ll keep for up to 2 months. Just remember to leave out the gummy worms – add those after thawing your graveyard dirt cups.
- Thawing: When you’re ready to enjoy your frozen Dirt Cups, simply transfer them to the refrigerator and let them thaw overnight. Give them a gentle stir, add fresh gummy worms, and they’re good to go!
Remember, Dirt Cups are at their best when fresh, so try to enjoy them within a few days for the perfect balance of creamy pudding and crunchy “dirt”! 🍫🍪
Serving Suggestions
Halloween Dirt Cups are a delightful treat on their own, but why not make them part of a larger dessert experience? Here are some fun serving ideas:
- Dessert Bar: Set up a “Build Your Own Dirt Cup” station at parties. Provide different toppings, such as candy pieces, sprinkles, and fruit, so guests can customize their cups.
- Garden Party: Serve Dirt Cups alongside other nature-themed treats like fruit skewers or veggie sticks with dip. It’s a quirky contrast that’s sure to get people talking!
- Movie Night: Pair Dirt Cups with other nostalgic snacks for a perfect movie night spread. Think popcorn, candy, and these fun pudding cups for a sweet finish.
- After-school Snack: Surprise the kids with Dirt Cups after school. Serve them with a glass of cold milk for a fun and filling treat.
- Picnic Dessert: Pack Dirt Cups in mason jars for an easy, portable picnic dessert. Don’t forget the spoons!
- Ice Cream Topping: Crumble a Dirt Cup over a scoop of vanilla ice cream for a twist on the classic dirt and worms sundae.
Remember, the joy of Dirt Cups is in their playful presentation, so have fun with your serving style. Whether it’s a fancy dinner party or a casual hangout, these treats are sure to bring smiles all around! 😊🎉
FAQs
Can I make Dirt Cups ahead of time? Absolutely! You can make them a day in advance and store them in the refrigerator until you’re ready to serve. Just add any gummy candies before serving to prevent them from melting too hard.
What can I use instead of gummy worms? If gummy worms aren’t your thing, or if you’re looking for a vegetarian option, you can use candy flowers, chocolate rocks, or other fun, themed edible decorations.
Are Dirt Cups gluten-free? Traditional Dirt Cups are not gluten-free as they contain regular Oreo cookies. However, you can easily make them gluten-free by using gluten-free cookies.
How can I make my Dirt Cups healthier? For a healthier version, you can use low-fat milk, sugar-free pudding, and a lighter whipped topping. You can also add a layer of fresh fruit.
What’s the best way to crush the cookies? A food processor works best for evenly crushed cookies. If you don’t have one, a Ziploc bag, a rolling pin, or a heavy skillet will work fine.
Can I make Dirt Cups in a large dish instead of individual cups? You can layer the ingredients in a large serving dish, which is great for a party setting.
More Easy Recipes
- Air Fryer Strawberry Cobbler
- Air Fryer Meringue Cookies
- Air Fryer Chocolate Strawberry Mini Cheesecakes
Don’t Forget To Pin!
Dirt Cups
Description
Ingredients
- 2 cups crushed chocolate graham crackers, approximately 9 graham cookies
Chocolate Pudding Ingredients:
- 3.4 ounce vanilla Jello pudding mix,
- ¼ cup cocoa powder
- 2 cups milk, I prefer to use 2%. Skim makes to thin and heavy cream makes the pudding too rich)
Whipped Cream ingredients
- 1 cup heavy cream cream
- 3 tablespoons powdered sugar
- ½ teaspoon vanilla extract
Decorations:
- 1 cup Gummy worms
- 1 cup Cookies, we used Milano Cookies Pepperidge Farm
Instructions
- In a food processor, crush the chocolate graham crackers. If you don’t have a food processor you can put the cookies in a Ziploc bag, take all air out and close it. Roll a rolling pin to crush them. Set aside.
Pudding Mix:
- In a large mixing bowl combine the pudding mix, cocoa powder, and milk.
- Whisk until all ingredients are combined.
Whipped Cream (if homemade):
- In a large bowl, with a hand mixer, whipped the cream to soft peak.
- Add in the powdered sugar and vanilla extract and whipped until desired consistency, stiff peak
- Fold in the whipped topping into the pudding mixture. Gently mix until all combined.
Assemble:
- Layer 2 tablespoons of crushed graham crackers in the clear 9 oz cup.
- Gently add in 2 tablespoons of chocolate pudding.
- Repeat until the cup is full
- Finish by sprinkling graham crackers on top to create the dirt
Decoration:
- Cut the cookie in half (in this case the Milano cookies) and stick the cut side down into the pudding.
- Place the gummy worm as desired.
- Keep refrigerated until ready to serve!
Equipment
- Plastic Cups, I used 6, 9 ounce clear cups
Nutrition
Share this recipe
We can’t wait to see what you’ve made! Mention @forktospoon or tag #forktospoon!