Air Fryer Butternut Squash
Description
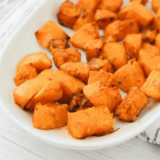
Air Fryer Butternut Squash is slightly crispy on the outside and has fully tender insides. Makes an excellent side dish in 20 minutes!
Ingredients
- 1 medium butternut squash
- 2 teaspoons extra virgin olive oil
- 1/2 teaspoon cumin
- 1/4 teaspoon cinnamon
- 1/2 teaspoon salt
- 1/4 teaspoon pepper
Instructions
- Preheat air fryer to 400˚F (200˚C), air fryer setting.
- Peel the butternut squash and cut into 1/2 inch cubes.
- Toss the butternut squash pieces with olive oil, cumin, cinnamon, salt, and pepper in a medium bowl.
- Spread the butternut squash pieces in a single layer in the basket of your air fryer (if the pieces don't all fit in one layer, cook them in batches).
- Cook for 15-18 minutes or until turning golden in color and fork-tender, shaking every 5 minutes to ensure even cooking.
- Remove from air fryer and serve.
Equipment
- Cooking Spray
- Parchment Paper, optional
Notes
-
Storing:
- Cool Down: Allow your dish to cool to room temperature before storing. This prevents condensation, which can affect the dish's texture and flavor.
- Air-Tight Containers: Use sealable containers or plastic wrap to keep out air and moisture, preserving the freshness of your dish.
- Label and Date: If storing multiple dishes or for extended periods, label with the dish name and date prepared to ensure you consume it while still fresh.
- Refrigeration: Store in the refrigerator for short-term storage (typically 3-5 days, depending on the dish).
- Portioning: If possible, freeze in individual portions for easier defrosting and reheating.
- Use Freezer-Safe Bags/Containers: Ensure containers are airtight and moisture-proof to prevent freezer burn.
- Label and Date: Clearly mark the dish name and freezing date.
- Lay Flat: If using freezer bags, lay them flat for space-efficient storage. Once frozen, you can stand them upright.
- Consume within 3 Months: While many dishes can last longer, consuming within this timeframe ensures optimal flavor and texture.
- Thawing: If frozen, it's best to thaw in the refrigerator overnight for even reheating.
- Oven/Microwave: Depending on the dish, reheat in an oven (covered with foil to prevent drying out) at a moderate temperature or in a microwave using a microwave-safe container. Always ensure the food reaches a safe internal temperature.
- Stir Occasionally: If reheating stews, soups, or saucy dishes, stir occasionally for even heating.
- Avoid Repeated Reheating: For food safety and quality, only reheat what you plan to consume, and avoid reheating more than once.
Nutrition
Serving: 1ServingCalories: 104kcalCarbohydrates: 22gProtein: 2gFat: 2gSaturated Fat: 0.3gPolyunsaturated Fat: 0.3gMonounsaturated Fat: 2gSodium: 299mgPotassium: 667mgFiber: 4gSugar: 4gVitamin A: 19935IUVitamin C: 39mgCalcium: 94mgIron: 2mg